Sharing is caring!

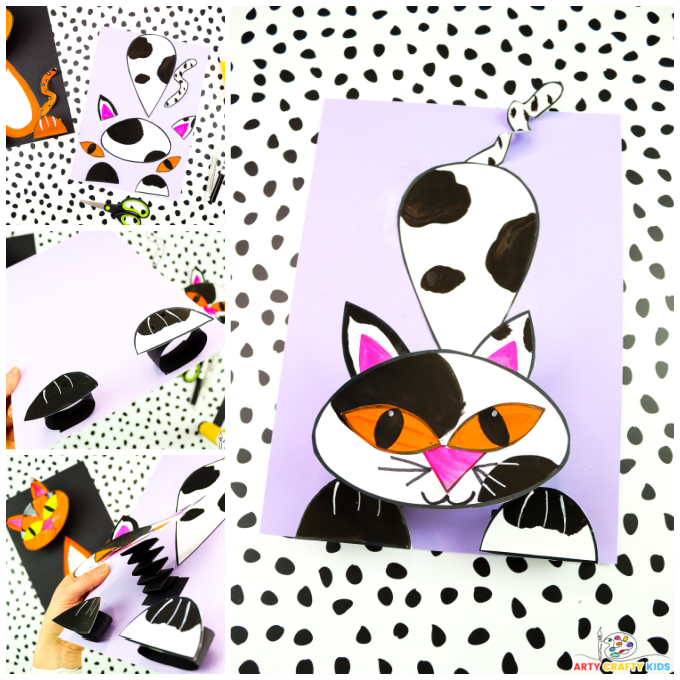
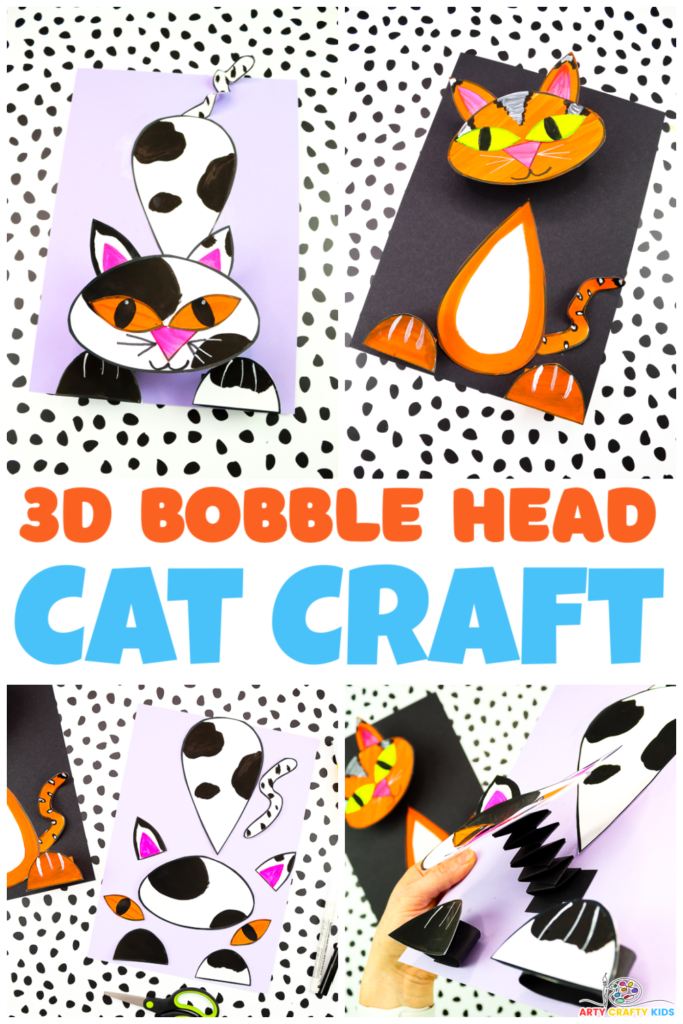
We’re beyond excited to introduce a super fun craft—our Bobble Head 3D Paper Cat Craft! This playful project is perfect for kids and cat lovers of all ages, bringing the magic of our feline friends to life in the most delightful way.
The star of this craft has a moving bobble head! Give it a gentle touch and watch as the cat’s head wobbles and bobs. It’s a lively, entertaining feature that adds an extra layer of fun to your Arty Crafty Kids creation.
Our Bobble Head 3D Paper Cat isn’t just any ordinary paper cat. You can adjust its posture from a relaxed sitting position to an excited pouncing stance! It’s like having two cats in one.
And here’s the best bit, this craft is all about personalization. Kids can design their own unique cat—choose colors, patterns, and expressions to create a feline friend that’s one of a kind.
And if you’re looking for more cat-themed fun, don’t forget to check out our other feline crafts! Try our easy peasy Paper Plate Cats, vibrant Romero Britto Cats, and colorful Watercolor Doodle Cats for even more creative adventures.
How to Make a Bobble Head 3D Paper Cat Craft
Materials:
- Colored Backing Card Stock
- A Favorite Coloring Medium (paint, crayons, paint sticks)
- Black and White Marker Pen
- Scissors (or Paper Cutter)
- Glue Stick
- Bobble Head Cat Template (members will need to login to access the template).
Not a Member?
Join the Arty Crafty Kids club to access the Bobble Head Cat Template, along with 1000’s more Art and Craft templates, How to Draw Guides, and Coloring Pages.

3D Paper Cat Step-by-Step Tutorial

Step 1: Color in the Cat Template
Start by painting or coloring in the template. What color will your cat be? Consider giving it spots, splats, stripes, or maybe it will be rainbow colored, all black, white, or orange with bright piercing eyes.
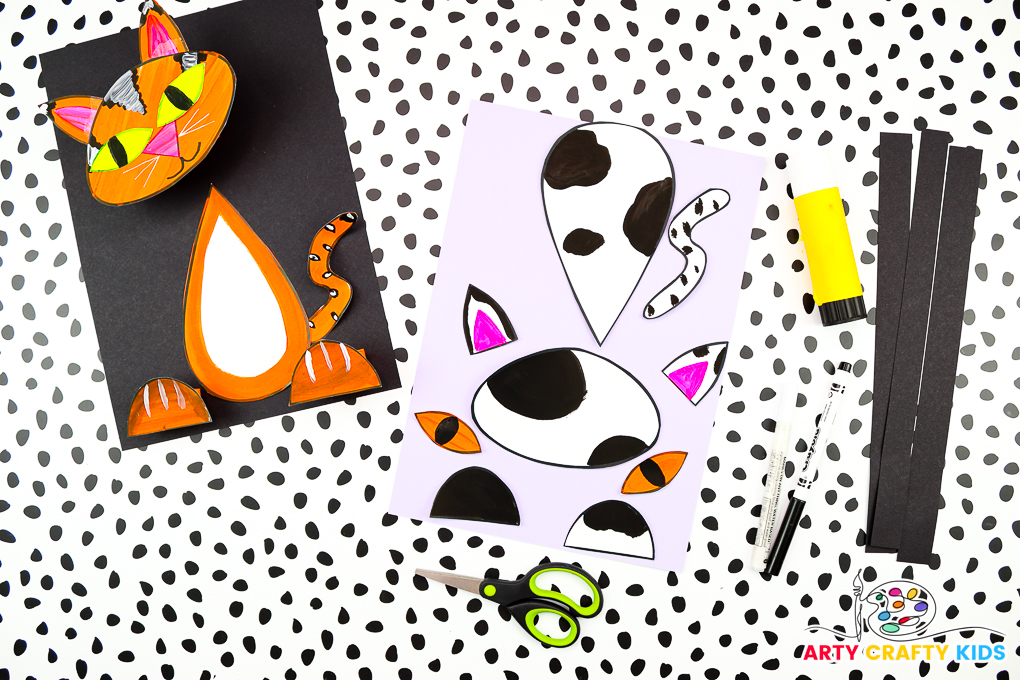
Step 2: Cut out the Cat Template Elements
Carefully cut out the cat elements once the template is complete and dry.
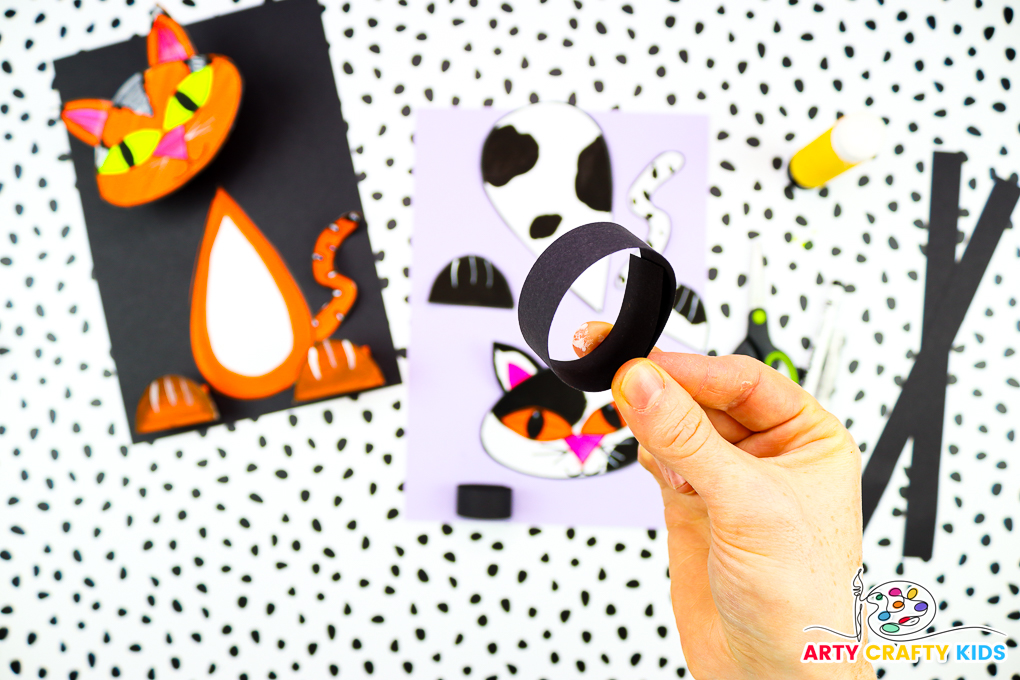
Step 3: Create two paper loops.
Take one paper strip and cut it in half.
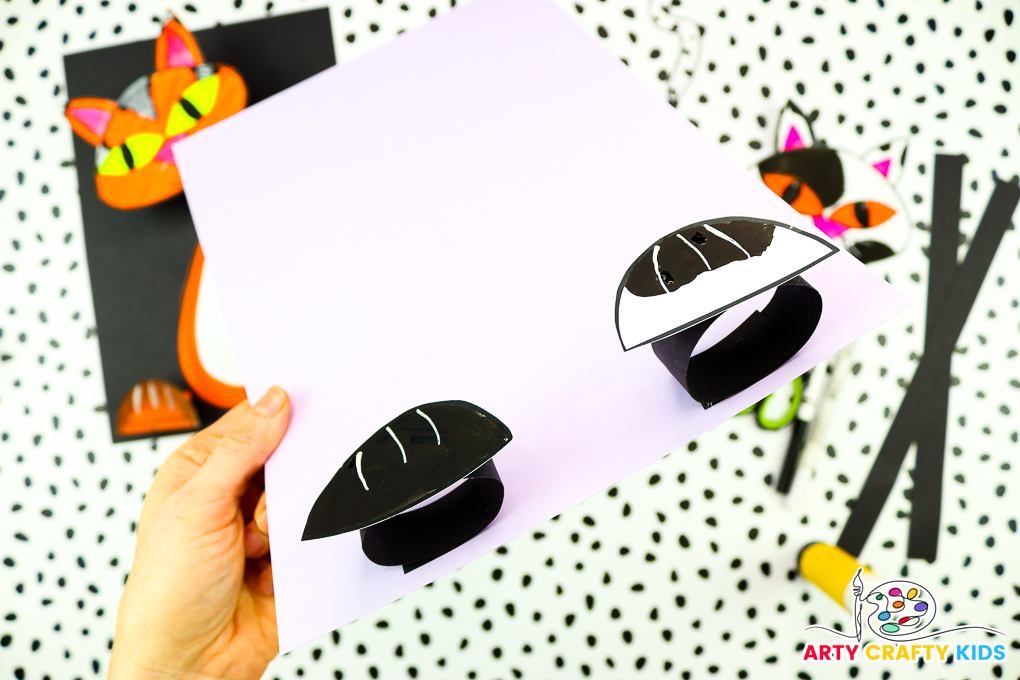
Step 4: Glue the loops onto a sheet of cardstock and affix the paws on top.
For guidance, align the cat’s head or body to the bottom of the backing card.
Secure a paper loop on either side of the cat’s head/body.
Add a paw to the top of each loop.

Step 5: Glue the cat’s body and tail.
Now it’s time to decide, will your cat be a pouncer or a sitter? Ours will become a pouncer!
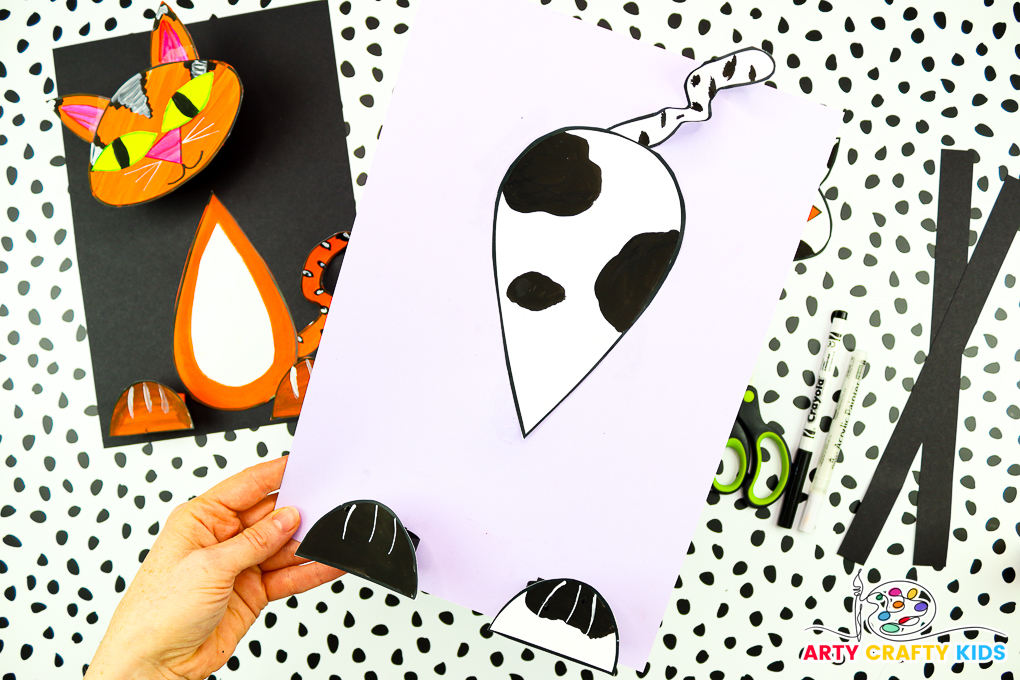
Glue the cats body to the backing card, allowing some over hang of the tail.
Add a kink to the tail by adding a slight concertina fold and affix the tail to the cat’s bottom.
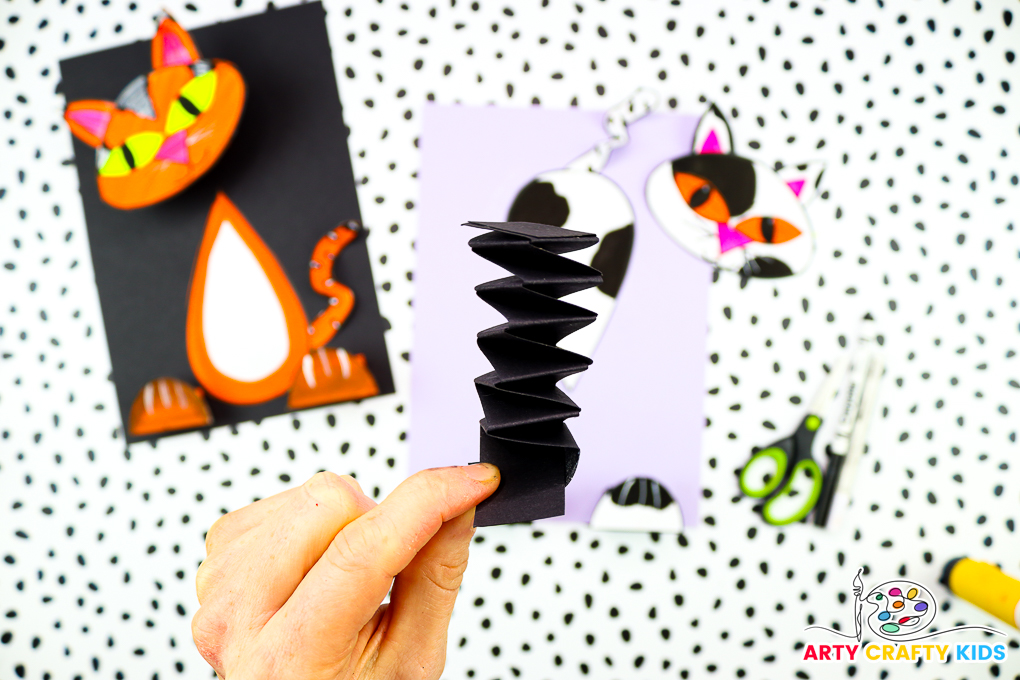
Step 6: Create a Paper Spring
Step 1: Cut two equal strips of paper.
Step 2: Glue the ends of the paper strips together, overlapping at the end to form a right angle.
Step 3: Tightly fold the bottom of paper strip over the top one.
Step 4: Now fold the bottom strip of paper over the top one again. Continue this pattern, always folding the bottom strip on top of the other, until you have folded to the end and are left with a neat little square. Secure the ends with glue.

Step 7: Assemble the cat’s head.
Assemble the cat’s head; adding a pair of ears, eyes, and a nose.
Using a black marker pen (or white depending on the color of the cat), draw whiskers

Step 8: Affix the spring and cat’s head.
Finally, glue the spring just below the cat’s body and then affix the cat’s head on top.
Our feline friend’s head will now wiggle and wobble in preparation to pounce!
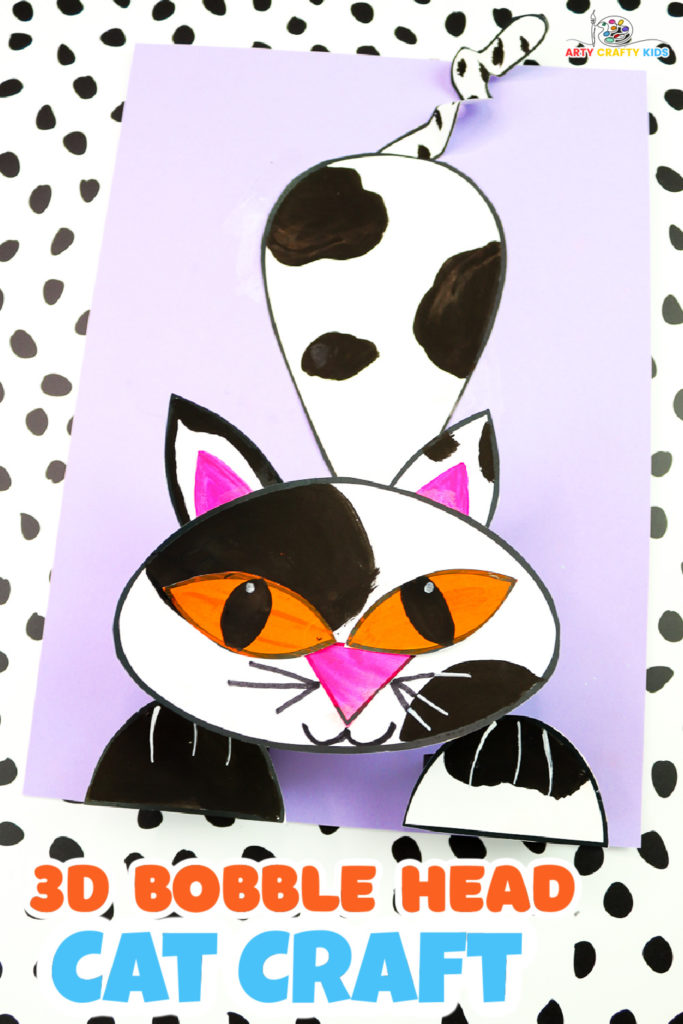
The Bobble Head 3D Paper Cat Craft tutorial is complete! This craft isn’t just fun; it’s also a fantastic way to develop fine motor skills and encourage imaginative play. Plus, it’s a wonderful opportunity for some creative family time
For more fun with 3D effects, check out this collection of 3D Paper Crafts, along with our complete catalog.
