Sharing is caring!


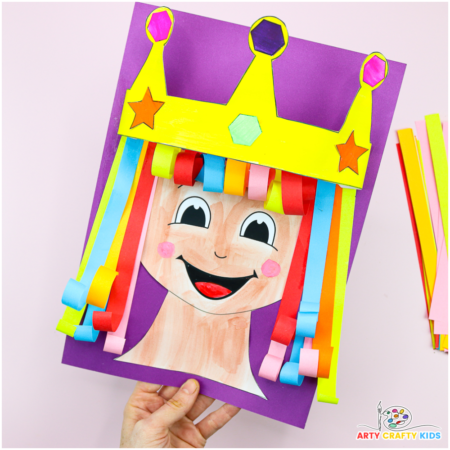
Make your Arty Crafty Kids royally happy with our 3D Paper Queen Craft Tutorial; where we combine creativity and fun to help preschoolers learn the letter Q through hands-on crafting.
In this step-by-step guide, we’ll walk you through the process of creating a stunning 3D paper queen, perfect for little hands and big imaginations.
This craft not only provides an engaging way to teach the letter Q but also offers numerous fine motor benefits.
As children color, cut, and assemble their queens, they practice essential skills such as hand-eye coordination, scissor control, and precise gluing. These activities help strengthen the small muscles in their hands, preparing them for tasks like writing and buttoning clothes.

To complement the 3D Paper Queen Craft, children could link the alphabet to any one of our paper animal crafts or 3D Paper Crafts, as well as explore our alphabet coloring pages and letter tracing activity sheets.
How to Make a 3D Paper Queen Craft
Materials:
- Colored Construction Paper
- A piece of Colored Cardstock
- Watercolor Paint or a Favorite Coloring Medium
- Scissors
- Gluestick
- Queen Template (members will need to login to access the template).
Not a Member?
Join the Arty Crafty Kids club to access the Queen Template, along with 1000’s more Art and Craft templates, How to Draw Guides, and Coloring Pages.

3D Paper Queen Step-by-Step Tutorial

Step 1: Color in the queen template.
Using a favorite medium (watercolors are a great option for this craft), color in the Queen’s head; adding skin tone, blushing cheeks, and perhaps distinctive facial features such as freckles or moles.
As an extension, why not grab a mirror and paint the queen in your image?
Color in the crown and jewels.

Step 2: Cut out the Queen elements and assemble the crown.
Carefully cut out the template elements.
Glue the jewels onto the crown – make a pattern!

Step 3: Affix the Queen’s head.
Align the queen’s head to the bottom of a piece of card stock. Position in the center and secure with glue.
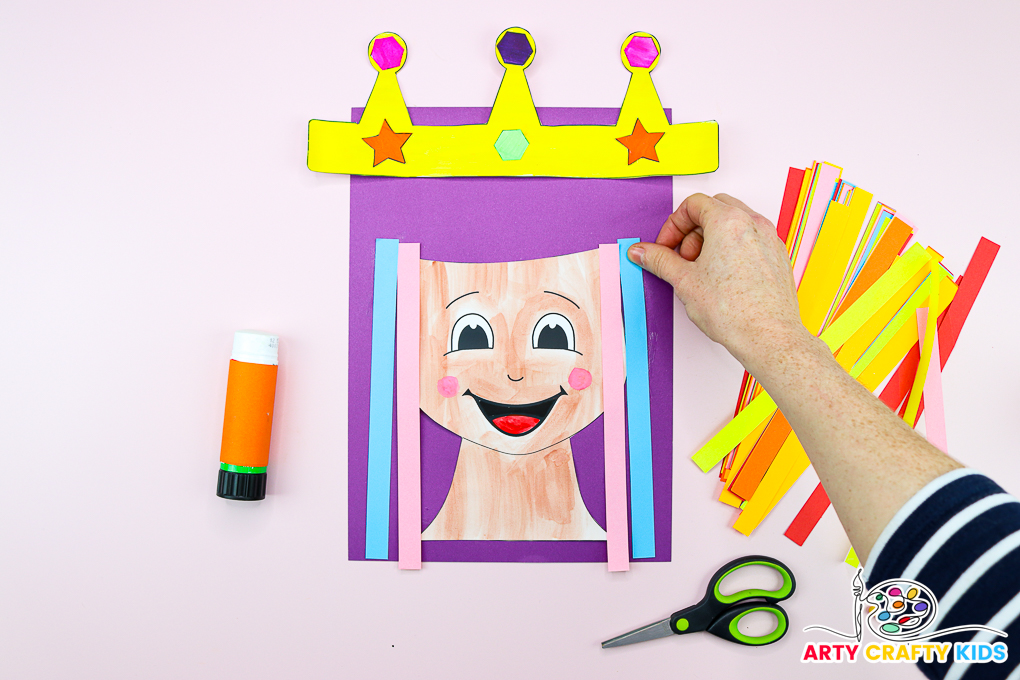
Step 4: Add paper strips to the Queen’s head.
Using a paper cutter or scissors, cut a piece of colored paper (or multiple sheets of colored paper for patterned/ rainbow hair) into several strips (approx 1cm wide).
Next, frame the queen’s head with strips of paper.
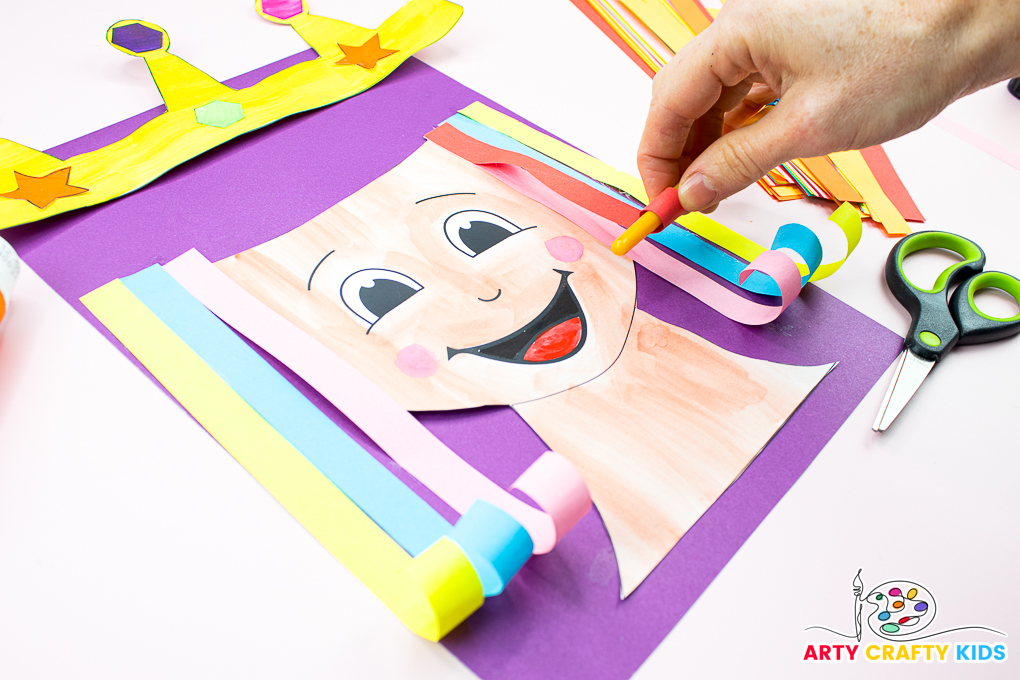
Step 5: Curl the paper strips.
Option: The paper can be left straight or to enhance the 3D effect, curled or crinkled.
To curl, simply roll the paper around the tip of a paintbrush or pencil.
Gently remove the rolled paper from the tip of the brush and allow the paper to naturally unfold to reveal the curl.

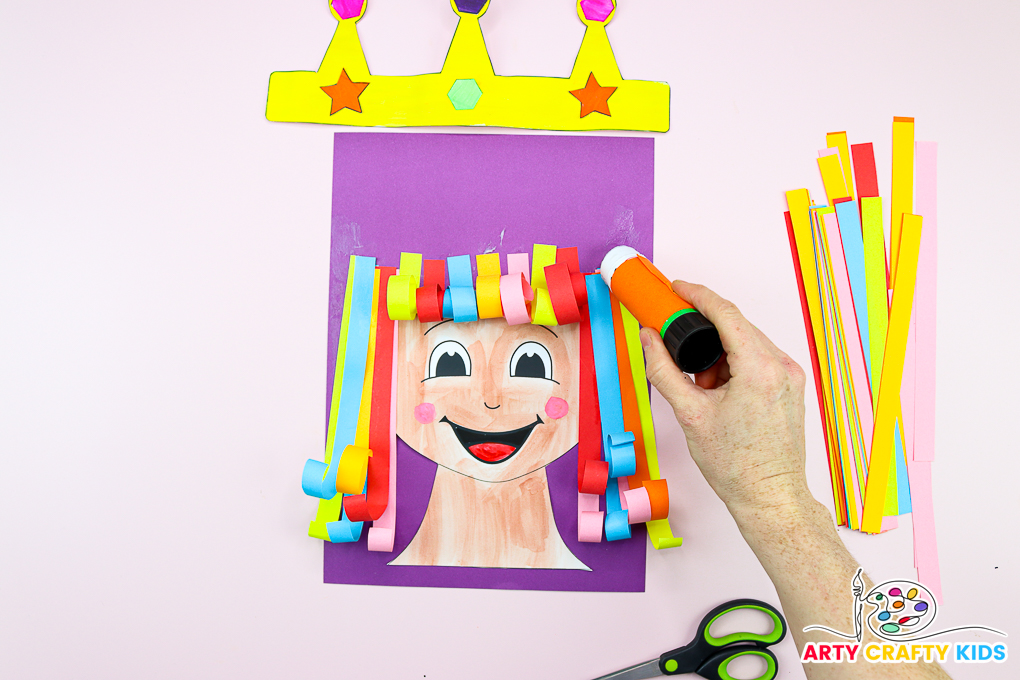
Step 6: Layer the paper strips.
Continue framing the queen’s head with curled or straight paper until her head is full.
Strips of paper may be layered, cut to varied lengths, folded in a concertina style, or curled tightly to create different textures.
Step 7: Affix the Queen’s crown.
Now the queen is ready for her crown.

Gently fold the crown round, allowing the two ends to meet without creasing the crown.

Apply a thick layer of glue to the colored side of each end of the crown. Fold the glued areas around to meet the backing card, just above the Queen’s hairline.
Maintaining the rounded bend in the crown, ensuring it pops from the backing card and over the hair line, firmly press the inside of the two folds down.

Enjoy creating your majestic 3D paper queen, a perfect craft to celebrate the letter Q and inspire creativity in preschoolers!
This activity not only nurtures artistic expression but also allows children to personalize their queens, making each creation unique and special.

