Sharing is caring!
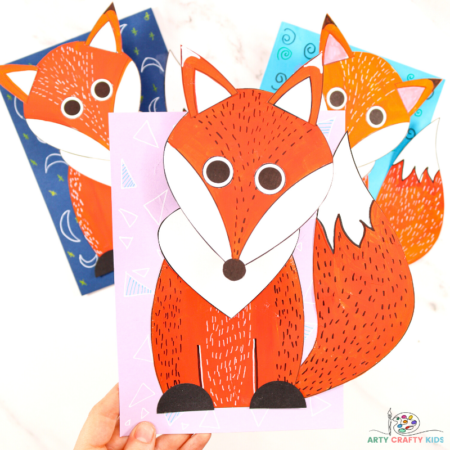
Kickstart this year’s Autumn crafting season with a super cute and easy to make 3D Paper Fox Craft. Our crafty fox introduces children to simple 3D elements to help bring their fox to life; adding movement, dimension and lots of fun to the creative process!
Fall is a time of observing seasonal change and all things woodland; from nature walks and crafts to learning all about forest animals. The fox is one of our favorite woodland animals, with its bushy tail, bright colors and fun characterisation in literature and film – it’s a great subject for creativity and we just love making fox crafts!
To make crafting with the kids super easy, we have designed a simple fox template that can be colored in, cut and assembled. Children are encouraged to make the fox their own by experimenting with colors, textures and markings that are perhaps inspired by a real or fictional fox. This leaves the craft open to exploration and I’m sure within a classroom setting, would a make a rather fantastic fox display!
How to Make a 3D Paper Fox Craft
Materials:
- A5 Colored Cardstock
- White Cardstock for Printing
- Paint or Another Coloring Medium
- Marker Pens/ Acrylic or Chalk Pens
- Scissors
- Glue Stick
Download the Fox Template:
The 3D Fox template is available to members of the Arty Crafty Kids club.
Members will need to log in to access the templates: https://www.artycraftykids.com/product/3d-fox-template/
Not a Member?
Watch the Step-by-Step Paper Fox Tutorial:
Let’s Make a Fox!
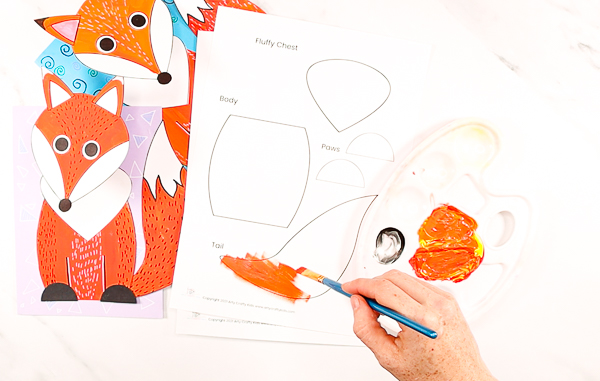
Color in the Fox Template
Use your favorite paints or crayons to color in the fox.
We love to color our templates with acrylic paint as it’s generally quick drying, vibrant in color and easy to use!
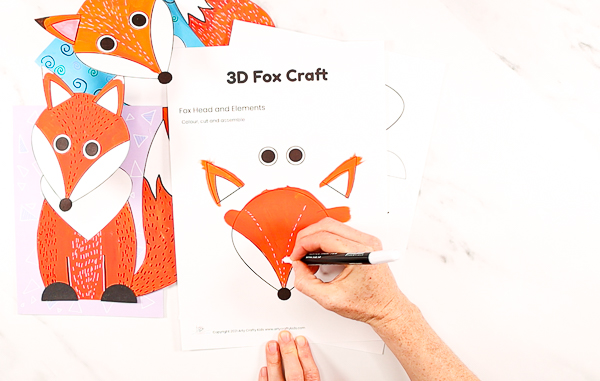
Add Detail to the Fox Design
If you look closely at a fox, its fur is bristled with shades of black, brown, white and red. This gives Arty Crafty Kids scope to make the fox their own; adding unique markings, patterns or shading to make areas of the fox stand out.
Perhaps the design could be inspired by the fox’s they see in fact books, in the wild or illustrations of Fantastic Mr Fox.
We have created short dashed lines with a white chalk pen to the crown of the fox’s head. If you do not have markers to hand, these dashed may also be created with short strokes of the paint brush.
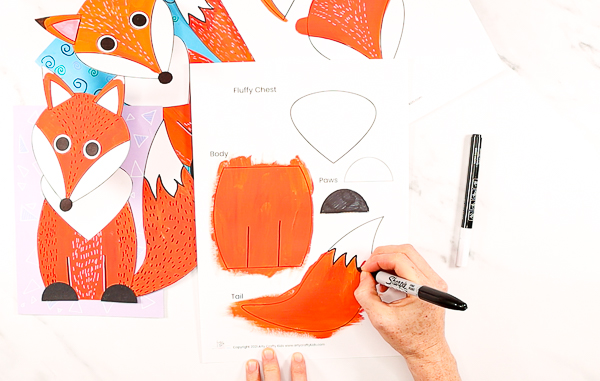
And again, if you do not have a white marker pen, perhaps use a black one instead! This is particularly useful for creating the impression of legs on the body and defining the tip of the tail.
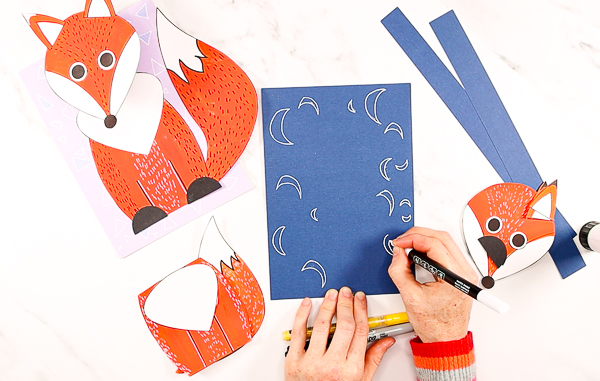
Design a Background for the Fox
The fox template fits beautifully onto a sheet of A5 card stock (or A4 card stock cut in half).
Select a piece of colored card stock and draw a few doodles around the border. Our examples include moon and stars, triangles and random colorful swirls.
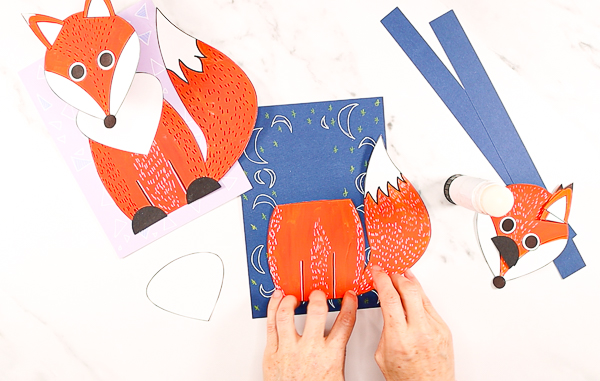
Glue the Fox’s Body and Tail
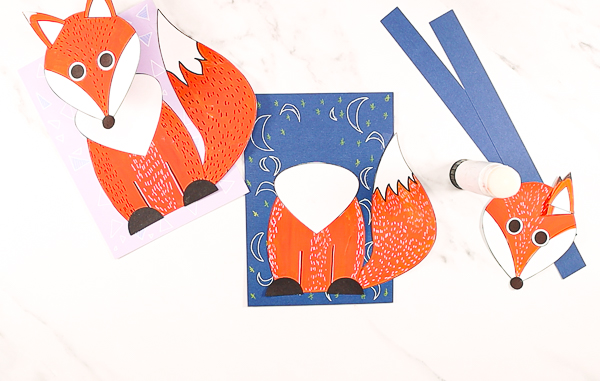
Once the background is complete, position the card stock in a vertical position and glue the body and tail to the bottom of the backing card.
The tail has been designed in such a way that it fits nicely behind the body and can be led horizontally across the bottom, thus creating the impression of the tail wrapping itself around the fox.
Have a play and see what works!
Glue the White Chest to the Fox’s Body
Glue the white chest to the top of the fox’s body.
For extra definition, Arty Crafty Kids may also add white cotton wool to make the chest “fluffy”.
Add a pair of black semi-circle feet to the bottom of the fox’s body.
Adding a 3D Element to the Fox Craft
Our 3D Paper Fox craft uses a simple accordion spring to add a sense of depth and movement to the craft. This is a great way to introduce simple 3D effects to children.
Let’s Make an Accordion Fold
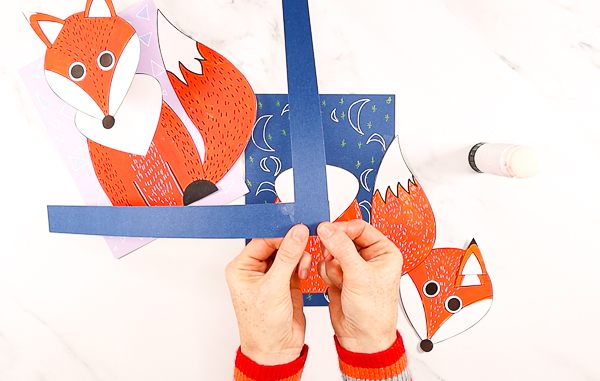
Using scissors or a paper cutter, cut out two even strips of colored paper. Strips of card do give a better bounce but are a bit trickier for kids to fold, so if you give card a go, a bit of adult help might be needed!
To create the right sized strip, we recommend cutting the paper from the shortest side of an A4 piece of paper – or the longest side of a piece of card – and making the strips at least an inch or so wide.
Take the two strips and position them in a 90° angle, like the corner of a picture frame (as shown above), and glue the connecting papers together.
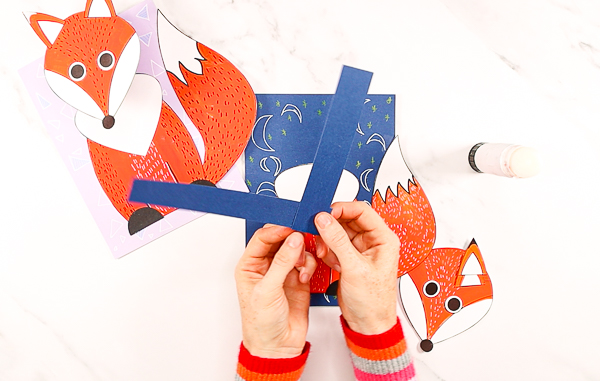
Fold the bottom strip over the top and crease the fold along the edge. This will make the accordion fold nice and tight!
Continue Folding the Paper Strips
Continue this process, folding the bottom over the top and creasing, until all the paper has been folded up.
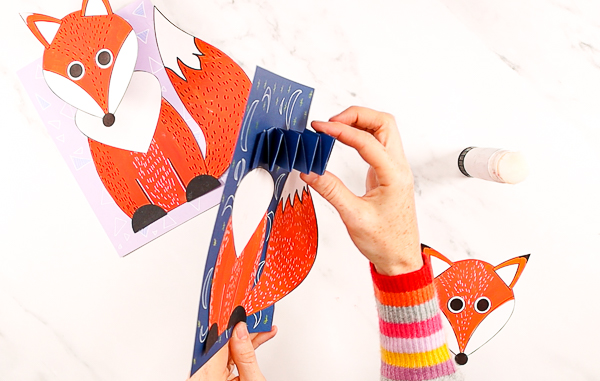
Then seal the ends with glue so your accordion fold doesn’t come undone.
Secure the Accordion Fold
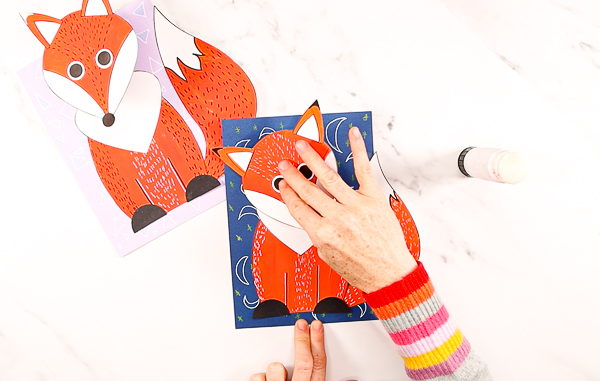
Once the accordion fold is complete, position the spring just above the white chest and glue one end to to the backing card.
Secure the Foxes Head to Complete the Craft
Next, assemble the fox’s head; adding eyes and ears to complete the face.
Add a dab of glue to the other end of the spring and secure the fox’s head to the top.
The 3D Paper Fox Craft is Complete
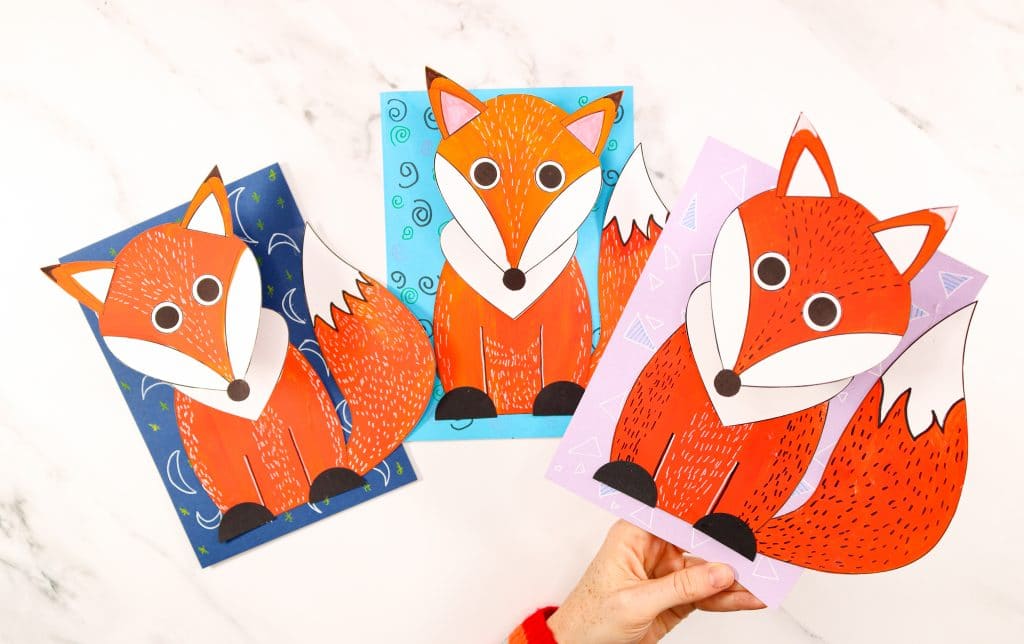
The foxes heads will now wobble and shake with a little jiggle. This not only introduces the concept of using 3D elements within crafts, but also demonstrates how movement and play can be included in creativity.
For more fox crafts for kids, take a look at our Moving Eyes Fox Craft, Yarn Wrapped Fox and Paper Roll Foxes.
More 3D Paper Crafts for Kids to Make
At Arty Crafty Kids we love our 3D paper crafts and have a huge selection of easy paper crafts for kids to make. It’s amazing what you can achieve with a little paper and glue, which also makes crafting with kids super easy – you simply do not need a massive stash of materials that never get used!
Take a look at these super easy craft to try with the kids!

