Sharing is caring!
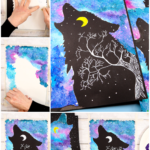

This Wolf Silhouette Painting is the perfect art project for kids, combining creativity with the ease of a step-by-step process and the timeless appeal of one of nature’s most iconic creatures.
With a single wolf silhouette template, children and adults alike can explore the striking contrast of negative and positive space while experimenting with color to design a beautiful, moonlit sky.
January brings the “Wolf Moon” in the UK, a time traditionally associated with the howling of wolves under the full moon, making this Wolf Silhouette Painting a perfect winter project for kids to explore creativity while learning about nature, folklore, and the significance of the season.
This project is a fantastic art lesson for kids of all ages, especially in a classroom or homeschooling environment. Younger children can experiment with blending colors, while older kids can focus on intricate details like adding stars, trees, or unique patterns to the wolf silhouette.
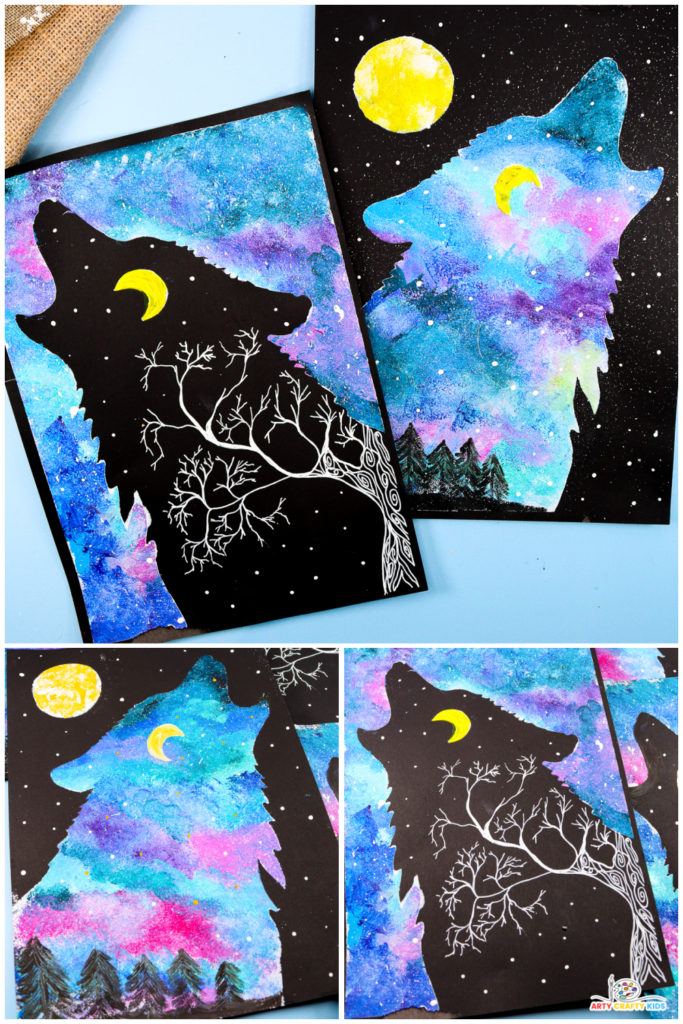
They’ll love the hands-on nature of this activity, layering colors with sponges, brushes, or even fingers to create unique textures. This process not only boosts confidence in their artistic abilities but also helps them explore the themes of creativity and imagination.
Pair this project with our Reindeer, Owl Silhouette Painting, or other nature-inspired art for a collection of stunning nighttime creatures!
How to Make a Wolf Silhouette Painting
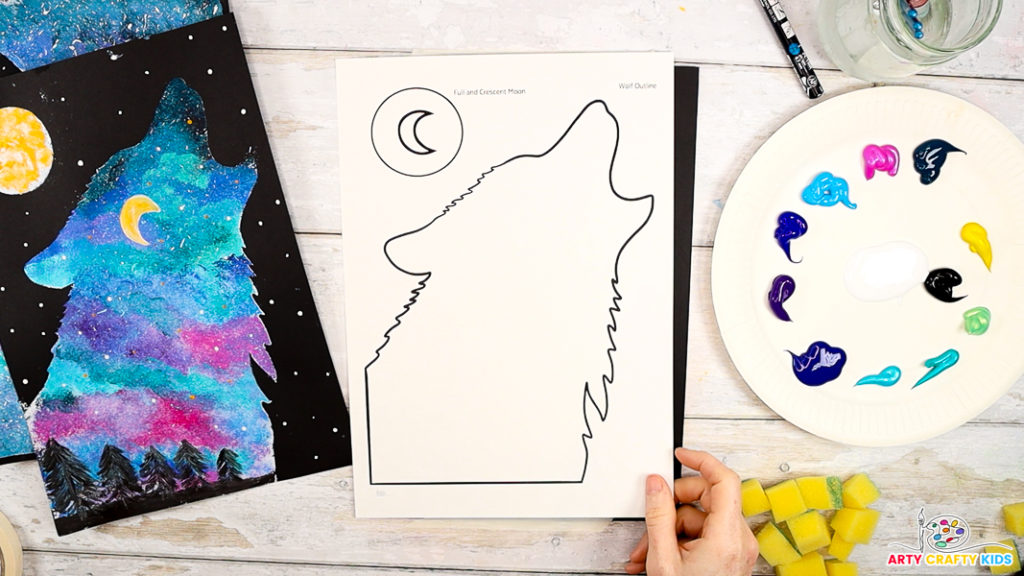
- Black and White Card Stock
- A White Acrylic Pen ( Posca Pens are great!)
- Acrylic Paint – Blue, Yellow, Pink, Green, White and Black
- Paintbrush – Round Tipped and Fine Tipped
- Masking Tape
- Sponge
- Scissors
- Wolf Silhouette Art Templates (members will need to login to access the templates).
Not a Member?
Join the Arty Crafty Kids club to access the Wolf Silhouette Art Templates and 100s more Art and Craft templates, How to Draw Guides and Coloring Pages.

Wolf Silhouette Art: A Step-by-Step for using the negative space silhouette.
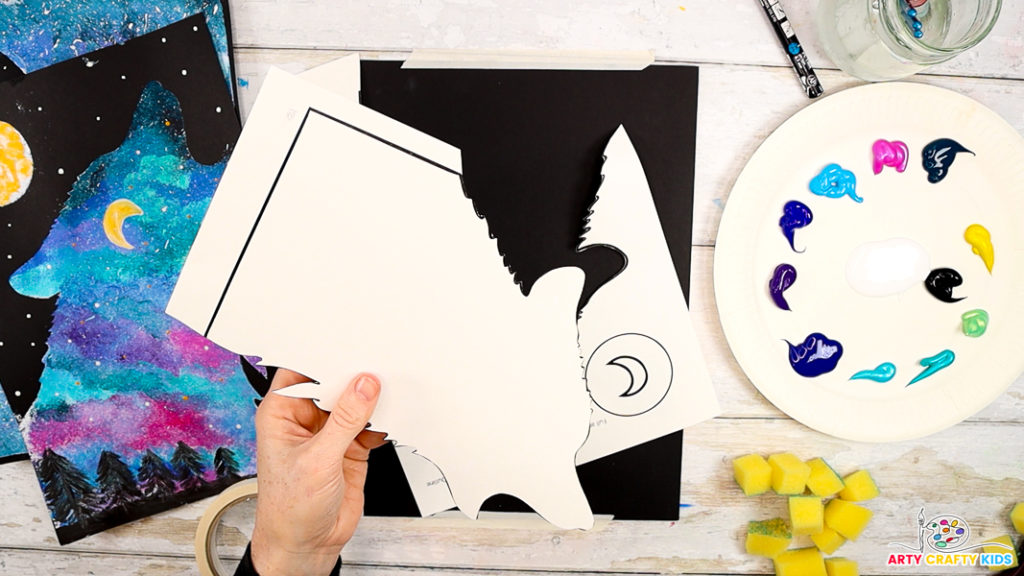
Step 1: Carefully cut out the wolf template.
To use the negative space silhouette, carefully cut out the wolf in a single motion, ensuring the surrounding paper remains intact.
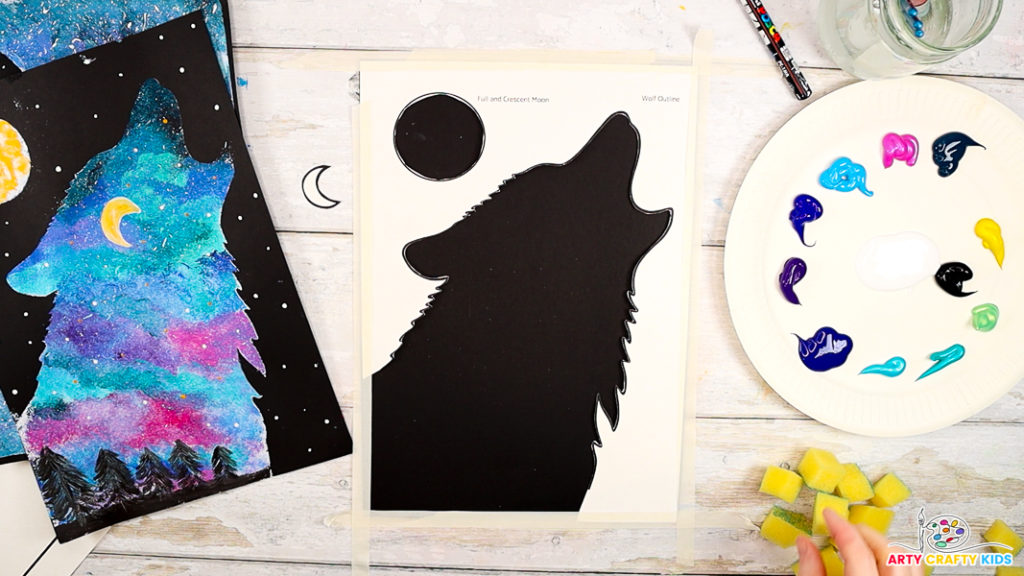
Step 2: Prepare the canvas and paint the silhouette white.
Begin by securing the black cardstock to your workspace using masking tape to prevent it from moving. Next, position the negative space silhouette over the black cardstock and tape it down firmly with masking tape to hold it in place.
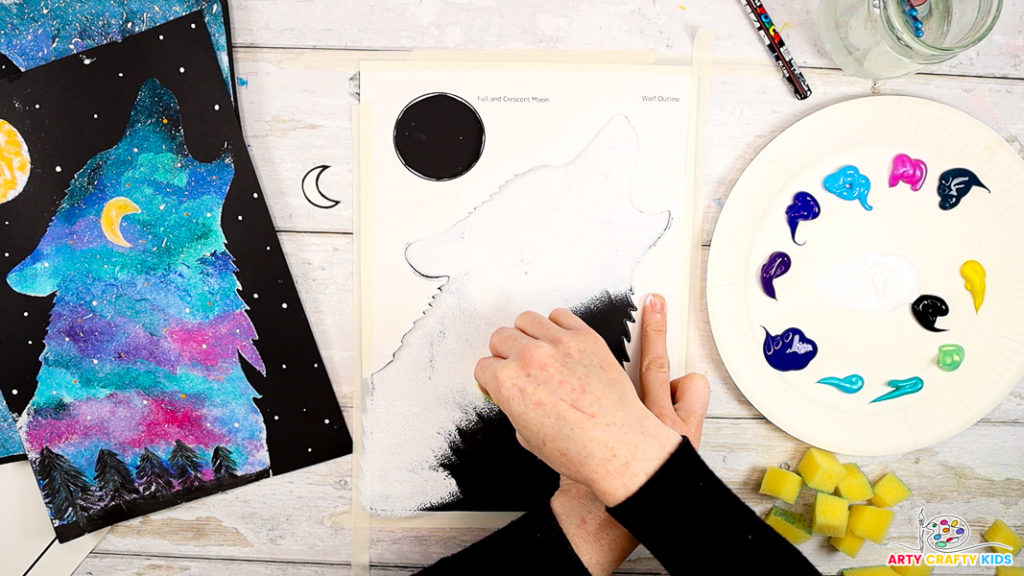
Dip a sponge into white paint and gently dab within the silhouette opening, carefully filling the space with soft, even layers of white. This technique ensures clean edges and creates a striking contrast against the black background.
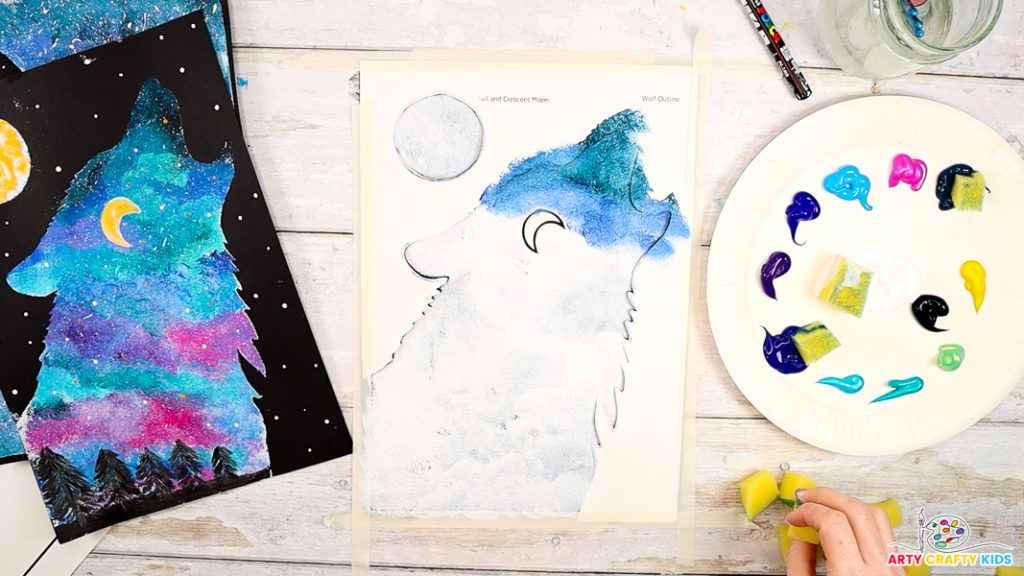
Step 3: Place the moon inside the white section of the wolf.
Before adding color to the wolf silhouette, position the moon shape within the wolf outline – we’ve placed it in the area where the eye would typically be.
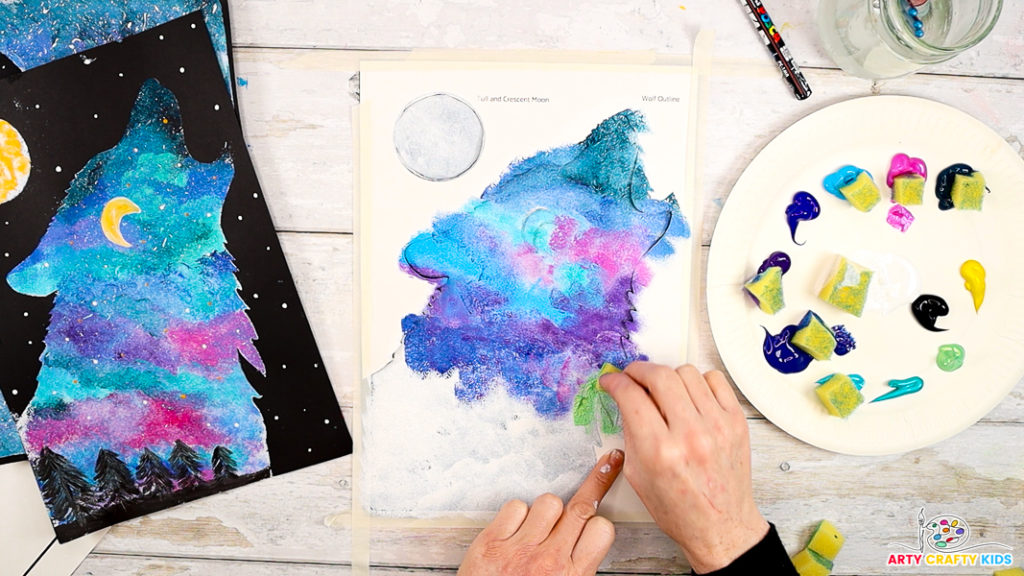
Step 4: Paint the wolf with Northern lights-inspired colors.
Choose deep blues and purples for the night sky, and vibrant greens, pinks, and yellows for the northern lights. Add white or metallic paint for highlights.
Start with darker tones, blending smoothly across the wolf silhouette using a sponge or wide brush.
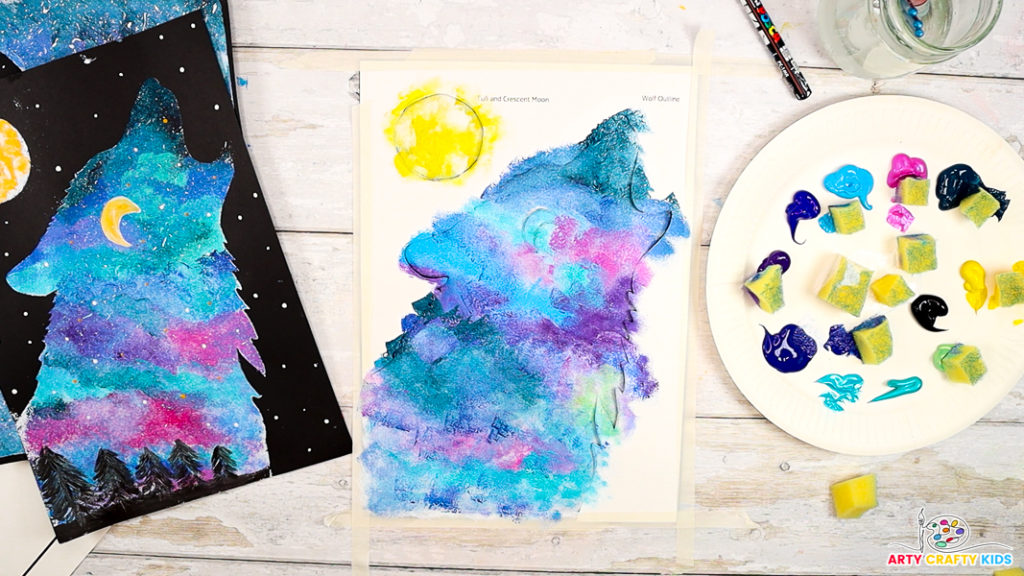
Apply lighter colors like green, pink, and yellow in soft streaks or waves, using a dry brush or sponge for a glowing effect. The dreamy blend of colors adds a touch of fantasy, creating a magical sky that feels straight out of a fairy tale.

Step 5: Remove the negative space wolf silhouette.
Once your Arty Crafty Kids have finished their wolf silhouette painting, gently peel away the negative space silhouette and moon.
Fill the moon inside the wolf’s silhouette with yellow paint.

Step 5: Paint simple pine tree silhouettes.
Start with the Trunk:
Using black paint and a thin brush, paint a single vertical line to form the tree trunk. Begin at the top of the desired tree height and extend it downward.
Add the Branches:
Starting at the top of the trunk, paint short horizontal lines on either side to create the smallest branches. Gradually make the lines longer as you work down the trunk, giving the tree a triangular, pine-like shape.

Layer the Branches:
Overlap the lines slightly to give the appearance of a full, textured tree. Keep the branches uneven and natural to mimic real pine trees.
Fill and Refine:
Once the structure is complete, fill in gaps and thicken areas as needed to enhance the silhouette. Adjust the shape to make the trees look unique and varied.
Repeat the process to create a forest effect, varying the height and width of the trees to add depth and interest to the scene.
These simple pine tree silhouettes beautifully complement the wolf design and enhance the wintry forest atmosphere!

Step 7: Paint Twinkly Stars
Add twinkly stars by dotting white paint across the sky with a fine brush or toothpick. Vary the sizes for depth, and scatter them randomly.
For extra sparkle, include a few starbursts with tiny rays around the dots. These stars add a magical touch to your wolf scene!

Step 8: Splatter paint stars for extra interest.
Apply white paint to a bristly paintbrush and scrape a popsicle stick against the bristles to splatter the paint across the painting.
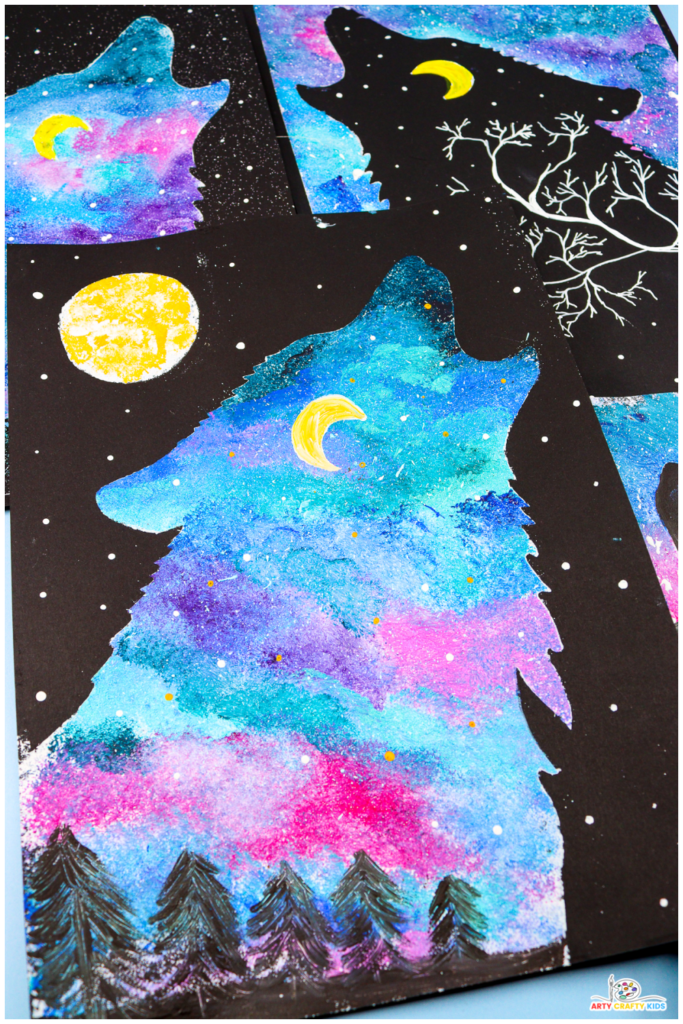
Finish your wolf silhouette painting by adding a scattering of stars to the black background around the silhouette.
This simple touch enhances the contrast between the vibrant, colorful sky and the dark wolf, creating a magical, eye-catching effect that brings the artwork to life.
Wolf Silhouette Night Sky Painting: Step-by-Step Instructions
This step-by-step guide will walk you through creating a stunning wolf silhouette painting, complete with a vibrant, moonlit night sky.
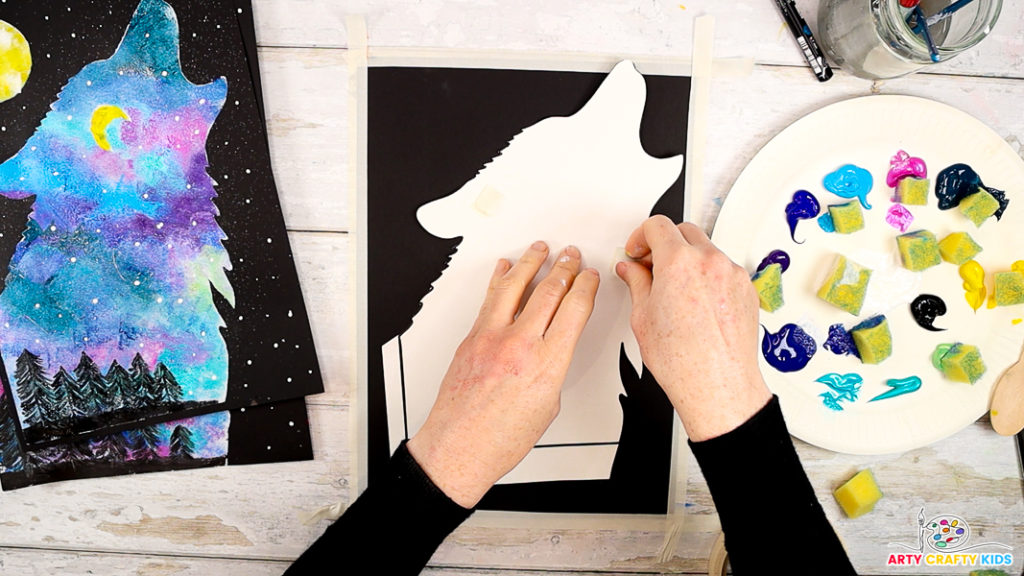
Step 1: Prepare the canvas and wolf silhouette template.
Begin by securing the edges of the black cardstock with tape.
Place the wolf silhouette cutout on the cardstock and fix it in place with masking tape around the edges. Ensure the template is flat to avoid paint seeping underneath.
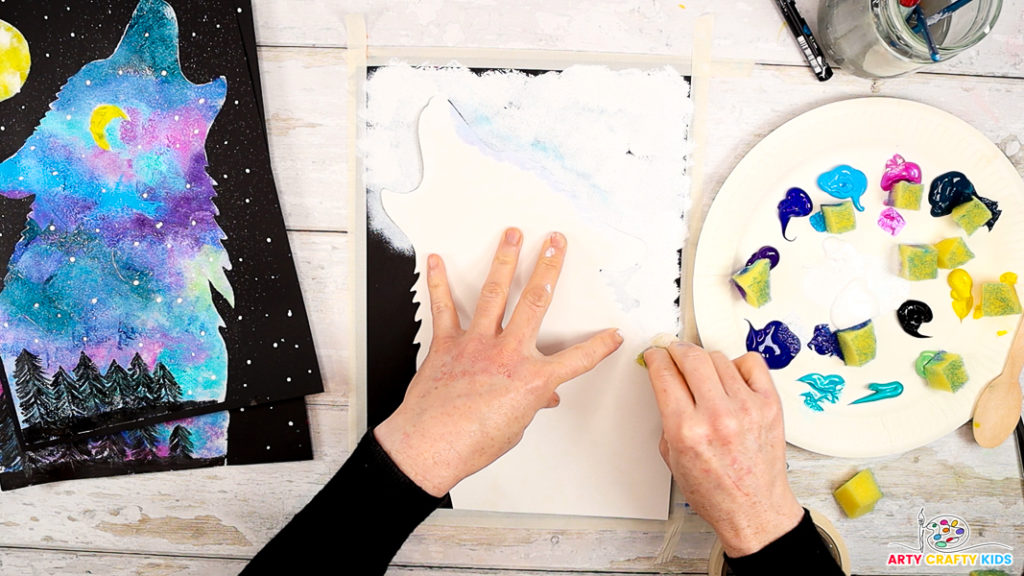
Step 2: Paint the surrounding space white.
Before painting the night sky, use a sponge to gently dab white paint around the wolf, filling the surrounding space.
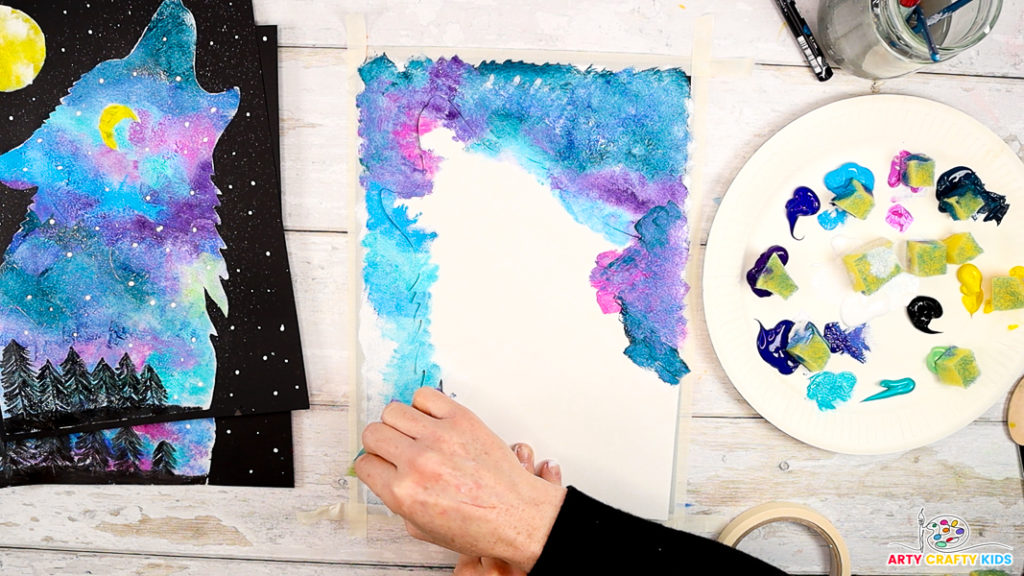
Step 3:Paint the night sky.
Using a sponge or large brush, apply a base layer of dark blue and purple paint around the wolf shape.
Blend the colors smoothly for a rich night sky effect. Work quickly to keep the edges around the silhouette clean.
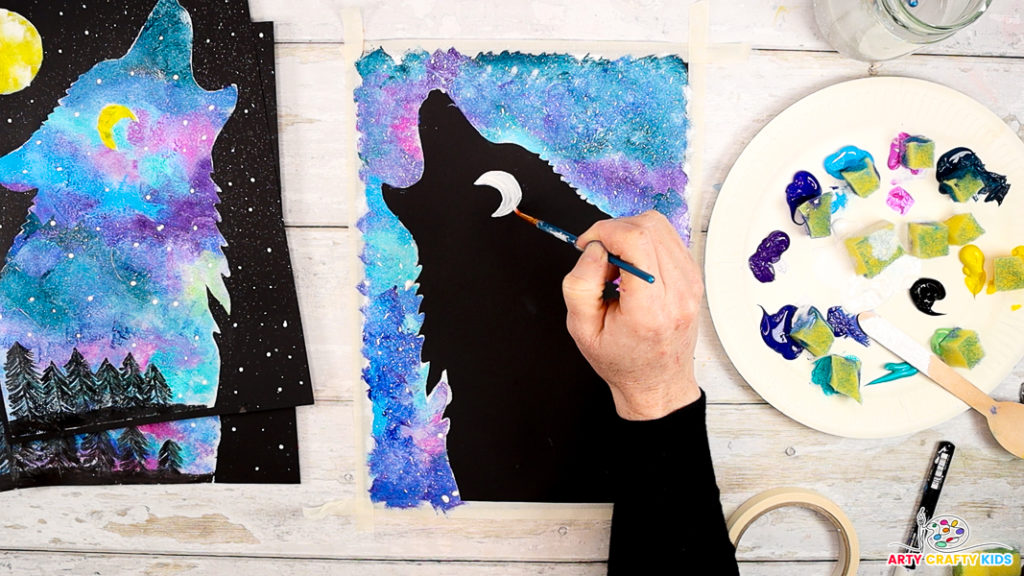
Step 4: Reveal the wolf silhouette.
Use a moon template to create a moon shape within the wolf silhouette.

Step 5: Draw a tree within the wolf.
You can either follow the suggested pine tree instructions or draw inspiration from our Four-Season Tree Drawing Tutorial to create a large, beautifully shaped tree to fill the space.
Use a white acrylic marker to draw a clean, single line within the wolf silhouette.
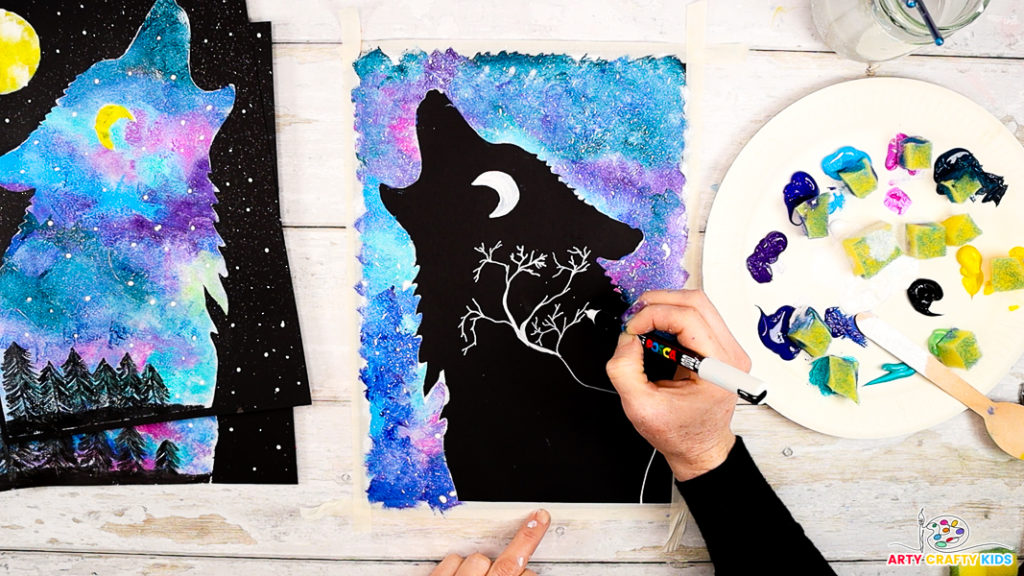
Next, draw smaller, wavy lines branching out from the main line, adding additional smaller lines to form the structure of a tree.
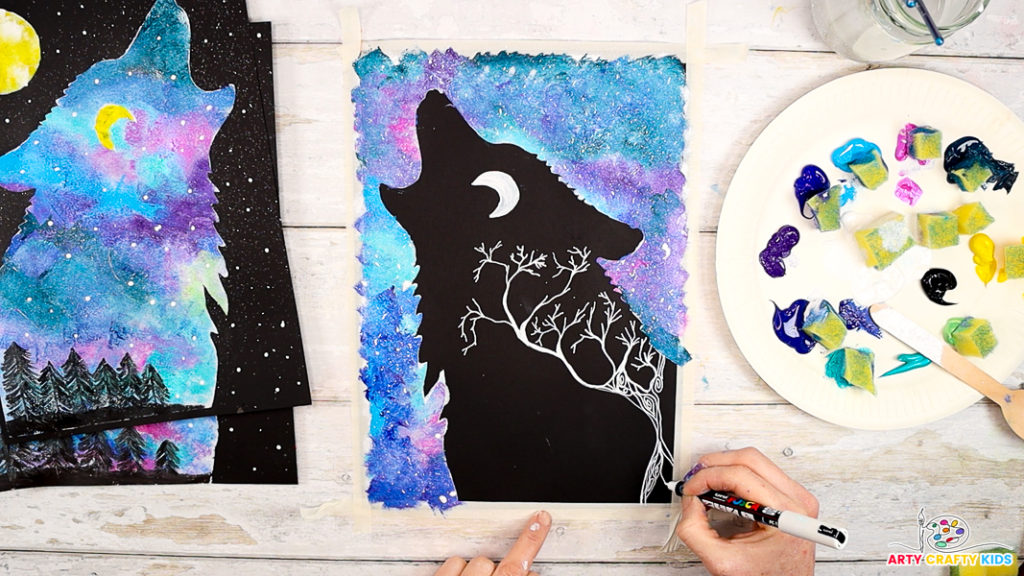
Continue adding branches to shape the tree, then include wavy lines to create the trunk.
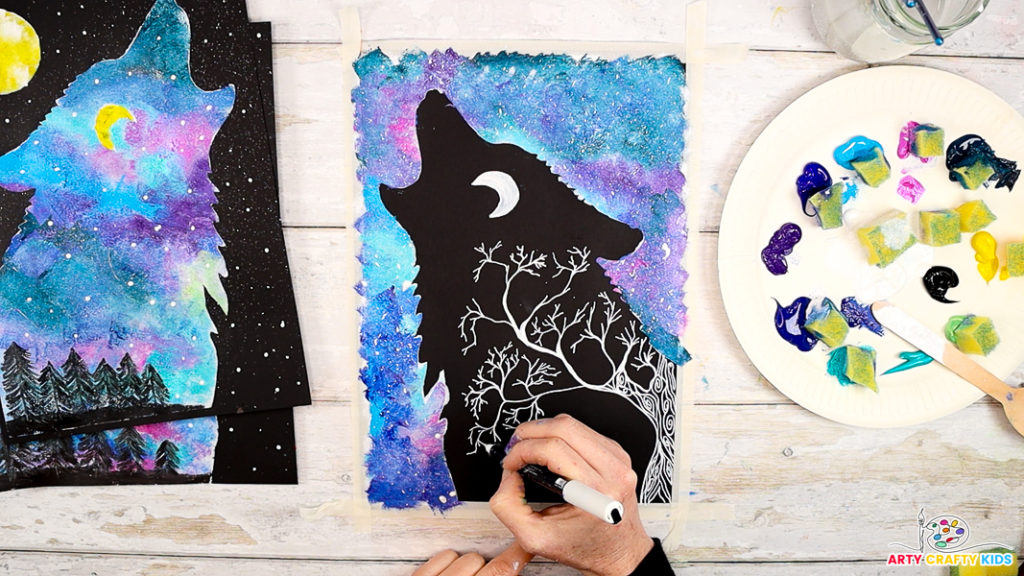
Keep adding to the tree within the wolf silhouette until you’re satisfied with its shape.
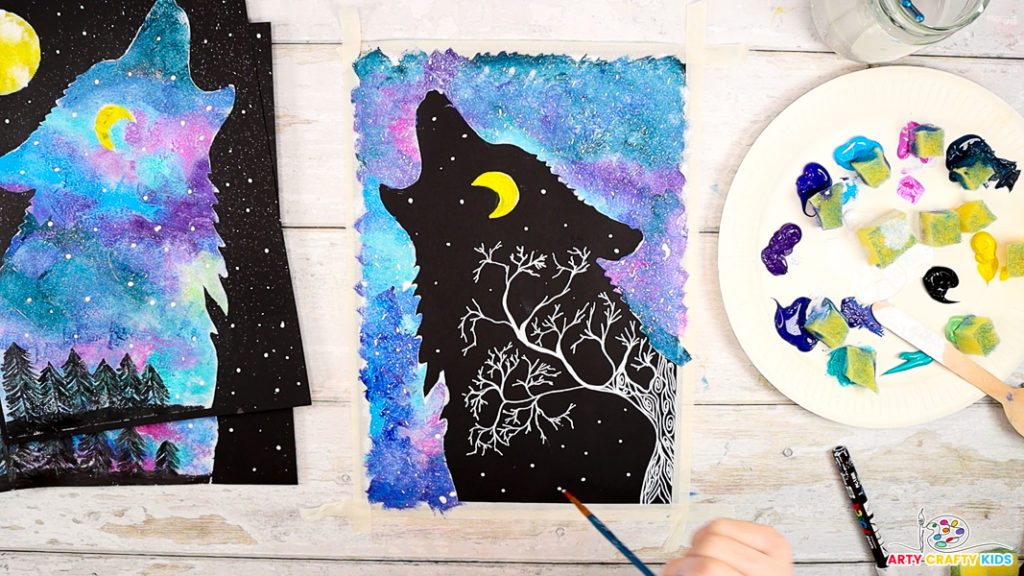
Step 6: Add twinkly white stars to the wolf painting.
Add twinkling stars within the black reindeer silhouette by dotting white paint with a fine brush.
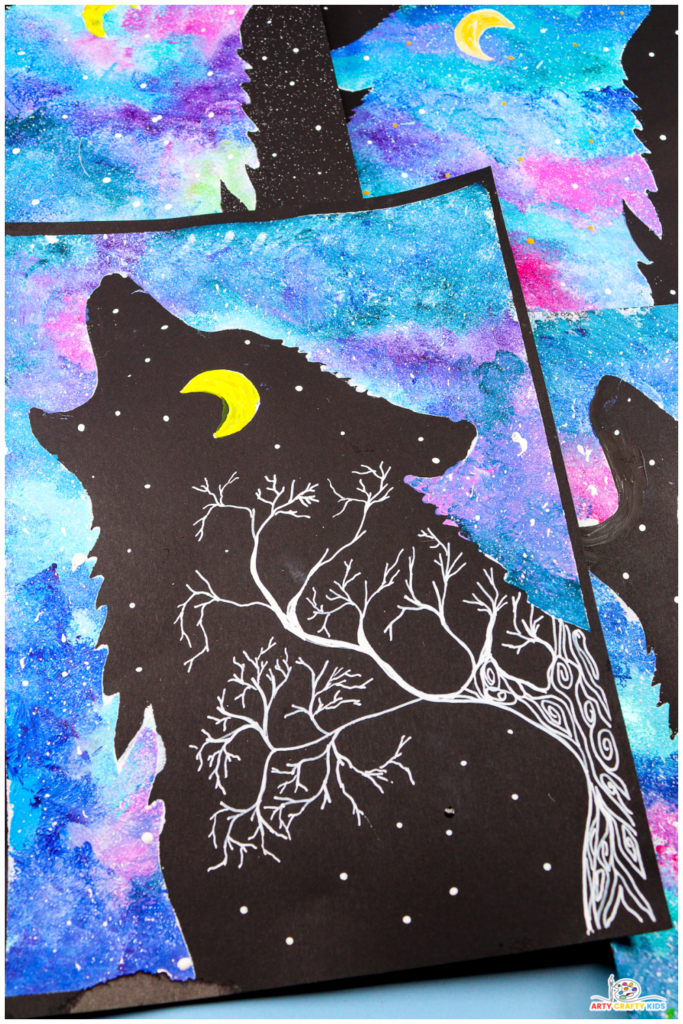
The Wolf Silhouette Painting tutorial is complete!
Through this project, your Arty Crafty Kids will have explored artistic techniques like blending colors, creating contrast, and layering details to form a visually striking composition.
Beyond the art skills, this activity highlights the significance of the wolf—a powerful symbol of freedom, intuition, and community across cultures. By combining the majestic wolf with a magical, moonlit sky, this artwork becomes a celebration of nature, imagination, and self-expression. A perfect reminder of the beauty found in both art and the natural world!


