Sharing is caring!
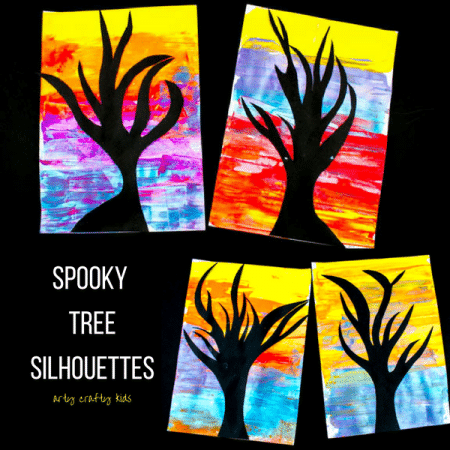
This spooky trees silhouette art project uses an art technique called scrape painting for its background views.
Scrape painting is an incredibly simple, but effective art technique that is perfectly suited to this Spooky Silhouette Tree Kids Art Project.
Using just a little paint and scraps of leftover stock card, kids will have a blast mixing the colours to create beautiful backdrops, filled with interesting colour blends and textures.
The tree element of the art project offers a superb opportunity for children to work on their cutting and fine motor skills.
With just a pair of scissors and a piece of A4 stock card, kids can cut cut cut freely to form their desired shapes, without the pressure of ‘following lines’ or getting it wrong.
It’s about tapping into their creative flow and finding their natural cutting rhythm.
Sound good? Let’s get started!
Spooky Silhouette Kids Art Project: Materials and Tutorial
This post may contain affiliate links leading to recommended products.
For each purchase, Arty Crafty Kids receives a few pennies to help keep the site ticking along!
Black Stock Card
White Stock Card
Kid-Friendly Paint
PVA Glue
Scissors
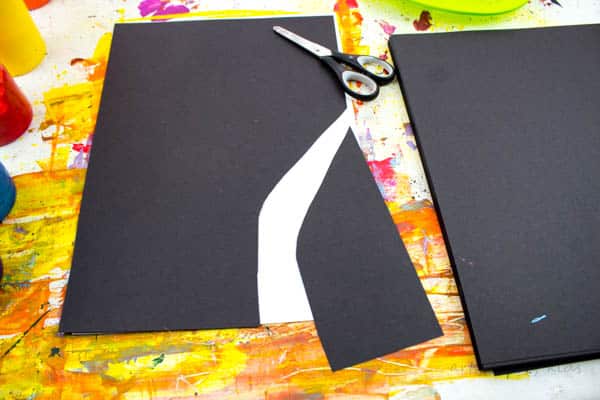
Step 1: Cutting the tree silhouettes
Begin cutting a tree form from a single piece of black card, starting from a central point at the bottom of the page and working your way up to create a curve – this will become the first branch and the starting point for the tree.
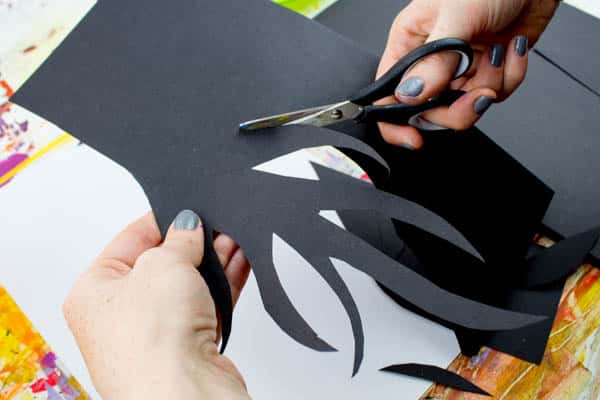
Step 2: Creating the branches of the silhouette trees
Continue cutting, twisting and bending to create multiple branches.
Try to make use of the full A4 space as you work around the card forming the branches of the tree.
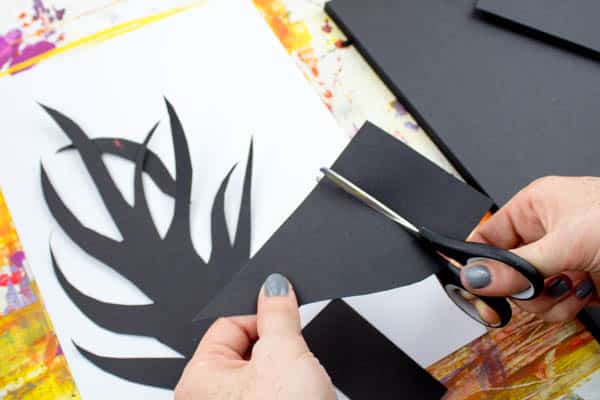
Step 3: The spooky silhouette trees take shape
Using the cuttings from the card, cut them into several thick rectangular shapes and put them to one side along a piece of white A4 card.

Step 4: Start creating the backgrounds
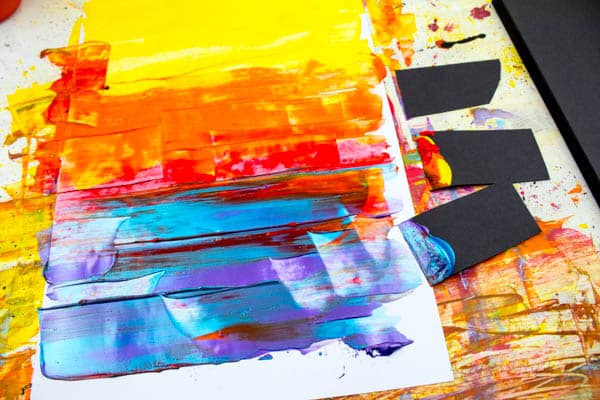
Add a number of blobs of paint to a piece of white card, starting with the lightest shades at the top and darker shades at the bottom.

Step 5: Use the Scrape Painting technique
Using a piece of scrap card, scrape the paint across the page.
Step 6: Compete the backgrounds for your spooky tree silhouettes to contrast from
Continue this process all the way to the bottom of the page, scraping the paint from left to right and right to left, picking up different colours and mixing along the way.
Step 7: Nearly finished your Spooky Silhouette Tree Kids Art Project
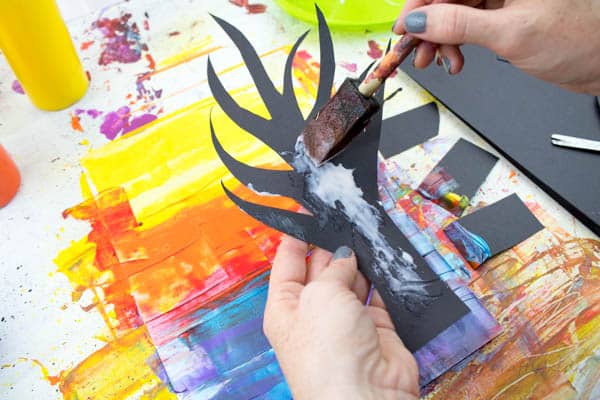
Leave the backdrop to dry and then apply lots of PVA glue to the back of the tree silhouette.

Step 8: Complete the Silhouette painting by adding the tree.
The Spooky Tree Silhouette Kids Art Project is now Complete!
I hope the Arty Crafty Kids love this easy Spooky Tree Silhouette Kids Art Project. With Halloween approaching, this could be good alternative the ghosts and ghoul crafts.
For more simple art projects, take a look at these:
All of these processes can be used to create silhouette backdrops – it could be fun to experiment and try all of these techniques at once!
Pin for Later!


