Sharing is caring!
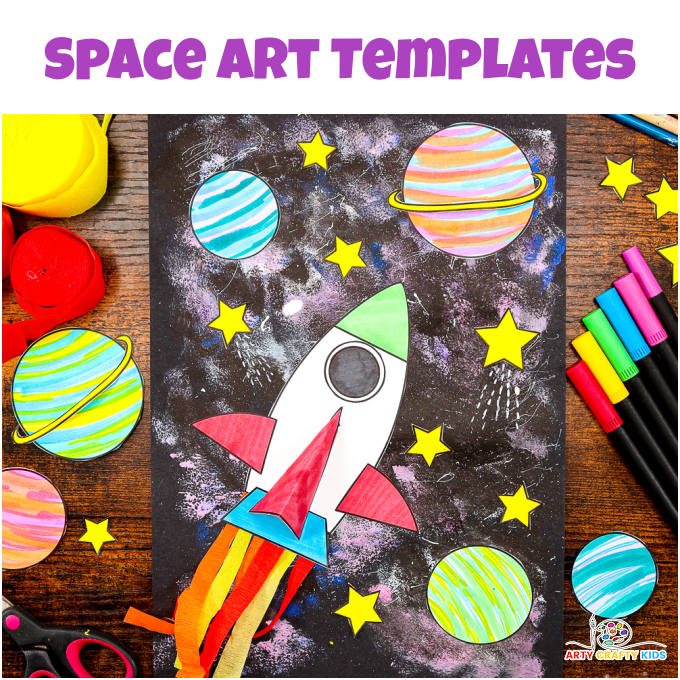
Launch your Arty Crafty Kids into space topic with this fun and easy, out-of-this-world Space Art Project!
This artistic cosmic project has it all, featuring a 3D spaceship, roaring flames, planets, and stars against the backdrop of an awe-inspiring galaxy painting!
Kids can easily create their cosmic scene using our provided templates for the spaceship and planets.
Perfect for young artists, this project combines artistic skills with a touch of crafty astronomy. It helps develop fine motor skills, enhances understanding of color theory, and can be the spark that lights scientific curiosity.

To further explore all things intergalactic, check out our flying rocket ship craft, space-themed coloring pages, Northern Lights painting, and stars and moon drawing tutorial.
And if your Arty Crafty Kids are feeling particularly creative, try incorporating Van Gogh’s Starry Night ( our finger-painted version!).
These additional activities will fuel your child’s imagination and creativity as they delve deeper into the wonders of the cosmos!
How to Make the Space Art Project for Kids
Materials:
- Black Cardstock
- White Cardstock for printing
- Acrylic Paint
- Sponge
- Marker Pens or Crayons
- Tissue Paper
- Scissors
- Glue
- Paintbrush
- Popsicle Stick
- Spaceship and Planet Templates (members need to login to access the templates).
Not a Member?
Join the Arty Crafty Kids club to access the Spaceship and Planet Templates, along with 1000’s more Art and Craft templates, How to Draw Guides, and Coloring Pages.

Part 1: How to Paint a Galaxy
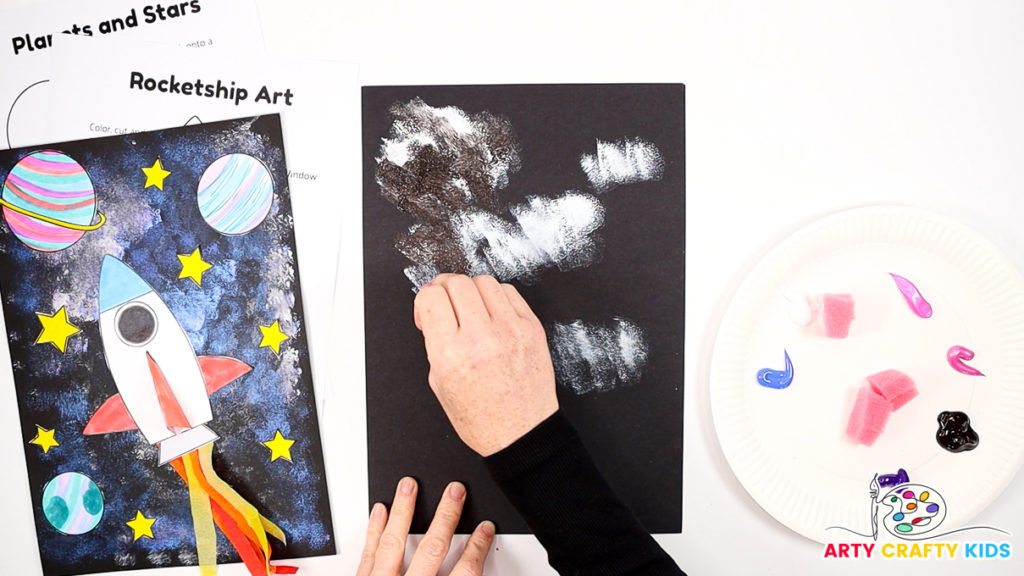
Step 1: Choose a galaxy-themed color scheme and prepare the sponges.
First, choose a selection of ‘galaxy-esque’ colors, such as blue, pink, white, and green. Cut a sponge into small pieces, assigning one piece for each color.
Start by dabbing the lightest color (white) across a sheet of black cardstock using the prepared sponges.
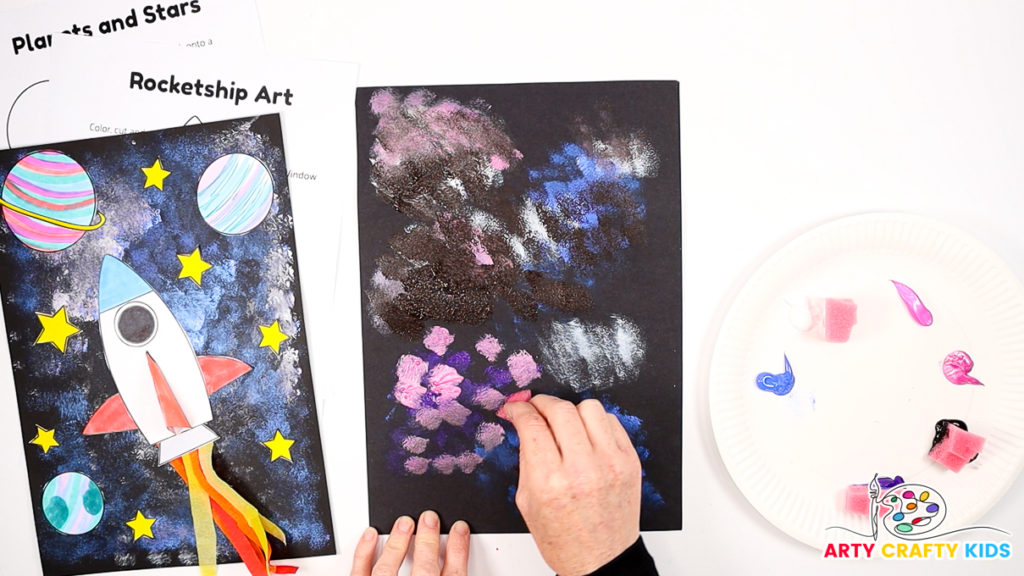
Step 2: Layer the colored paint.
Next, dab shades of pink, purple, and blue across some of the white areas and beyond. Layer the paints carefully, making sure to leave some areas of the black background visible for added depth and contrast.

Step 3: Layer the black paint.
Once all the colors are layered, gently dab black paint across the colored areas to break up the color blocks and create a stunning Milky Way galaxy effect.

Step 4: Splatter white paint across the galaxy painting.
Load a paintbrush with white paint and gently scrape a popsicle stick across the bristles to splatter the paint, creating a starry effect.
With that, the galaxy painting is complete. Allow it to dry thoroughly and move onto the spaceship element of the space art project.
Part 2: How to Make the Spaceship
Print the spaceship and planet templates onto white cardstock. Ensure to select ‘fit to page’ and adjust your printer settings to accommodate cardstock thickness for optimal results.
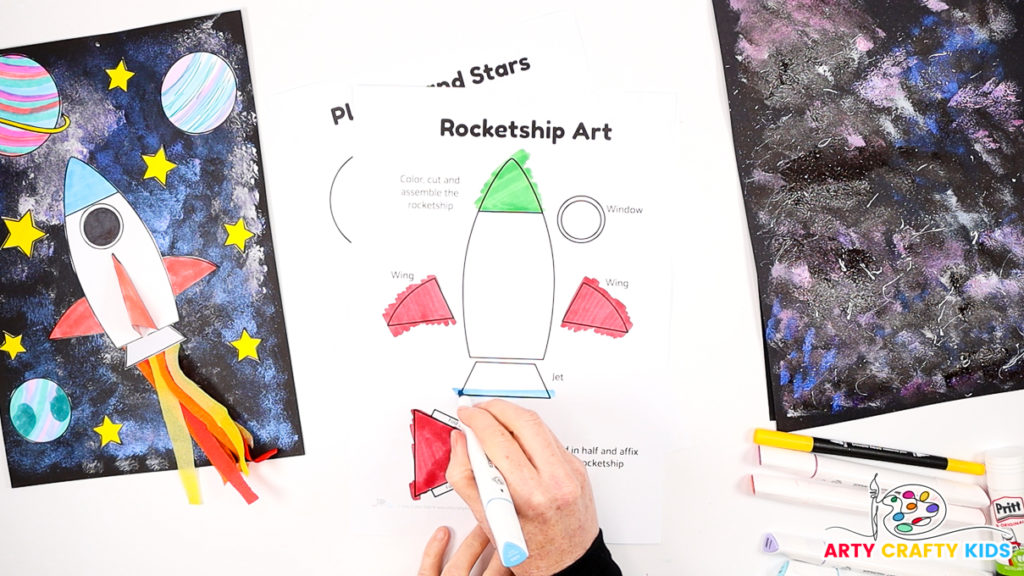
Step 5: Color in the spaceship.
Use a favorite medium to color in the parts of the spaceship.
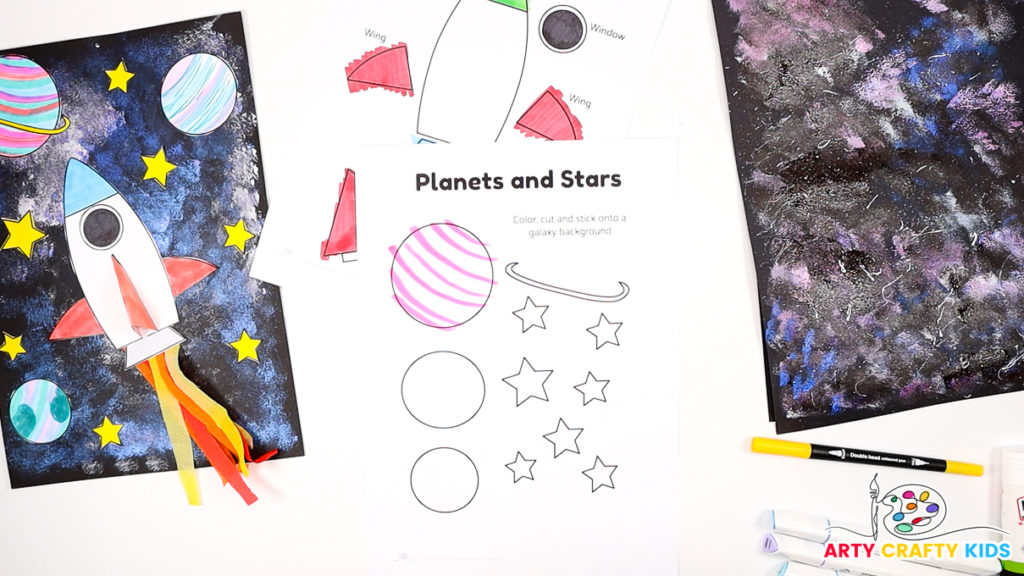
Step 6: Color in the planets and stars.
Color across the planets using slightly curved lines, using a variety of vibrant colors.

Coloring within the lines and blending colors helps create a gaseous planet look. Arty Crafty Kids can add a big red spot to emulate Jupiter or create an Earth-like planet for variety.
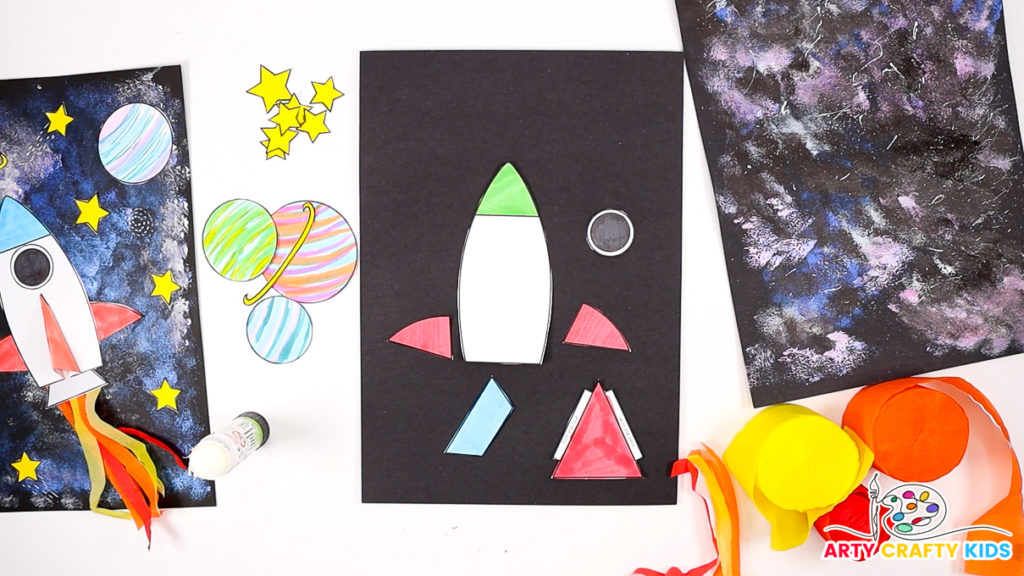
Step 7: Cut out the spaceship, planets, and stars.
Set the planets and stars aside, and align the spaceship pieces for assembly.
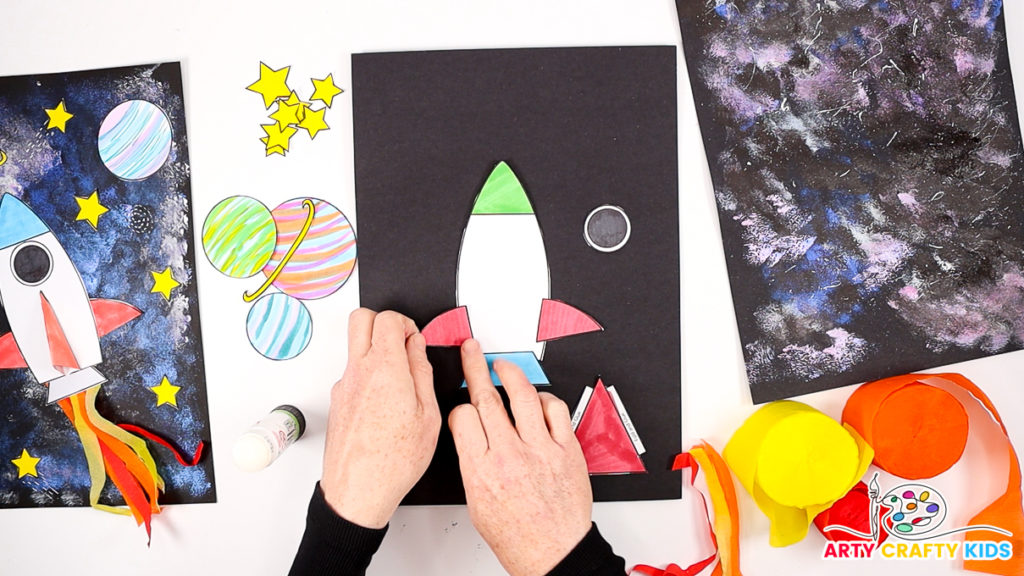
Step 8: Assemble the spaceship.
The wings and jet pack can be glued onto the spaceship, either on top or behind it.
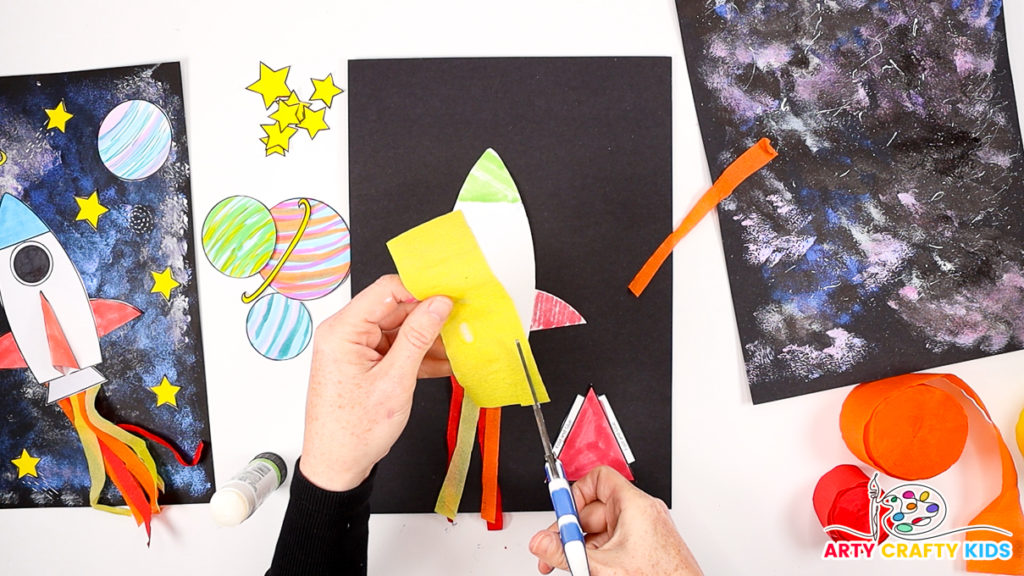
Step 9: Cut tissue paper into long strips.
Cut yellow, orange, and red tissue into strips, then glue them onto the back of the spaceship.

These strips represent the spacecraft’s roaring flames!
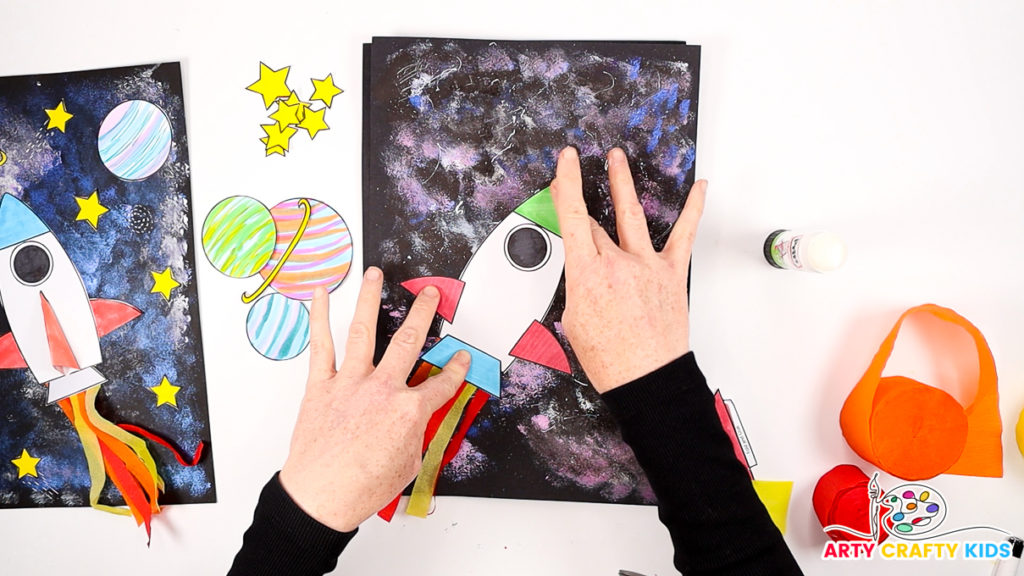
Step 10: Glue the spacecraft to the galaxy painting.
Apply a generous amount of glue to the back of the spaceship and affix it onto the galaxy painting wherever desired, ensuring the tissue paper flames remain free and roaring!

Step 11: Affix the final 3D piece to the spaceship.
Fold the large triangle element in half, fold the flaps, and apply plenty of glue.

Glue the piece in a central position, just below the spaceship’s window and slightly above the jetpack.
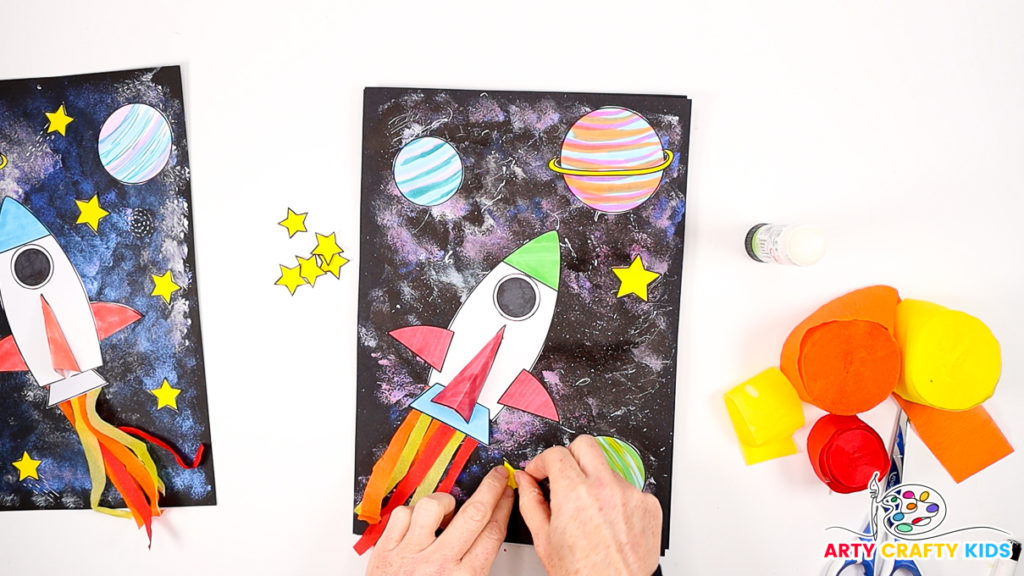
Step 12: Affix the planets and stars to the galaxy painting.
They can be positioned anywhere around the spacecraft!

Optional Step 13: Draw lines to create a shooting star!
Use a white acrylic marker pen to draw a series of dashed lines originating from the stars. This adds a sense of movement and creates the impression of a shooting star.
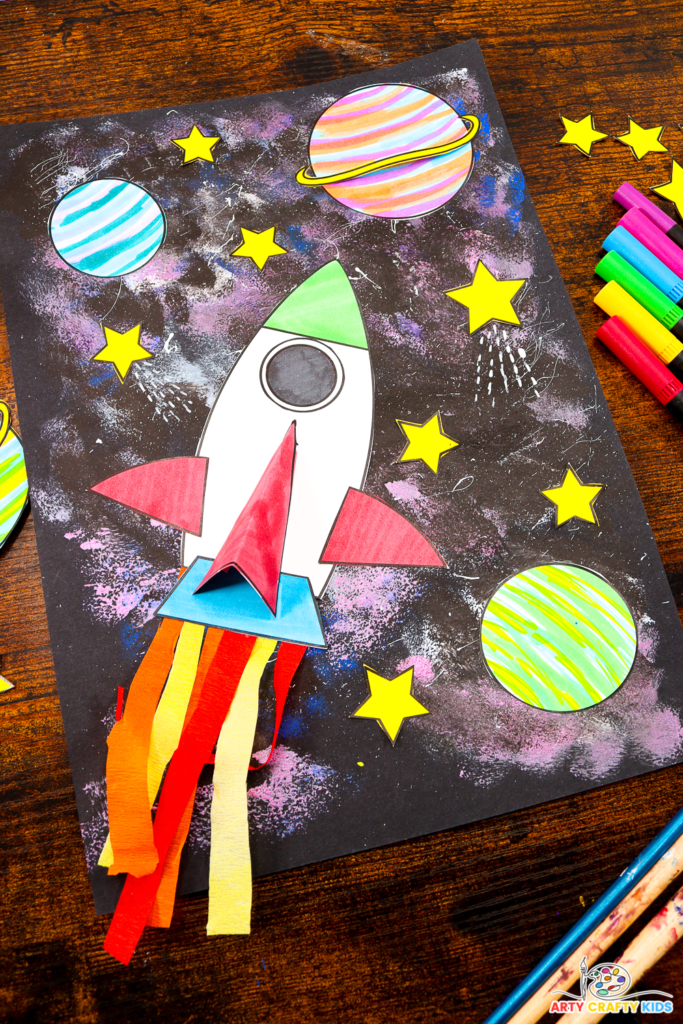
The wonderfully dynamic, mixed-media Space Art Project is complete, combining various artistic elements such as painting, collage, and drawing to bring the cosmic scene to life.
With its blend of textures, colors, and techniques, this project offers a rich and immersive creative experience for Arty Crafty Kids, allowing them to explore the depths of outer space through a diverse range of artistic mediums.
Download the Spaceship and Planet Templates:
Click the image below to find out how you can download the templates to complete the Space Art Project!
