Perfect for Spring, this simple rainbow art project is inspired by the Pointillism technique, made famous by artists like Georges Seurat and Paul Signac.
Artists used tiny dots of color to paint, which blend together when viewed from a distance, resulting in bright and detailed images.
Other artists, such as Camille Pissarro, Vincent van Gogh, and Henri-Edmond Cross, also explored this technique, each adding their own unique twist with expressive brushwork and bold color choices.
In this activity, kids will create a beautiful rainbow scene using only Q-tips and paint. This is a great way to explore color mixing, creativity, and patience while having fun with a simple yet impactful technique.

Perfect for little artists who love to experiment, this art project brings big, bold results with just a few small dabs of paint.
So grab some Q-tips, dip into your favorite colors, and get dotty with this easy and engaging Pointillism rainbow art project!
>>> Click HERE for Rainbow Art Projects for Kids.
Simple Rainbow Pointillism Art
Materials
- White Card Stock for Printing
- Paint (Ideally Acrylic)
- Q-tips (eco/ non-plastic)
- Rainbow Templates (members will need to login to access the templates).
The download includes two templates: one with a rainbow landscape and the other featuring a large single rainbow.
Not a Member?
Join the Arty Crafty Kids club to access the Rainbow Templates for Pointillism Art and 100s more Art and Craft templates, How to Draw Guides and Coloring Pages.

Rainbow Pointillism Art: Step-by-Step Tutorial
Using cotton buds, fingers, or even the end of a pencil, let’s explore how we can create a vibrant rainbow painting, one dot at a time.
Step 1: Set Up Your Colors
Squeeze small amounts of red, orange, yellow, green, blue, purple, and other fun colors onto a paper plate. If you’d like, mix shades together for extra color depth!
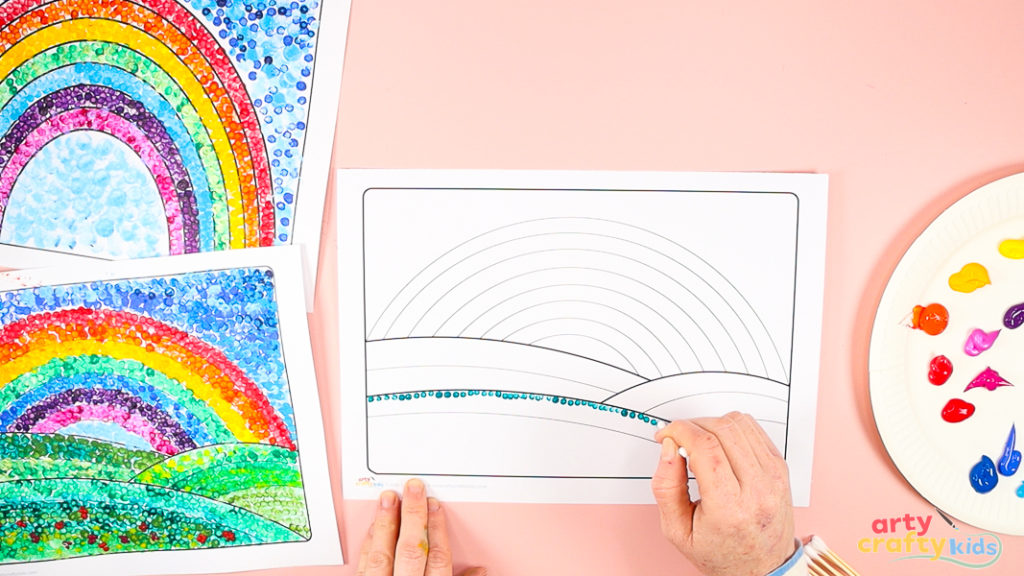
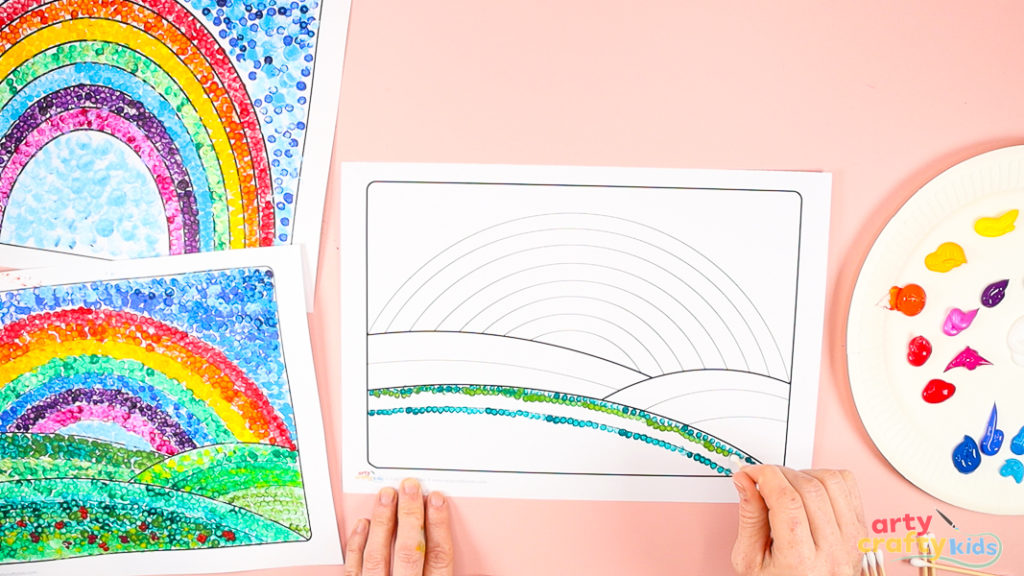
Step 2: Begin dotting!
Using either the landscape template or rainbow, dip a q-tip into your selected color and start with a row of dots.
In this example, we’re applying a row of dark green dots and following the line of the first of the hill within the landscape art. We’re using the q-tip as many times as possible to create variations in the boldness of the color.
Step 3: Building the landscape with different shades of green.
Dip a clean Q-tip into a lighter green and start dotting above and around the dark green row, creating a pointillism effect.
Overlap some dots slightly for a blended look, but leave enough space to see the individual shades.
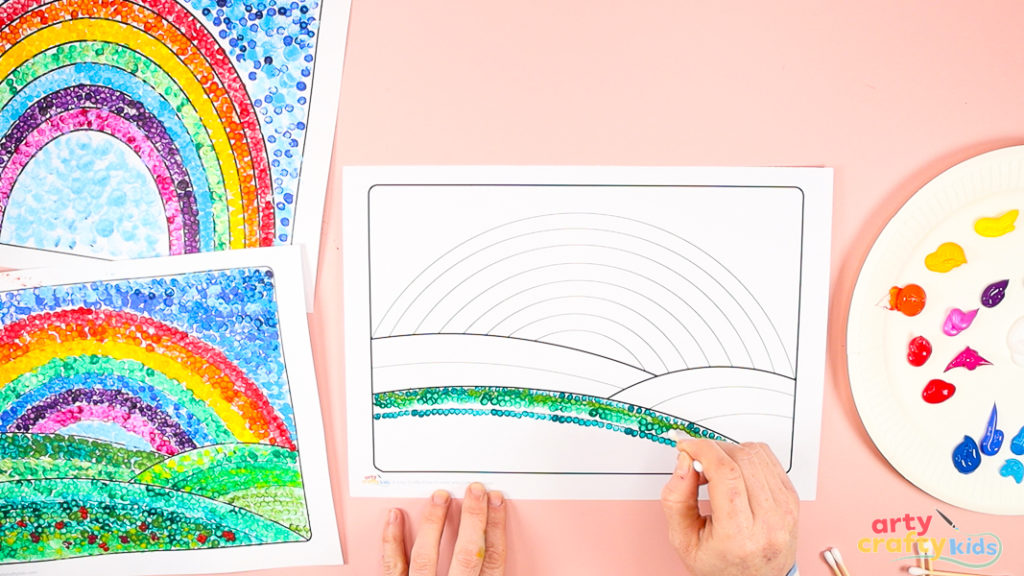
For extra dimension, introduce a third shade of green, perhaps a more vibrant or grassy tone.

Step 4: Add some wildflowers to the landscape.
Choose vibrant shades such as red, yellow, pink, white, or blue to represent various wildflowers, and add a few dots within the dotted hill.

Step 5: Add visual depth to the landscape.
To give the landscape a rich, layered feel, keep building up the hills with a mix of greens, yellows, and even hints of blue.
Use darker greens in the foreground for a bold contrast, then gradually blend in lighter tones as you move up the hills to create a sense of depth.
Keep layering your dots, overlapping colors, and playing with different shades until the hills feel full of life and texture—just like a real, rolling meadow!

Step 6: Begin painting the rainbow.
Fill the top arch space with numerous red layered dots.

In your Rainbow Pointillism Art, progress to orange and yellow, allowing the colors to overlap and blend as you dot along the arcs.
Don’t be afraid to cross over the lines slightly—this layering technique helps create a beautifully blended rainbow effect full of depth and vibrancy!
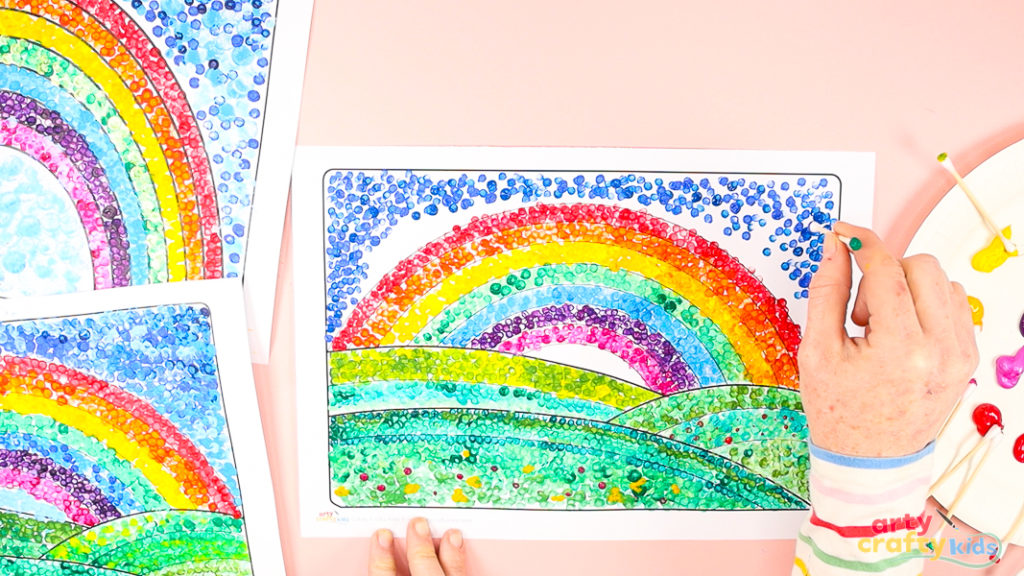
Step 7: Paint the sky.
With the rainbow complete, take a moment to appreciate how the pointillism effect makes the colors pop and blend beautifully!
Now, let’s bring the sky to life. Start with darker blues around the edges, then build up with lighter shades, layering the dots to create a bright, dynamic background.

Keep dotting, mixing different tones, and letting the colors blend naturally—this will give the sky depth and movement, making your scene feel full of energy!

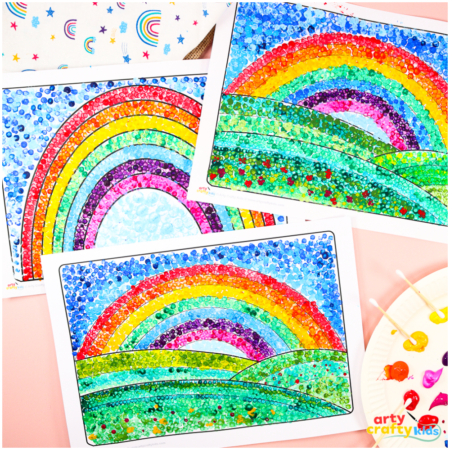
The Pointillism Rainbow Painting is Complete!
And just like that, your Rainbow Pointillism Art is complete!
It’s amazing how a collection of tiny dots come together to create such a bright, blended painting, isn’t it?
This technique is perfect for kids of all ages—whether they’re carefully layering colors or just having fun dotting away.
No need for perfect lines or fancy brushstrokes—just patience, creativity, and a little bit of messy fun!