Sharing is caring!
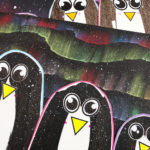


This fun and engaging Scrape Painted Penguin Winter Art project combines a variety of artistic techniques to create an adorable scene featuring penguins against a colorful Southern lights backdrop.
Children will love experimenting with the squeegee tool to craft their penguins, blending soft chalk pastels to mimic the Aurora Australis, and splattering white paint to add a snowy touch.
This activity is simple to follow and encourages creativity, fine motor skills, and the exploration of texture and color.
A wonderful way to celebrate the beauty of winter and inspire little artists!

How to Make Scraped Painted Penguin Winter Art
Materials:
- White and Black Card Stock
- Scrap Colored Paper
- Squeegee or another Scraper Tool
- Black and White Paint
- Chalk Pastels
- Scissors
- Glue Stick
- Penguin Facial Elements ( members will need to login to access the templates).
Not a Member?
Join the Arty Crafty Kids club to access the Penguin Facial Elements and 100s more Art and Craft templates, How to Draw Guides, and Coloring Pages.

Let’s Create our Scrape Painted Penguins!
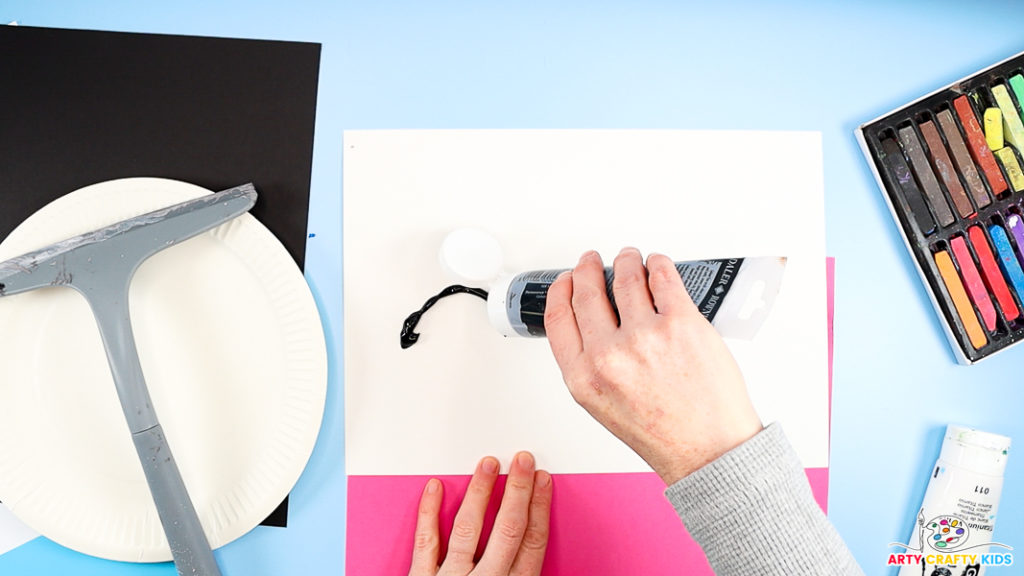
Step 1: Shape the black paint into an arch.
Apply black paint directly onto a piece of white cardstock, approximately 4-5 inches above the bottom edge.
Arty Crafty Kids can either squeeze the paint straight from the paint bottle or spread a blob using a paintbrush.

Step 2: Apply a spot of white paint.
Apply white paint about 1 inch below the black arch.
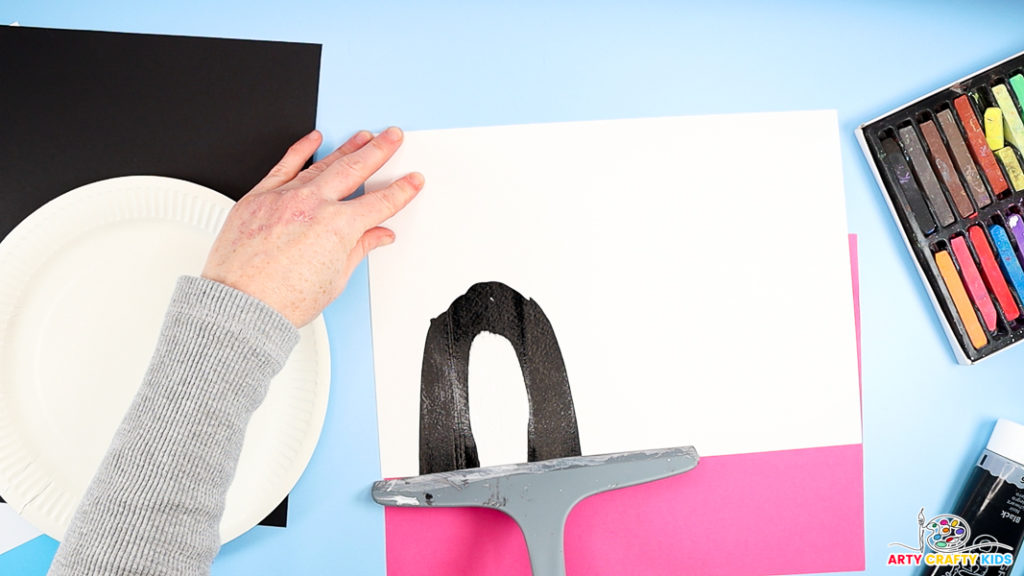
Step 3: Use a squeegee to scrape the paint.
Position a squeegee just above the black arch and gently drag it downward, spreading the paint evenly from the top of the arch to the bottom of the page.
This technique creates a smooth and striking effect, perfect for the penguin’s body.
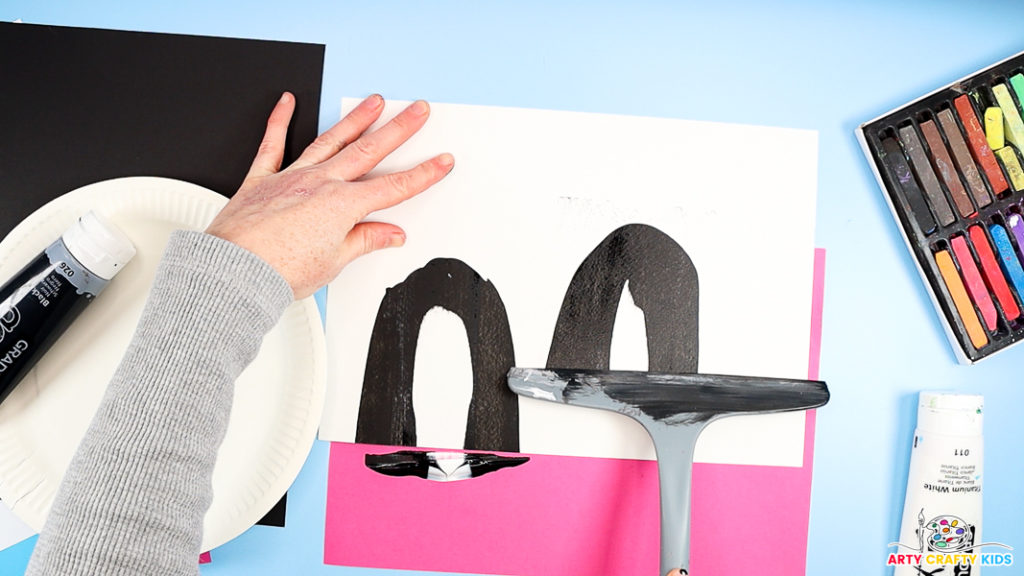
Step 4: Create additional penguin bodies.
Follow the initial steps to create additional penguin bodies, varying their sizes for added visual interest.
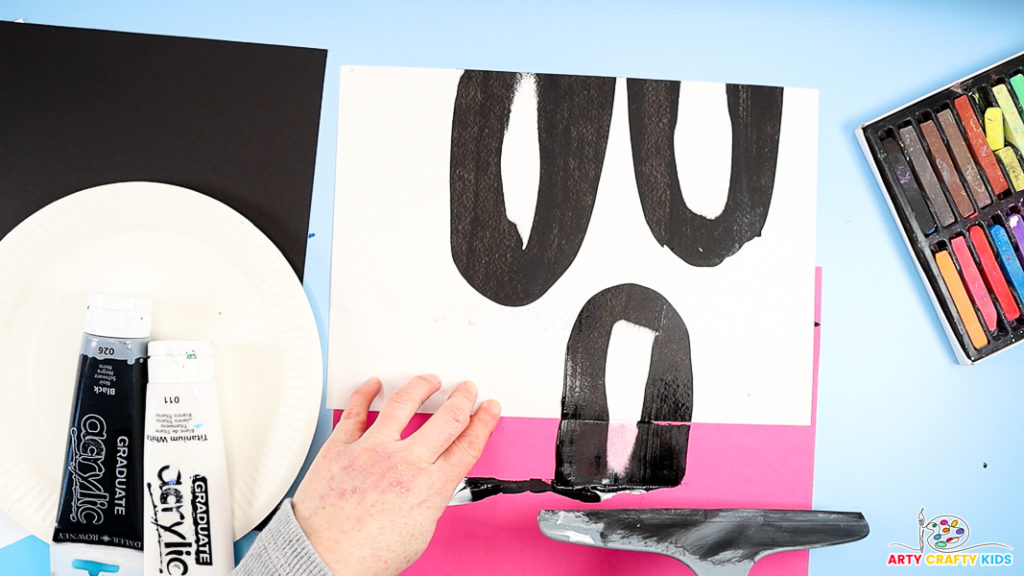
Pro Tip: Place a scrap piece of paper beneath the white cardstock to catch any excess paint scraped off during the process.
After completing the penguins, allow the paint to dry thoroughly.
How to Make the Northern Lights
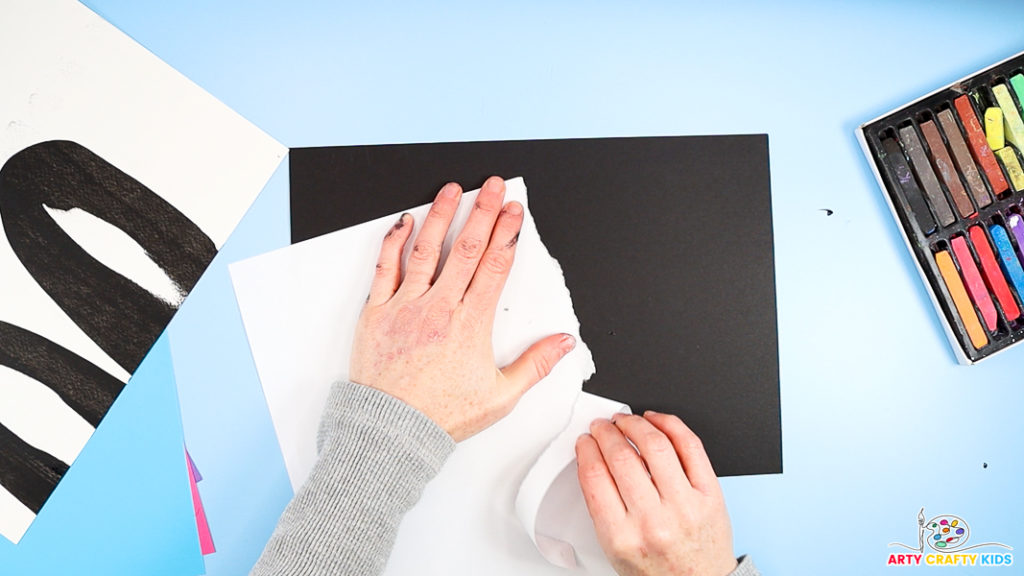
Step 1: Rip a strip of white paper to form a jagged edge.
Tear a horizontal strip from the top of a sheet of paper.

Step 2: Color the jagged edge.
Use chalk pastels to add color along the jagged edge of the white paper.
Consider the colors of the Northern Lights and aim to create a similar pattern in your design.
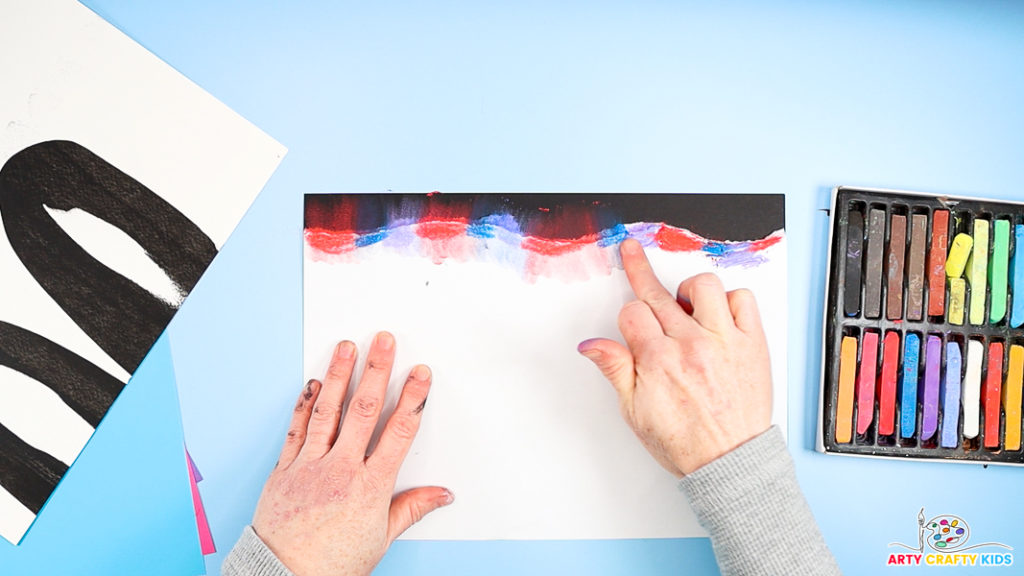
Step 3: Spread the chalk onto the black cardstock.
Position the torn paper on the black cardstock, then use your finger to gently blend the chalk onto the background.
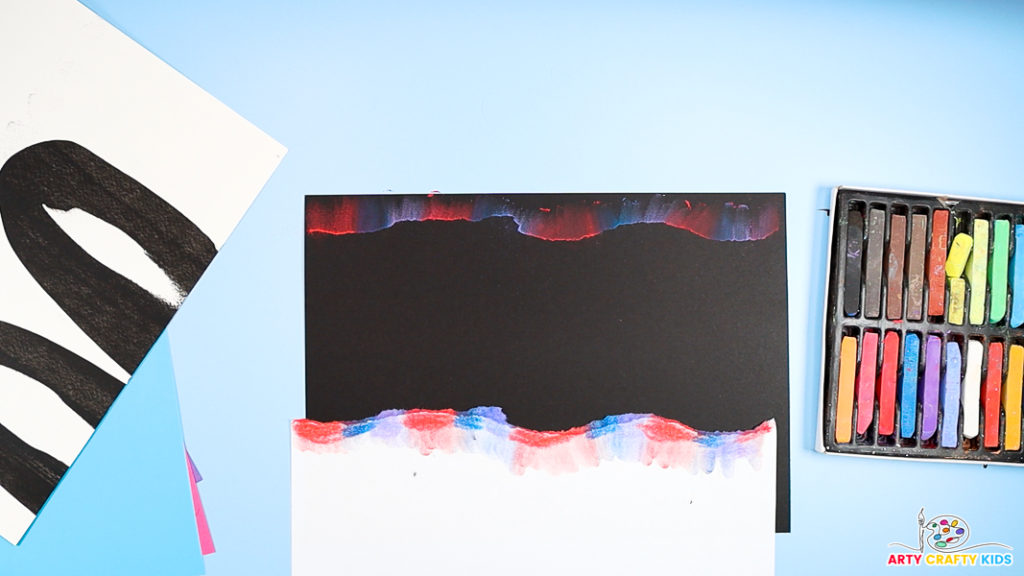
Step 4: Remove the white paper.
You should now have a stunning display of chalk-drawn rays that beautifully mimic the Northern Lights.

Step 5: Add additional layers of Southern Lights.
Keep tearing the paper to create varied line shapes, alternating the colors to form a vibrant and dynamic sky.
Combine the Penguins and Southern Lights Backdrop
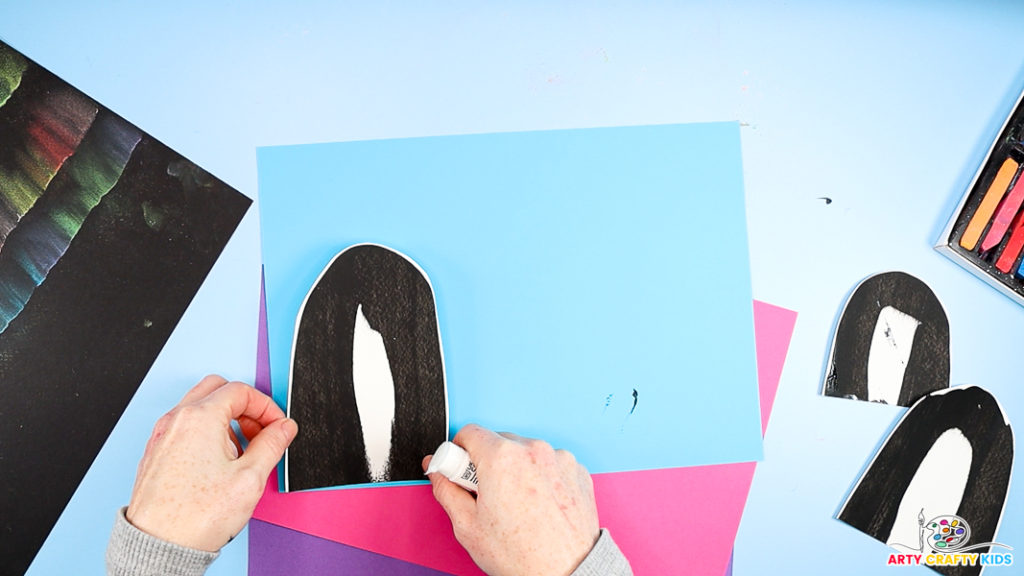
Step 1: Cut out the Pengiun Bodies.
Trim the penguin bodies and attach them to a colorful background paper using glue.
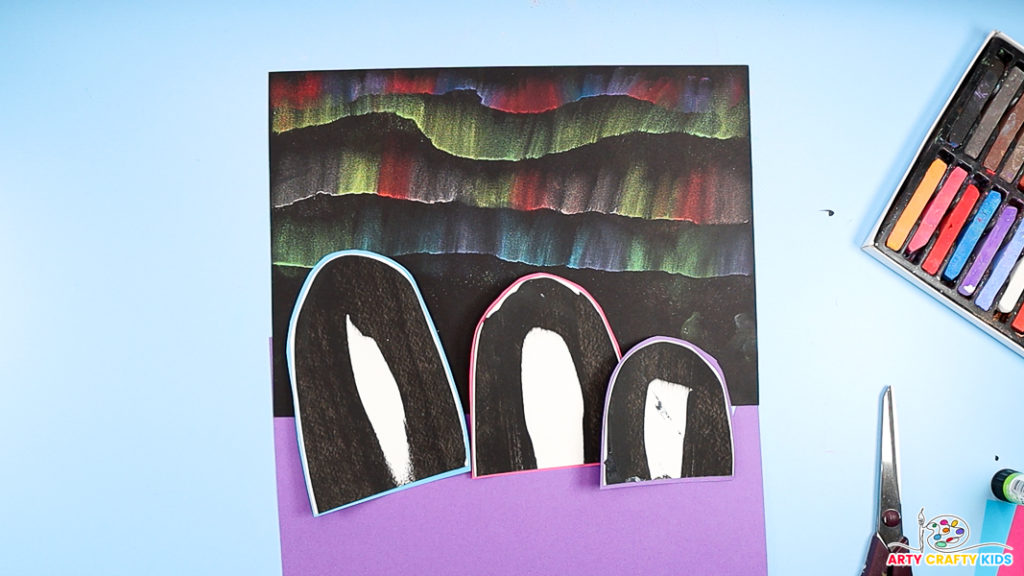
Step 2: Cut out the penguin shapes and give each one a colorful border.
Experiment with different colors for the borders to make each penguin stand out and add a playful touch to your winter scene.

Step 3: Add the penguins facial features.
Choose a different set of eyes and beaks from the template.

Once you’ve chosen the eyes and beaks, securely glue them in place on each penguin.
Next, attach the penguins to the Southern Lights winter scene, positioning them to create a charming and cohesive composition.

Step 4: Add a snowy effect with white paint.
To complete your penguin winter art, splatter white paint across the entire scene to create the appearance of falling snow.
Dip a paintbrush into the white paint and gently tap or flick the brush over your artwork, allowing small droplets of paint to scatter across the surface.
Be sure to cover the penguins and the Southern Lights background for a cohesive snowy effect.

I hope your Arty Crafty Kids enjoy creating their own magical winter scenes with this project. From experimenting with new techniques to assembling their adorable penguins, this activity is full of opportunities for creativity and skill-building.
The end result is a unique piece of art to love and display proudly – perfect for celebrating the beauty of the season!
More Winter Art Projects:
If your Arty Crafty Kids enjoyed this penguin project, why not try more winter-themed crafts? Create textured trees with Winter Tree Art, serene woodland scenes with Winter Bird and Birch Trees, vibrant auroras with Northern Lights Painting, or adorable Snowy Owls with sponge painting. Each project is a fun way to explore winter art!


