Sharing is caring!
This Polar Bear Silhouette Painting is the perfect winter art project for kids and adults alike.
With a single polar bear silhouette template, children can explore the striking contrast of negative and positive space while experimenting with vibrant colors to create a stunning aurora borealis backdrop.
The polar bear, a symbol of strength and the Arctic’s natural wonder, makes this project fun, and an excellent way to begin conversations about wildlife, conservation, and the magic of the winter season.
This activity is ideal for classrooms, homeschooling, or family craft sessions. Younger children will love blending colors to create their own unique skies, while older kids can focus on adding intricate details, like snowflakes, mountains, or even their own creative touches to the polar bear silhouette.
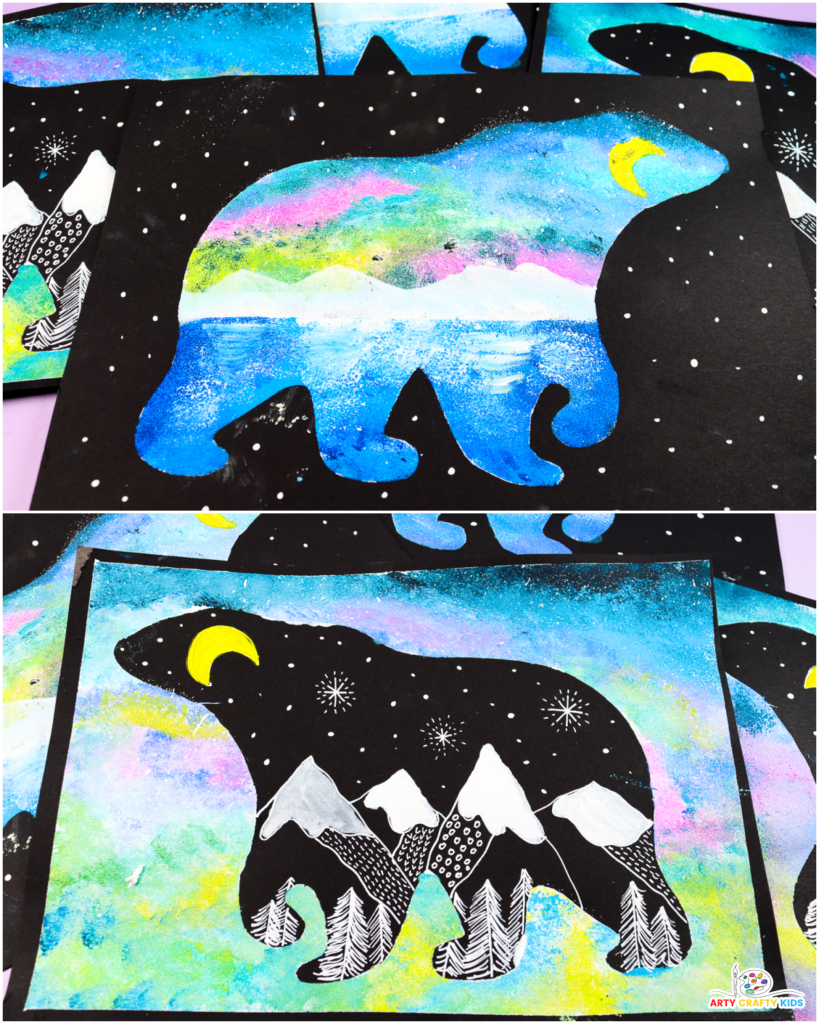
The Polar Bear Silhouette Painting is part of a Winter Silhouette Art series featuring a Wolf and Reindeer. Each project highlights a winter animal and uses vibrant seasonal colors, making it easy and fun for kids to explore positive and negative spaces in art.
How to Make a Polar Bear Silhouette Painting
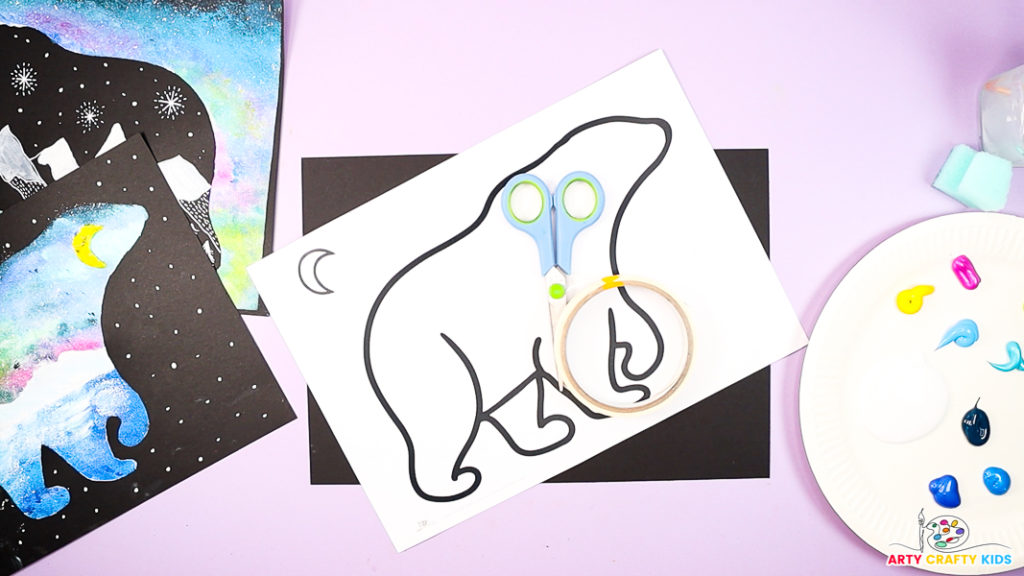
- Black and White Card Stock
- A White Acrylic Pen ( Posca Pens are great!)
- Acrylic Paint – Blue, Yellow, Pink, Green, White and Black
- Paintbrush – Round Tipped and Fine Tipped
- Masking Tape
- Sponge
- Scissors
- Polar Bear Silhouette Art Templates (members will need to login to access the templates).
Not a Member?
Join the Arty Crafty Kids club to access the Polar Bear Silhouette Art Templates and 100s more Art and Craft templates, How to Draw Guides, and Coloring Pages.

Polar Bear Silhouette Art: A Step-by-Step for using the negative space silhouette.
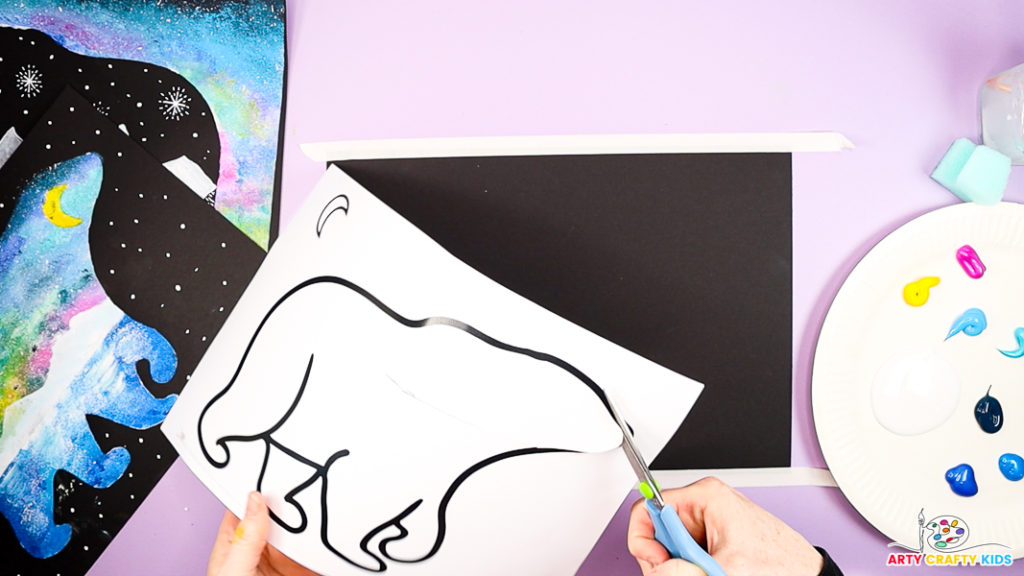
Step 1: Carefully cut out the polar bear template.
Start by carefully piercing a hole in the center of the template. Cut a straight line from the hole to the black outline of the polar bear, then proceed to cut out the inside of the template, ensuring the polar bear remains intact.
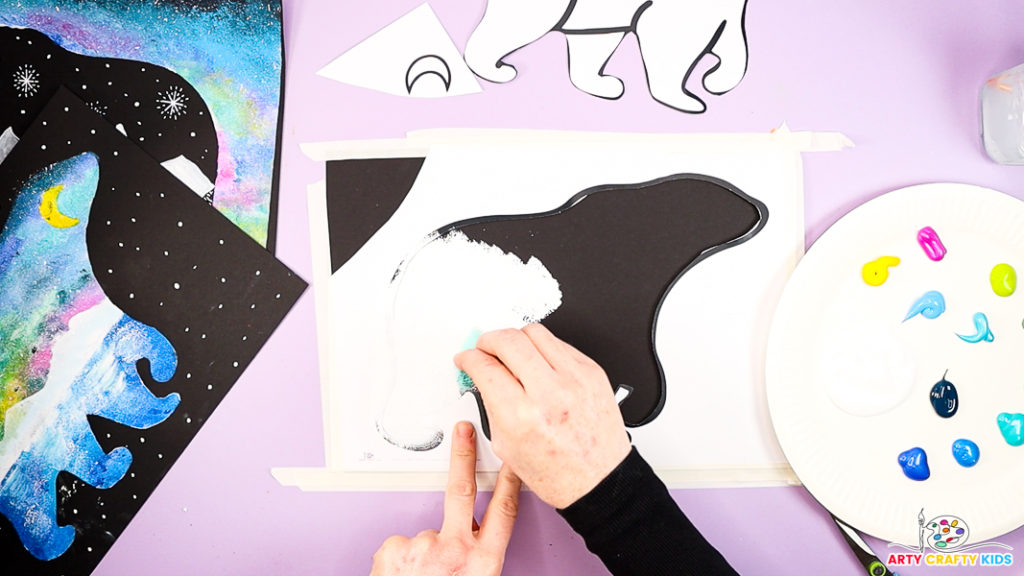
Step 2: Prepare the canvas and paint the polar bear white.
Begin by securing the black cardstock to your workspace using masking tape to prevent it from moving. Next, position the negative space silhouette over the black cardstock and tape it down firmly with masking tape to hold it in place.
Once the template is in place, dip a sponge into some white paint and fill the polar bear shaped space.
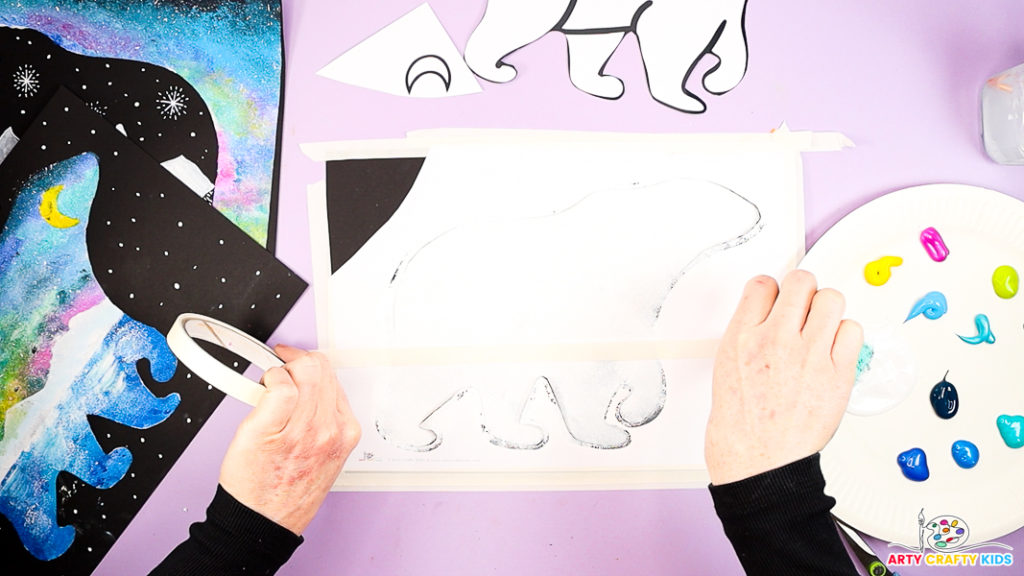
Step 3: Divide the polar bear with a strip of tape.
Once the polar bear is painted white, place a strip of tape a few centimeters above the legs. This tape will serve as the horizon line, separating the landscape from the sky.
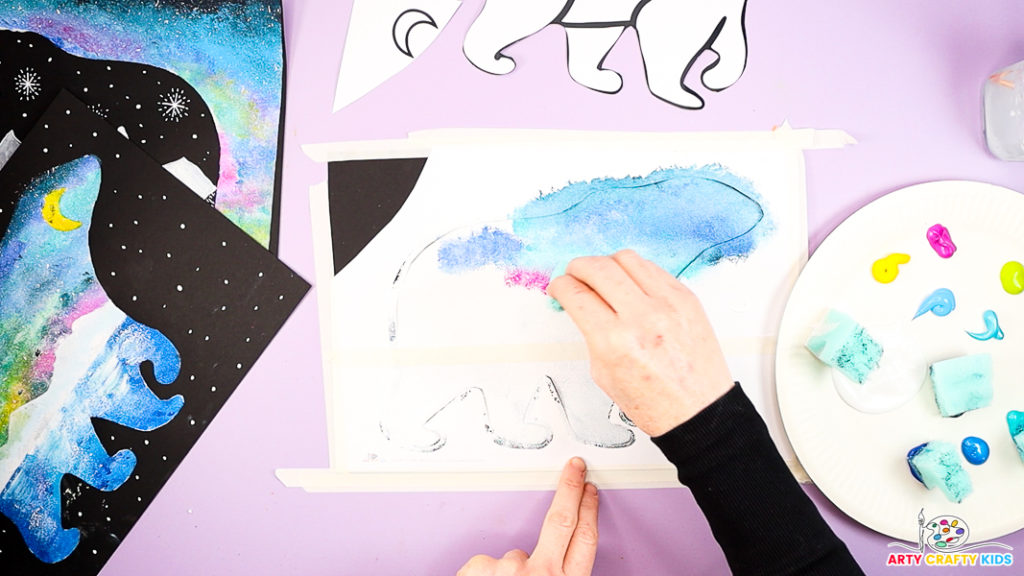
Step 4: Paint the upper half of the polar bear with Northern Lights-inspired colors.
Usse deep blues and purples to create a rich night sky and incorporate vibrant greens, pinks, and yellows to capture the glow of the northern lights. Add white or metallic paint to bring out highlights and add dimension.
Begin with darker shades, gently blending them across the polar bear silhouette with a sponge or wide brush to create a smooth transition of colors.
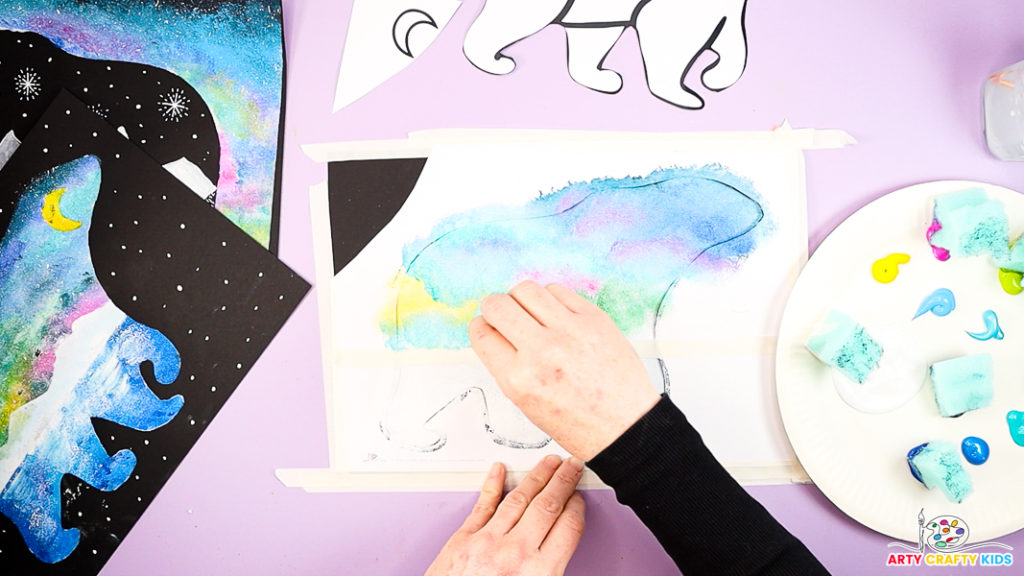
As you reach the horizon line, transition to lighter shades of green and pink to create a subtle, glowing effect that mirrors the aurora’s soft light.
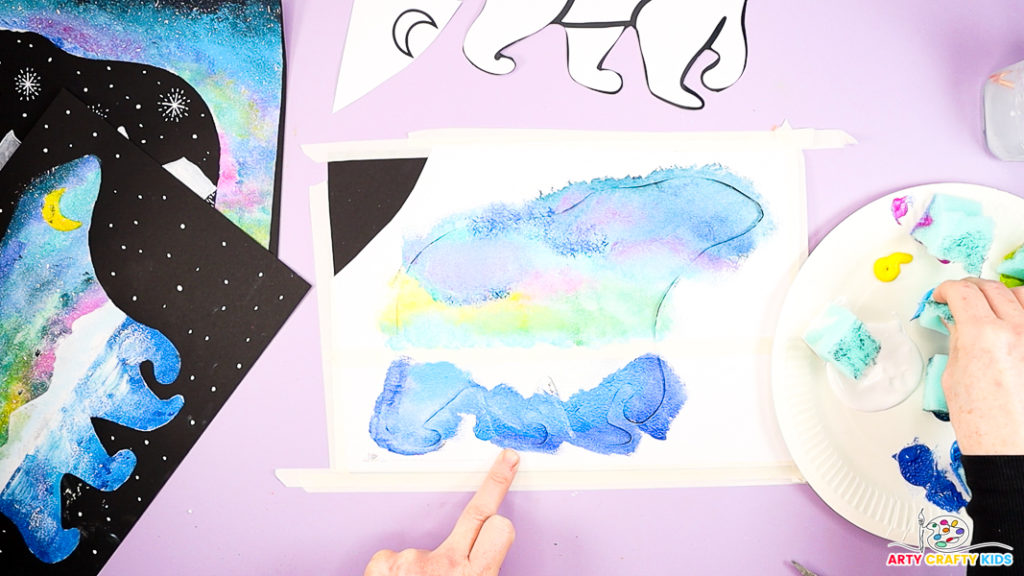
Step 5: Paint the lower half of the polar bear blue, to mimic the Arctic ocean.
Paint the lower half of the polar bear silhouette blue to represent the Arctic Ocean. Use varying shades of blue to create depth and movement, blending darker blues at the base with lighter tones as you move upward.
This helps give the impression of shimmering water beneath the polar bear.
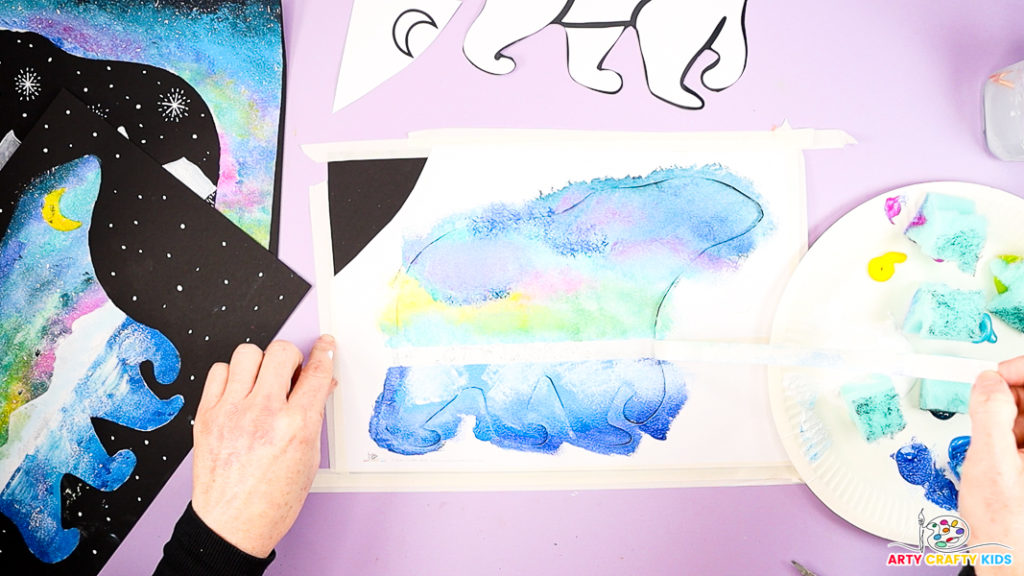
Step 6: Remove the horizon tape.
Once both parts of the polar bear are painted, carefully remove the dividing tape to reveal a clean white strip that separates the Arctic Ocean from the sky.
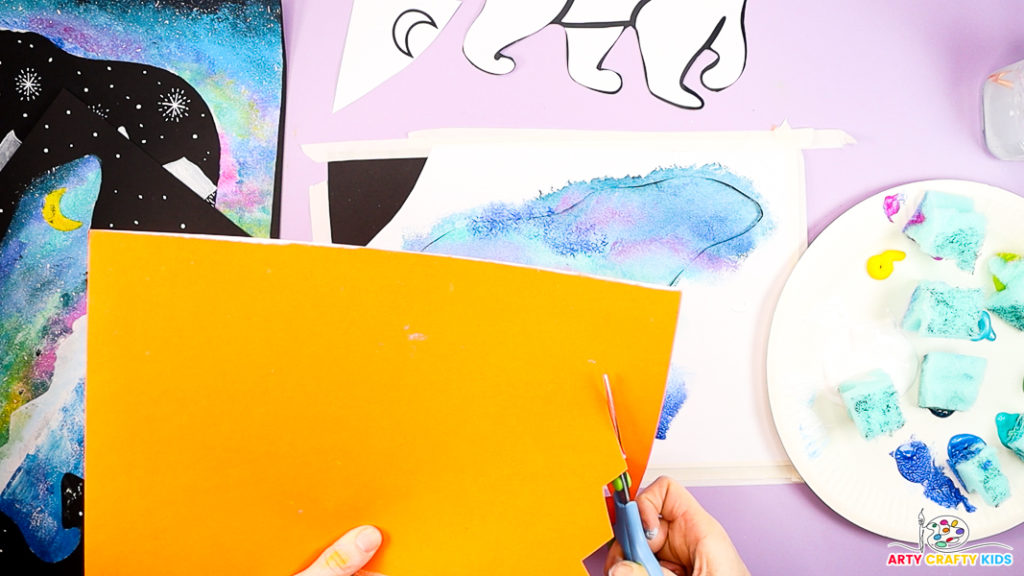
Step 7: Cut a zig-zaged line into some scrap paper.
Leave about an inch or more from the edge, and create a zig-zag line across the paper.
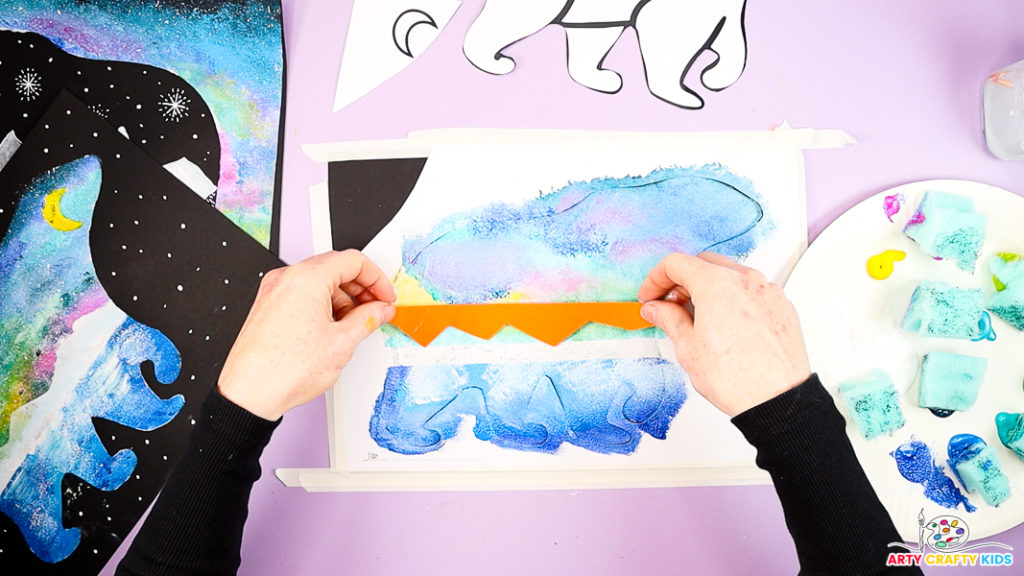
Step 8: Adding mountains to the Arctic landscape.
Place the zig-zagged line above the white horizon line.
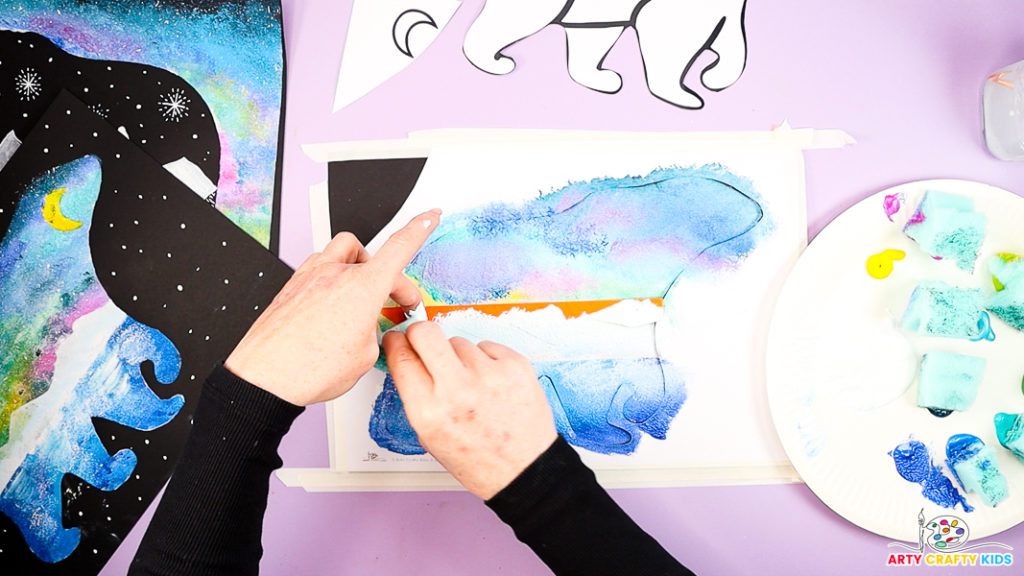
And paint the space beneath the zig-zagged paper white.
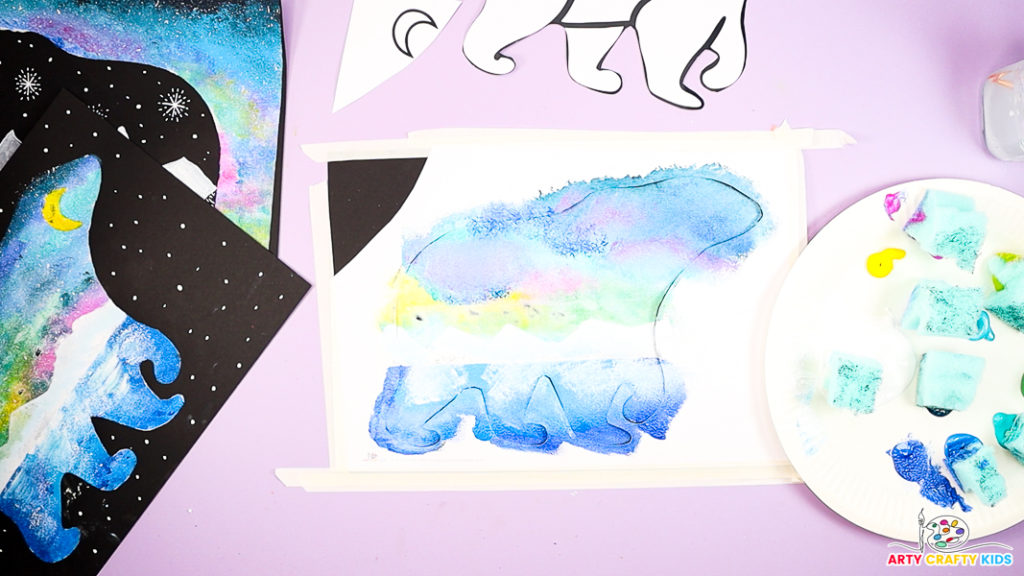
Step 9: Remove the zig-zagged paper to reveal the mountains.
The small mountains, dark ocean transitioning to light, mirrored by the light-to-dark gradient in the sky, help to create a sense of depth and perspective within the painting.
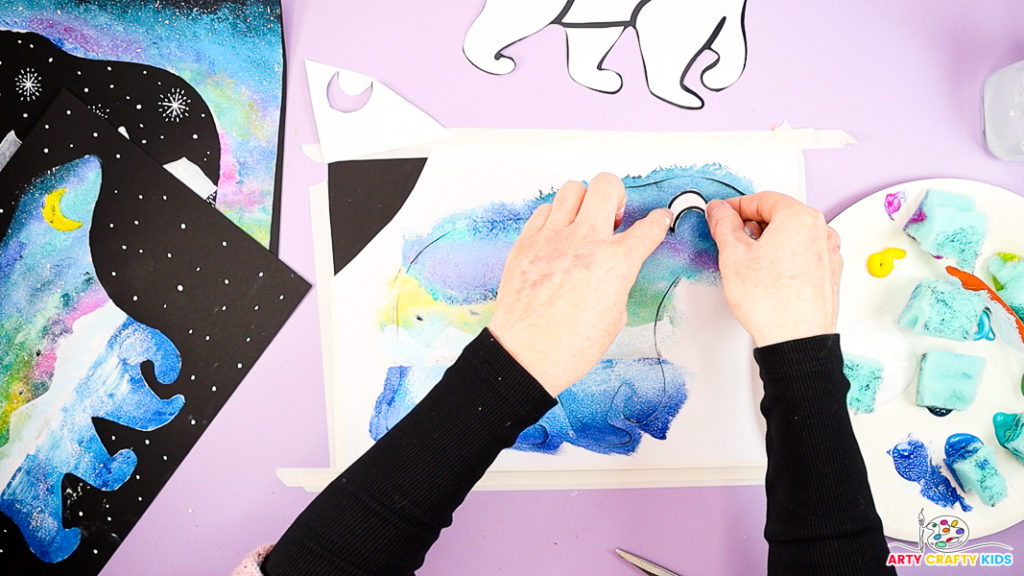
Step 10: Trace around the moon shape.
Trace around the moon shape using a pencil or white gel pen. This step adds a crisp outline to define the moon and helps it stand out against the vibrant backdrop.

Paint the moon yellow.

Step 11: Remove the template.
Once your Arty Crafty Kids have finished their polar bear silhouette painting, gently peel away the negative space silhouette.

Step 12: Fill the black space with twinkly stars.
Finish your polar bear silhouette painting by adding a scattering of stars to the dark sky around the silhouette.
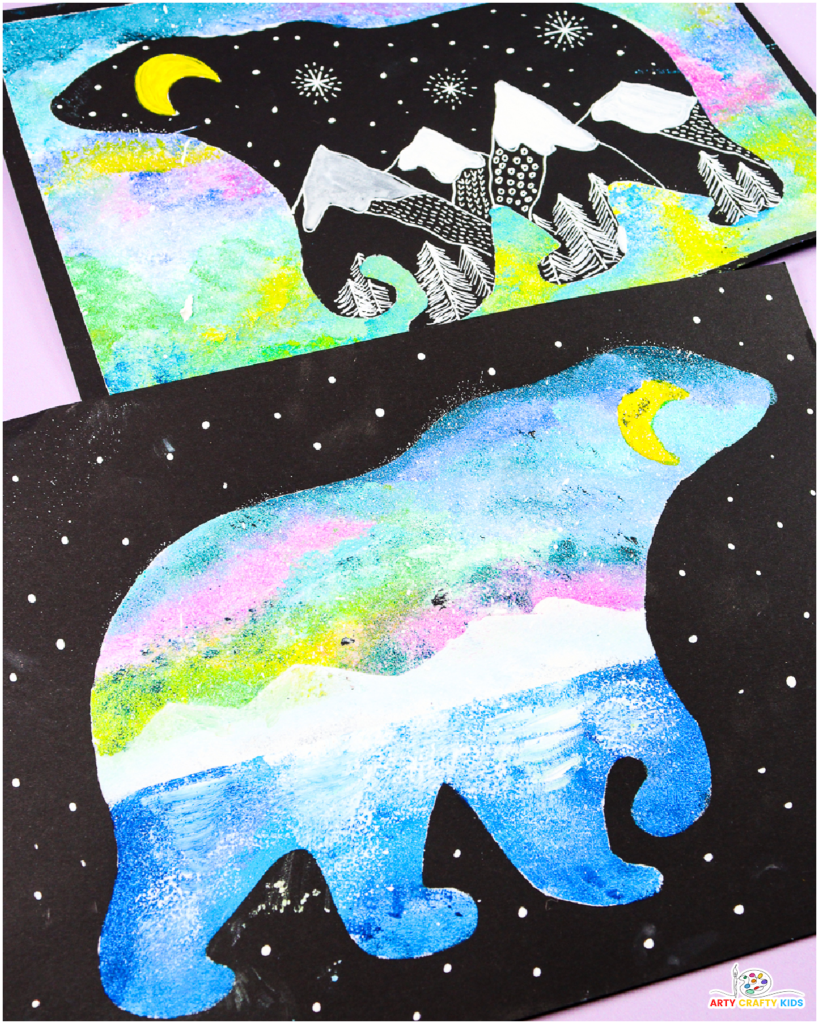
This simple addition enhances the contrast between the vibrant aurora borealis and the polar bear, creating a magical, eye-catching effect that brings the Arctic scene to life. You can also enhance the traced line with a touch of metallic or glitter paint for extra sparkle.
Wolf Silhouette Night Sky Painting: Step-by-Step Instructions
This step-by-step guide will walk you through creating a stunning polar bear silhouette painting, complete with a vibrant night sky.
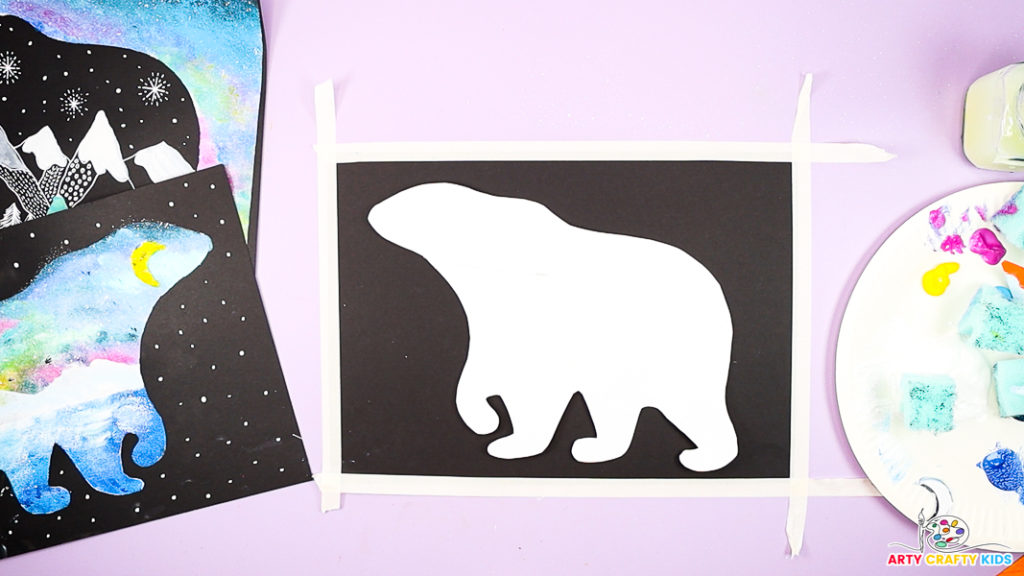
Step 1: Prepare the canvas and polar bear silhouette template.
Begin by securing the edges of the black cardstock with tape.
Place the polar bear silhouette cutout on the cardstock and fix it in place with masking tape around the edges. Ensure the template is flat to avoid paint seeping underneath.
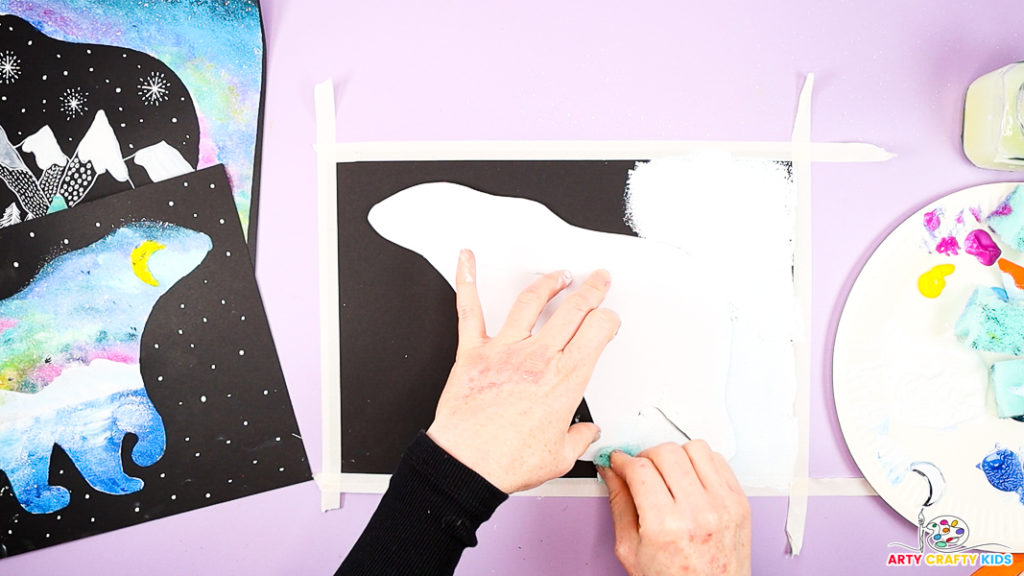
Step 2: Paint the surrounding space white.
Before painting the night sky, use a sponge to gently dab white paint around the wolf, filling the surrounding space.
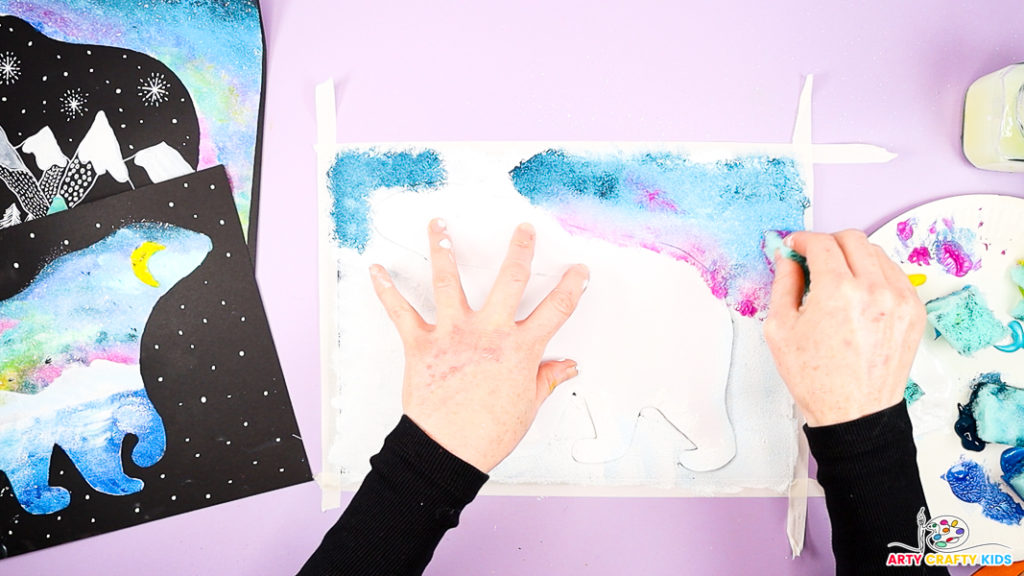
Step 3:Paint the night sky.
Using a sponge or large brush, apply a base layer of dark blue and purple paint around the polar bear shape.
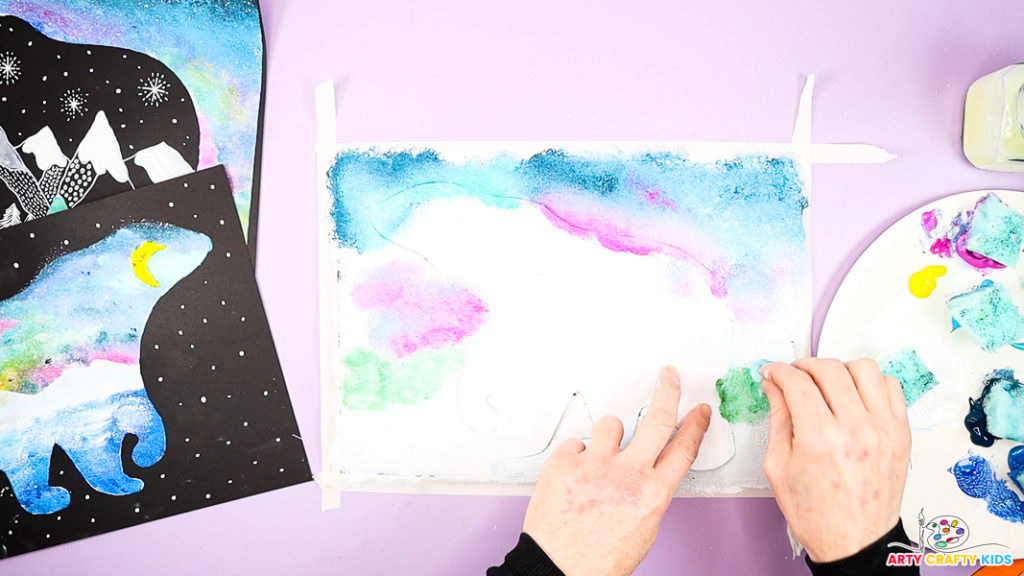
Blend the colors smoothly for a rich night sky effect. Work quickly to keep the edges around the silhouette clean.
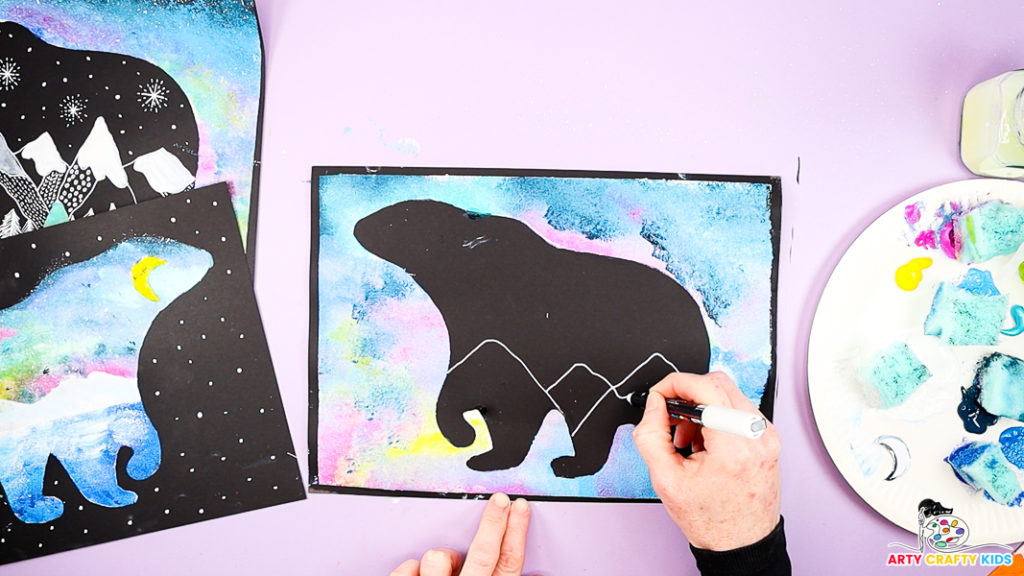
Step 4: Reveal the Polar Bear silhouette and create a mountainous landscape.
Use a white pen to draw a collection of overlapping triangles to form a mountain range. Start by sketching larger triangles at the base to represent the foreground, and layer smaller triangles on top to create the illusion of depth and perspective.
Vary the size and angle of the triangles for a natural, rugged look.
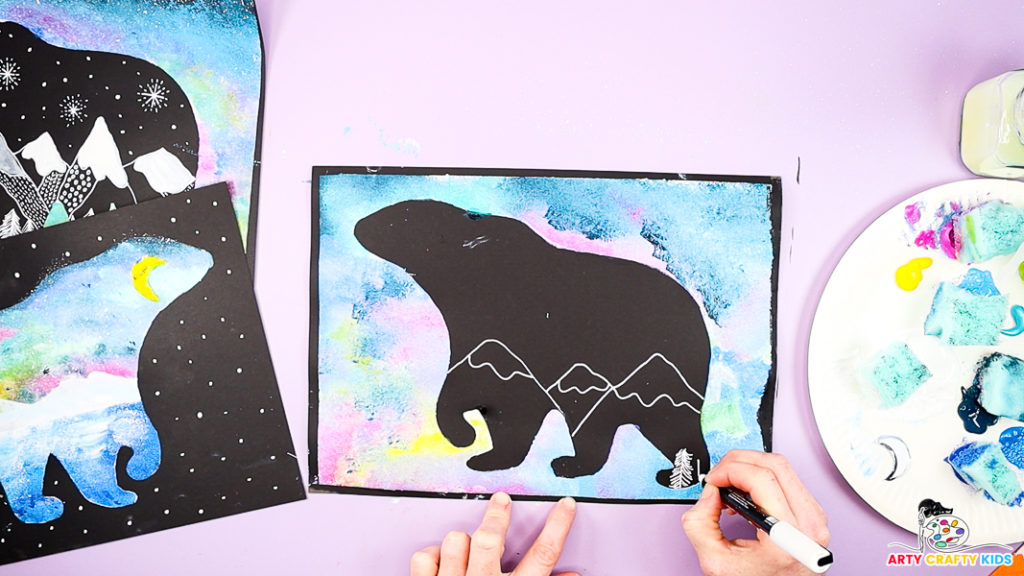
Step 5: Draw a collection of fir trees.
Start with the Trunk:
Using white pen, draw t a single vertical line to form the tree trunk. Begin at the top of the desired tree height and extend it downward.
Add the Branches:
Starting at the top of the trunk, draw short horizontal lines on either side to create the smallest branches. Gradually make the lines longer as you work down the trunk, giving the tree a triangular, pine-like shape.
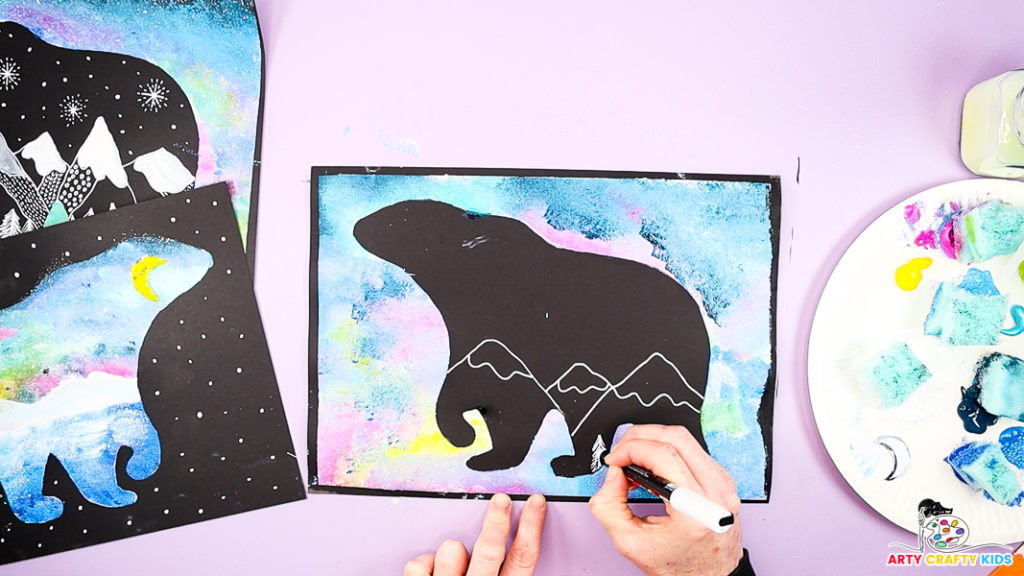
Layer the Branches:
Overlap the lines slightly to give the appearance of a full, textured tree. Keep the branches uneven and natural to mimic real pine trees.
Fill and Refine:
Once the structure is complete, fill in gaps and thicken areas as needed to enhance the silhouette. Adjust the shape to make the trees look unique and varied.
Repeat the process to create a forest effect, varying the height and width of the trees to add depth and interest to the scene.
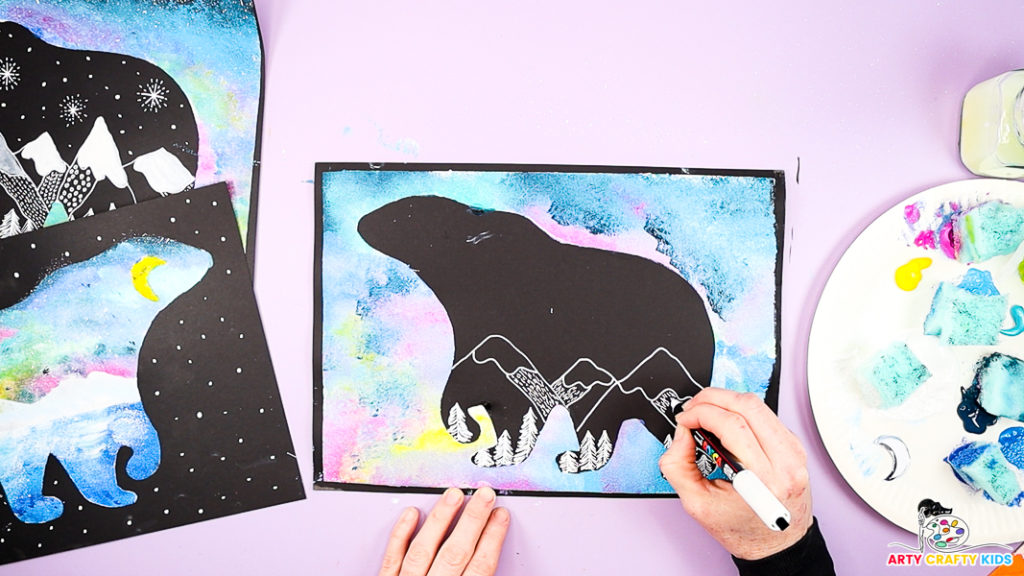
Step 6: Add details to the mountain range.
Add simple diagonal lines within the triangles to mimic the appearance of snow-covered peaks, giving the mountains a frosty, textured effect.
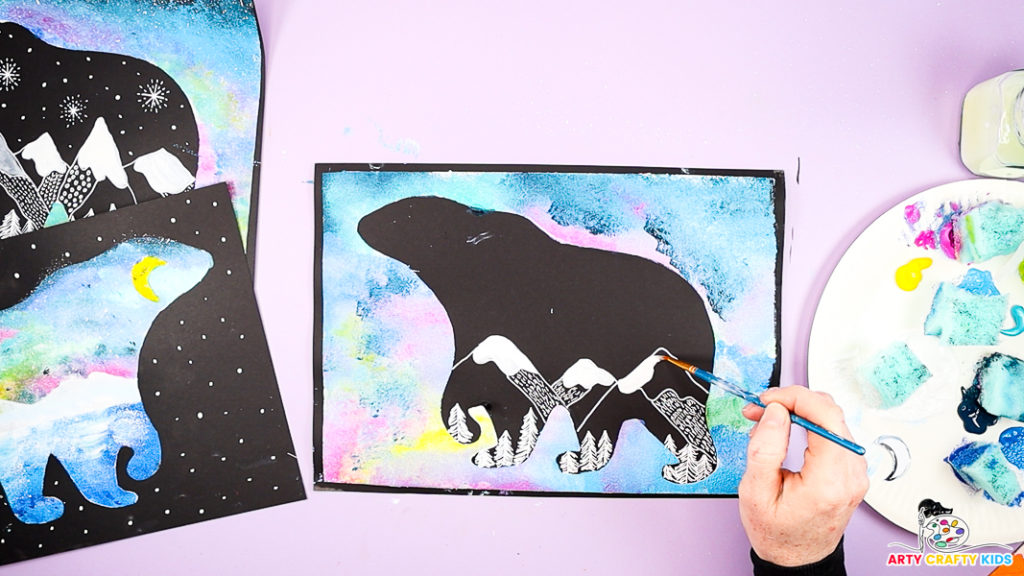
Step 7: Paint the snowy tips white.
Paint the snowy tips of the mountains white to highlight their frosty peaks. The stark contrast between the white snow and the black background creates a striking monochrome effect that enhances the overall composition.
This detail ties the snowy mountains and trees to the polar bear’s Arctic habitat, reinforcing the chilly, wintry atmosphere of the painting.
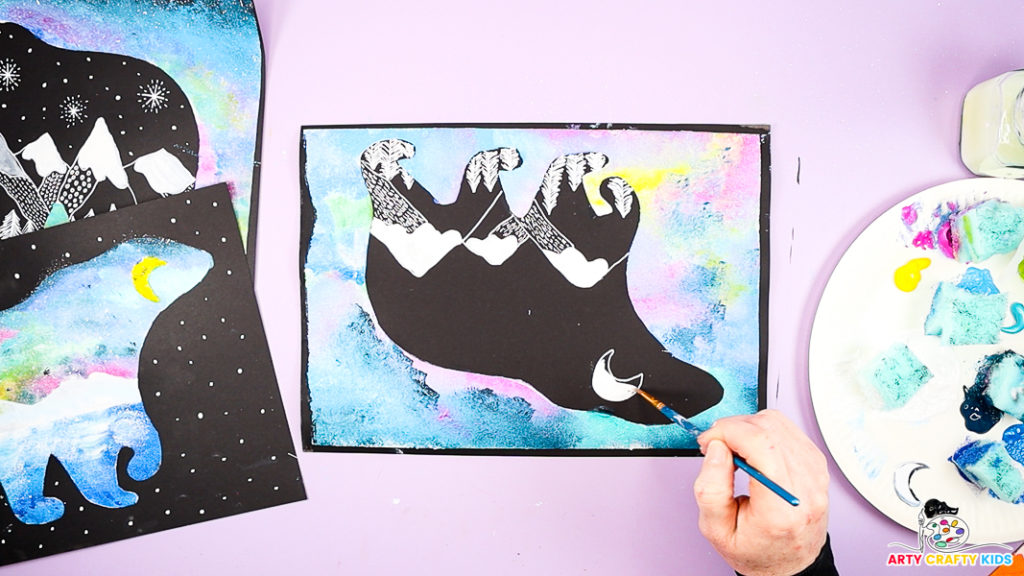
Step 8: Add a moon and twinkly stars.
Next, draw a moon within the polar bear silhouette and paint it yellow to create a focal point that adds warmth and visual interest to the composition.
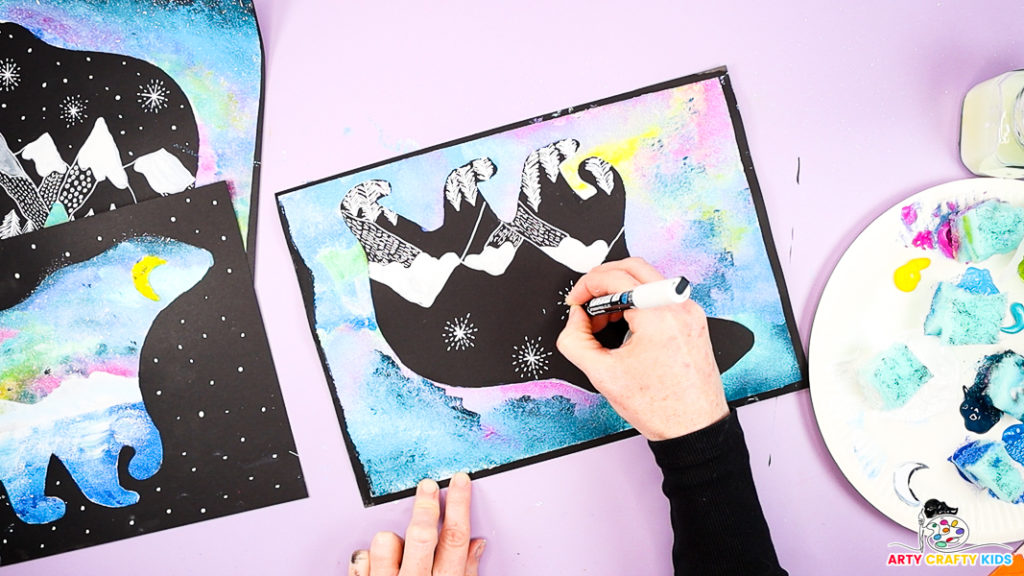
Finish the polar bear silhouette painting by drawing some twinkly stars.
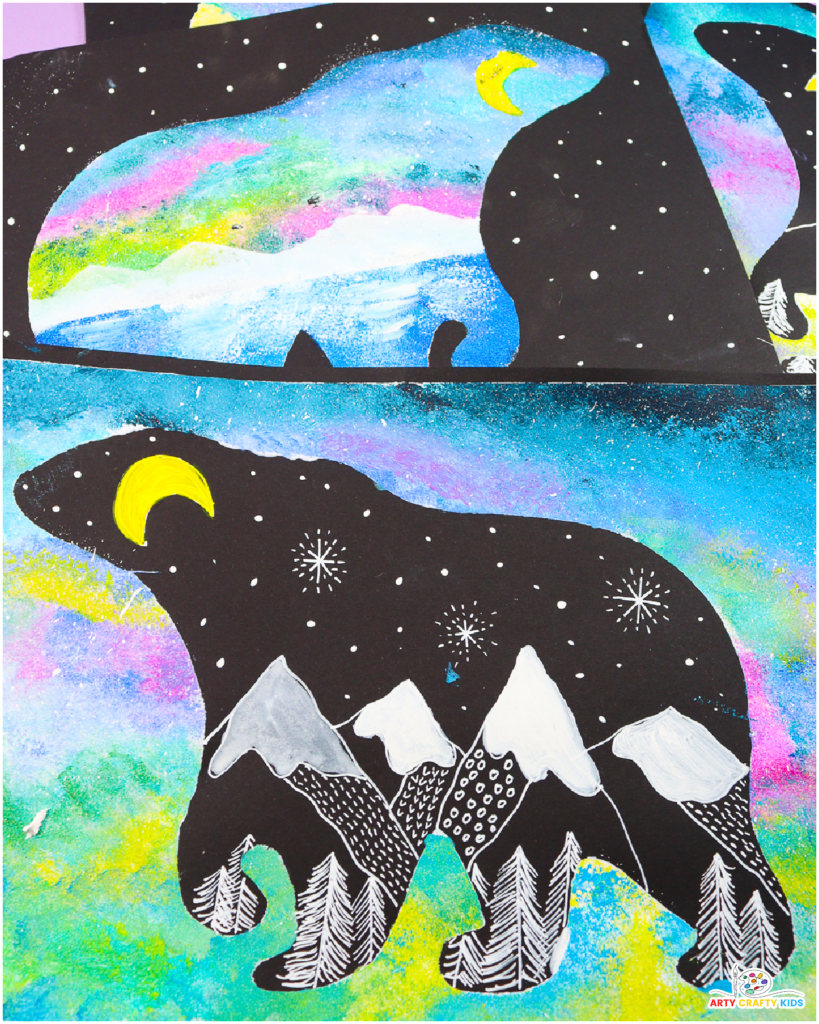
With the final details in place, your Polar Bear Silhouette Painting is complete! This stunning piece captures the magic of the Arctic with its vibrant aurora, crisp snowy mountains, and majestic polar bear silhouette.
Whether displayed at home, in the classroom, or as part of a seasonal art collection, this painting is sure to impress and inspire.
More Polar Bear Arts and Crafts:
Explore more creative polar bear arts and crafts themes! Dip into the Polar Bear Coloring Pages for a touch of relaxation, or try the Watercolor Painting of a Polar Bear with Abstract Line Art for a sophisticated twist.
For a fun and tactile experience, the Tape Resist Polar Bear Painting offers a unique way to create bold designs.
Finally, engage kids with the Easy Polar Bear Drawing and Art Project, combining step-by-step drawing with creative expression. These projects perfectly complement the silhouette painting and offer endless ways to celebrate the beauty of polar bears and their Arctic home.


