
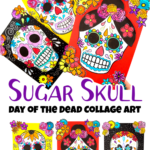


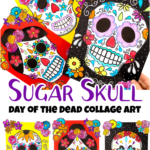
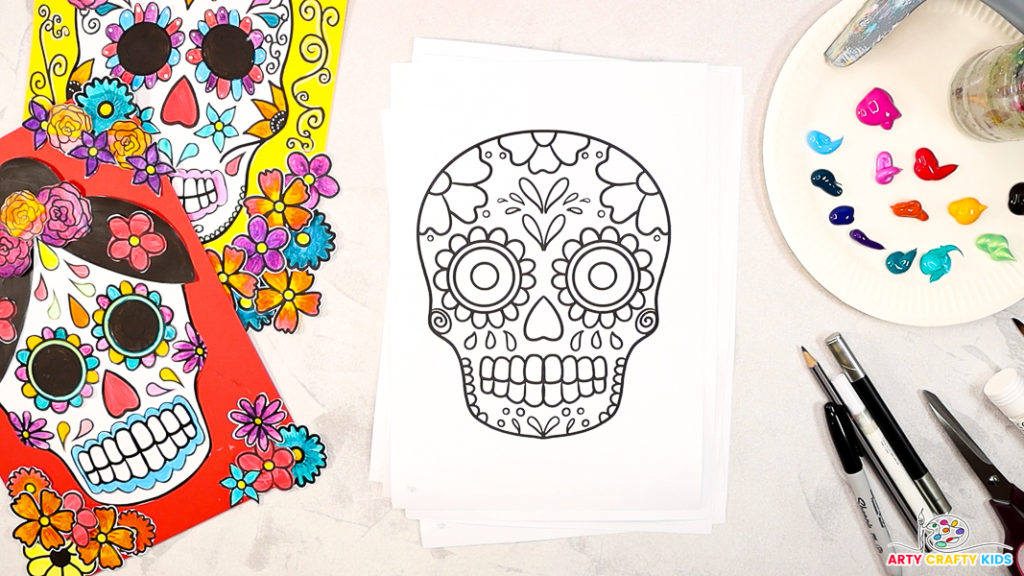
Learn how to create Easy Sugar Skull Art for the Day of the Dead celebrations with this easy, fun tutorial!
The Day of the Dead, or Día de los Muertos, is a vibrant and meaningful celebration where families honor and remember loved ones who have passed away.
One of the most iconic symbols of this celebration is the sugar skull, a colorful and decorative skull that embodies joy and remembrance.

In this tutorial, we’ll show you how to create your very own sugar skull art using our collaging templates that are perfect for kids and adults alike.
This art project is a wonderful way to introduce children to the rich cultural traditions behind the holiday while encouraging creativity and self-expression.
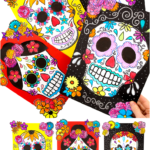
The Sugar Skull Templates:
Our sugar skull templates have everything kids need to bring their Day of the Dead art to life!
Packed with traditional motifs like flowers and hearts, they’re perfect for exploring the meaning behind these symbols—flowers celebrate the beauty and cycle of life, while hearts represent love and remembrance.
These elements help kids connect with the culture and personalize their art in a fun, meaningful way.
How to Make Easy Sugar Skull Art for the Day of the Dead
Materials:
- White Card Stock for Printing
- Colored Cardstock
- Colored Paper (optional)
- Coloring Medium ( paint, crayons, marker pens, etc)
- Scissors
- Glue Stick
- Pencil
- Black Marker Pen
- White Acrylic Marker Pen
- Sugar Skull Templates (members will need to login to access the templates).
Not a Member?
Join the Arty Crafty Kids club to access the Sugar Skull Templates and 100s more Art and Craft templates, How to Draw Guides and Coloring Pages.

Let’s Create Amazing Sugar Skull Art!
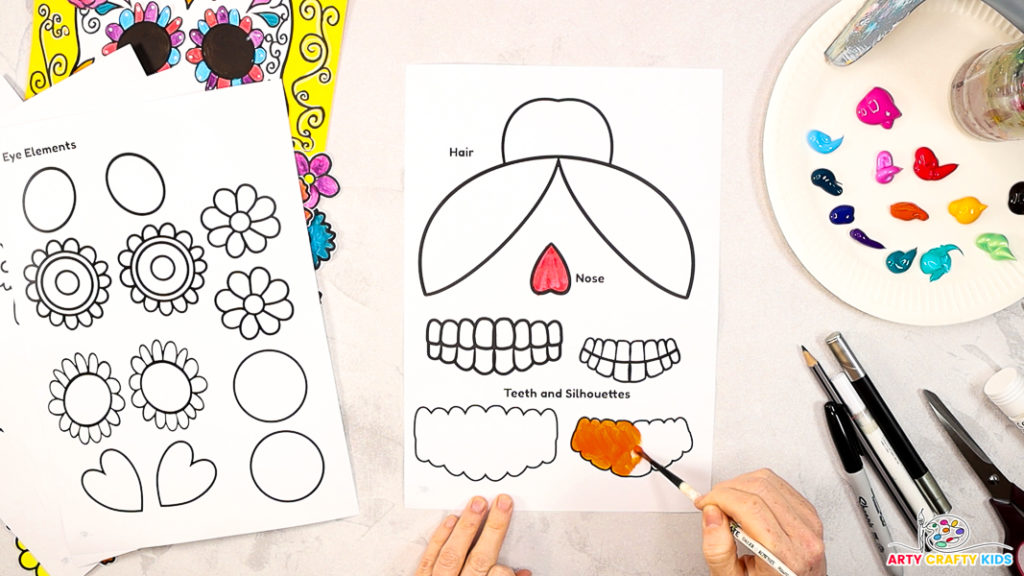
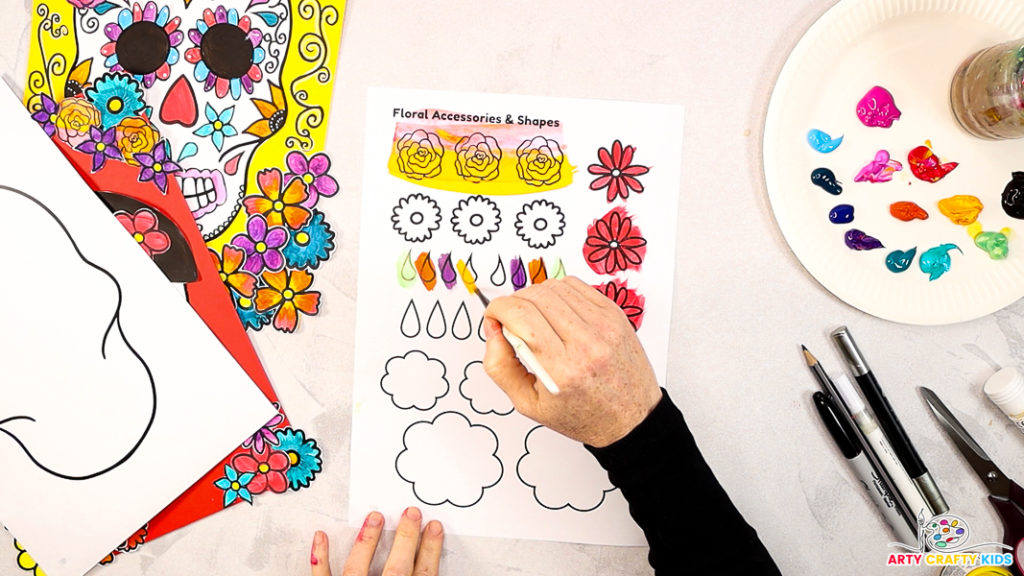
Step 1: Begin painting the Sugar Skull elements templates!
Print the templates onto high-quality, thick paper or cardstock, adjusting the printer settings to match the paper type.
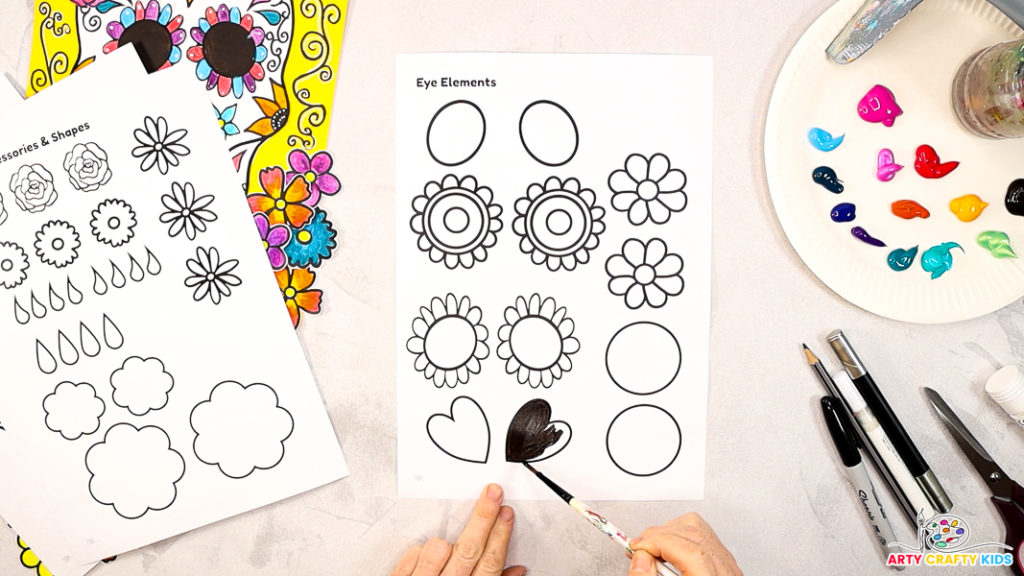
Next, choose your preferred medium to bring the templates to life, coloring in the designs that include flowers, eyes, teeth, mouth, hair, and decorative elements.
For this tutorial, we used paint to fill in the details – a fantastic method for kids to practice basic painting skills, explore blending techniques, and experiment with various effects to make their artwork stand out.
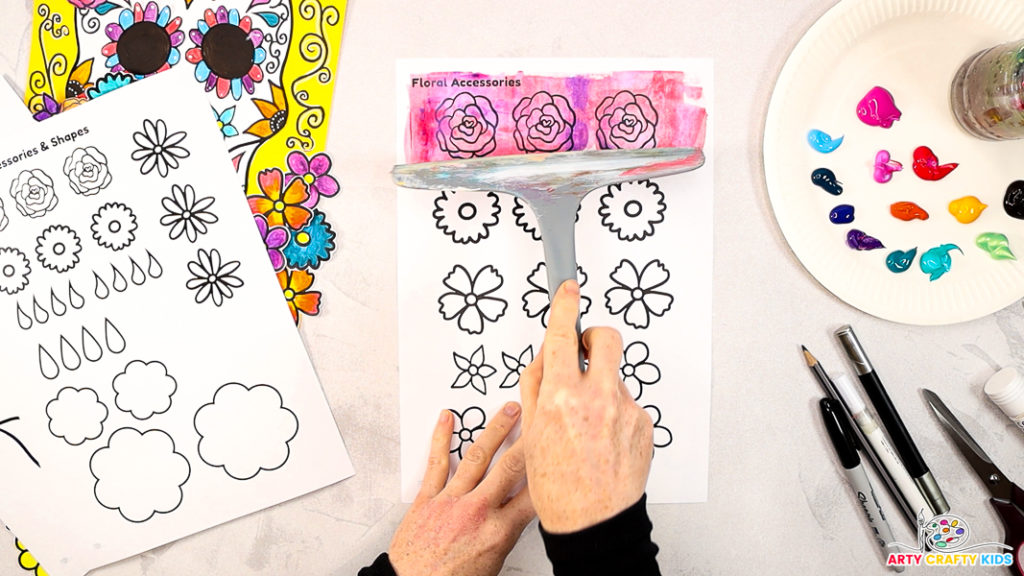
Step 2: Get creative with paint!
The templates are filled with various shapes and flower designs, offering a fantastic chance to explore new painting techniques like squeegee painting (also known as scrape painting).
This technique can add dynamic effects, similar to how we’ve used it in our ghost projects and Van Gogh-inspired sunflower artwork.
To paint the roses using a squeegee, simply add small drops of paint above the rose shapes and drag the squeegee downward.
This technique creates beautiful, blended effects that add texture and depth, making your sugar skull design more eye-catching and dynamic.
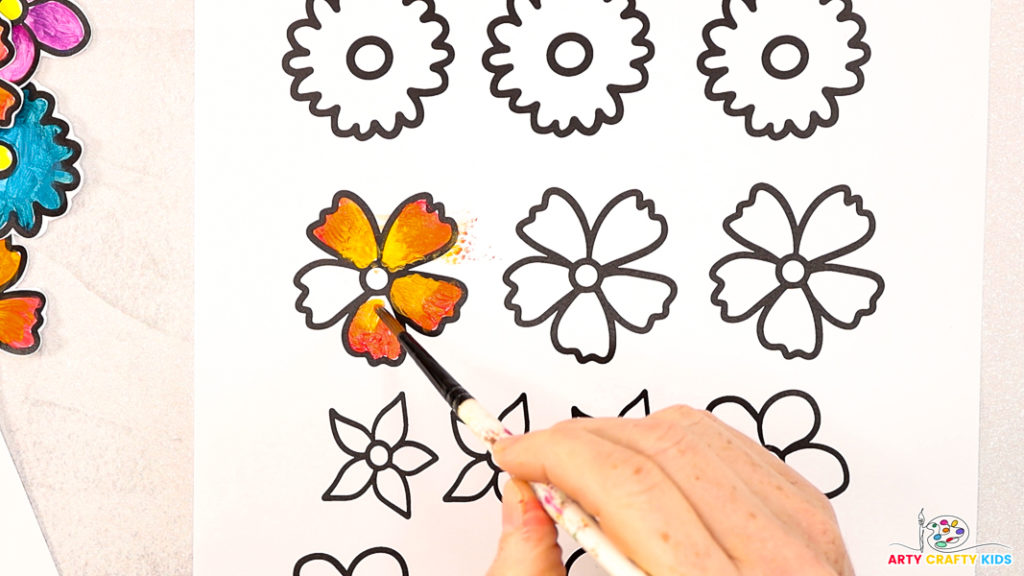
Use a paintbrush to create tonal effects and practice blending colors on the flowers. For instance, apply a darker shade of orange around the edges of the petals, and then blend in a bright yellow from the center outwards.
This technique creates depth and dimension, making the petals appear more lifelike and vibrant.
Experiment with a wide variety of colors for the flowers and decorative elements – this is your chance to get creative!
Mix and match bold color combinations and try different techniques, like blending or layering, to make each detail pop.
The Day of the Dead is a celebration of life, and color plays a central role, so embrace vibrant hues to reflect the joy and spirit of the holiday in your sugar skull design.
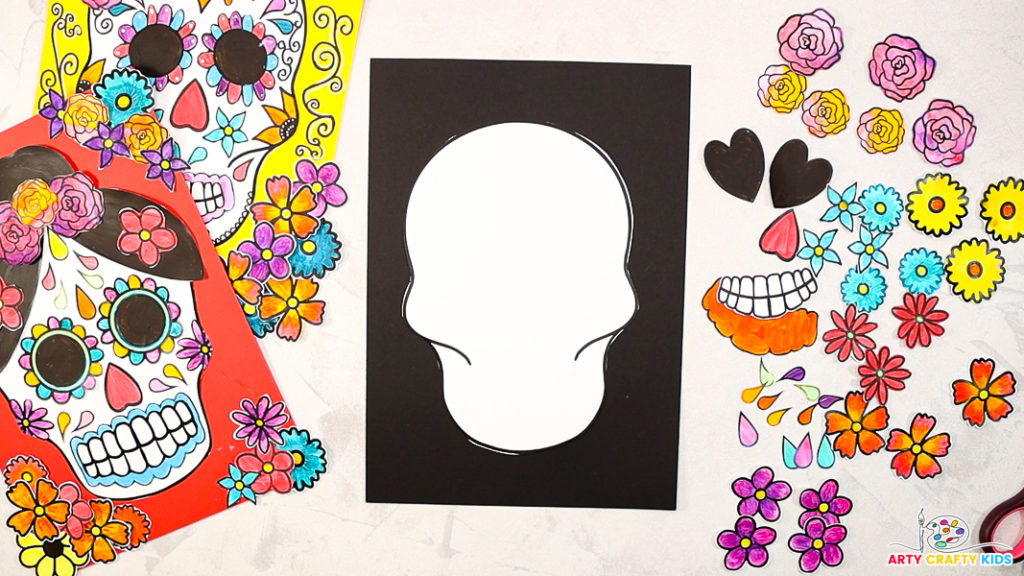
Step 3: Choose a skull and cut it out.
We have two skull designs – select one, carefully cut it out, and choose a black or colorful piece of cardstock as a backing (but don’t attach the skull just yet!).
Next, cut out all the flowers, teeth, and decorative elements and place them beside the skull. This will keep everything organized and ready for the collaging process!
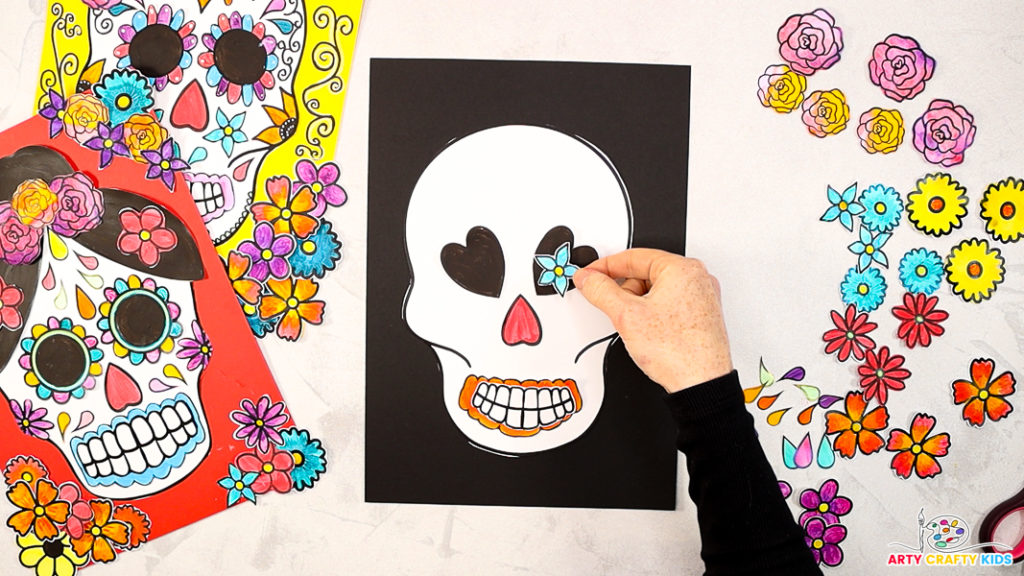
Step 4: Designing your Sugar Skull
Start by arranging the mouth, nose, and eye elements onto the sugar skull to plan your design (but don’t glue them down yet!). This lets you experiment with placement before committing to a final look.
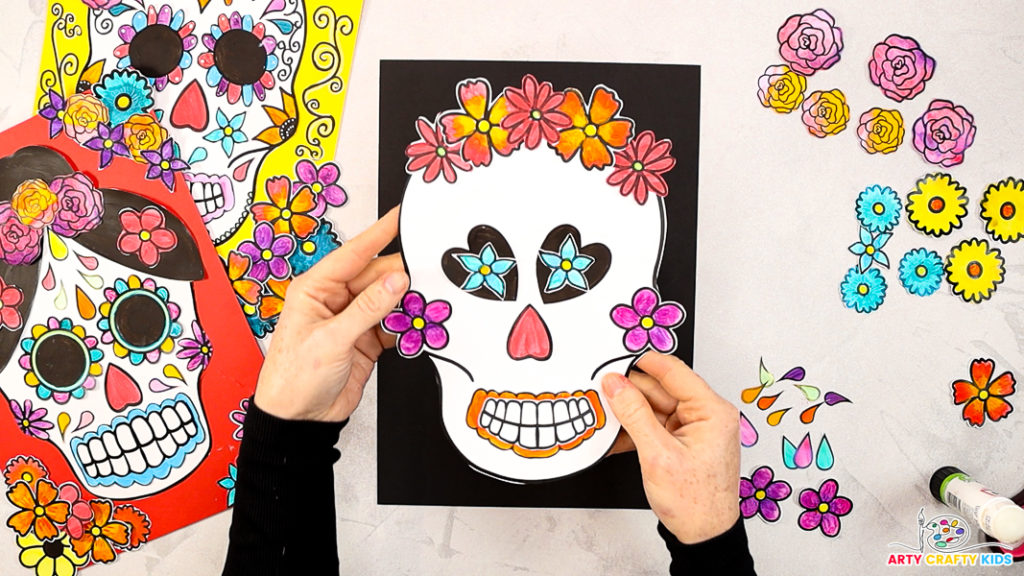
Once you’re satisfied with the arrangement of the facial features, glue them in place.
Next, start positioning the flowers around the skull’s head and cheeks. Don’t worry if some overlap the edges; we’ll trim and tidy them up later for a polished finish!

Step 5: Trim the flowers to outline the skull.
Carefully flip the skull over and trim any excess flowers, following the skull’s outline to create a clean and defined shape.
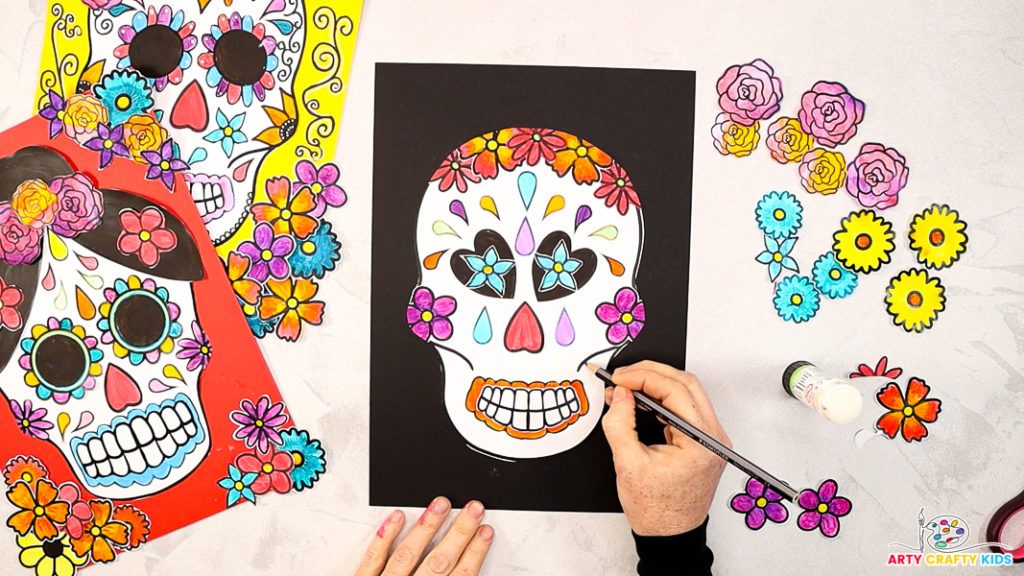
Step 6: Use a pencil to draw swirls onto the sugar skull.
Once you’ve finished collaging the elements onto the skull, use a pencil to sketch swirls and shapes in the blank spaces.

Use a fine-tipped marker or pen to create flowing, curved lines that weave between and around the flowers, eyes, and other details.
These swirls can fill empty spaces, connect different areas, and enhance the dynamic, celebratory feel of the artwork.
Experiment with varying the thickness and pattern of the swirls to create an intricate, layered effect that draws the eye and adds depth to the overall design.

Step 7: Glue the skull to the backing card.
Once the sugar skull is complete, glue it in the center of a piece of backing cardstock.
Arrange the remaining flowers around the border of the backing card to create a decorative frame that highlights and enhances the sugar skull.
Secure the flowers in place with glue, ensuring a balanced and vibrant design.
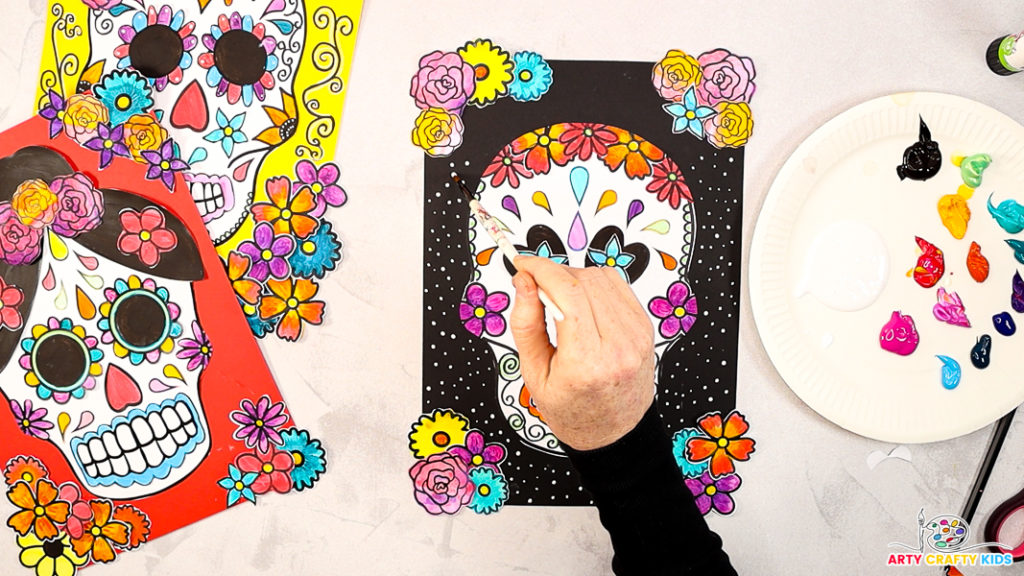
Step 8: Add the final touches to the sugar skull art.
To finish off your sugar skull art, fill the black space around the skull with tiny white dots using a fine-tip marker or brush – simple, but it really makes the design pop!
You could also try adding swirls, patterns, or even mini shapes for an extra touch of flair. These small details help fill the space and add a fun, dynamic feel to the background, making your sugar skull stand out beautifully.
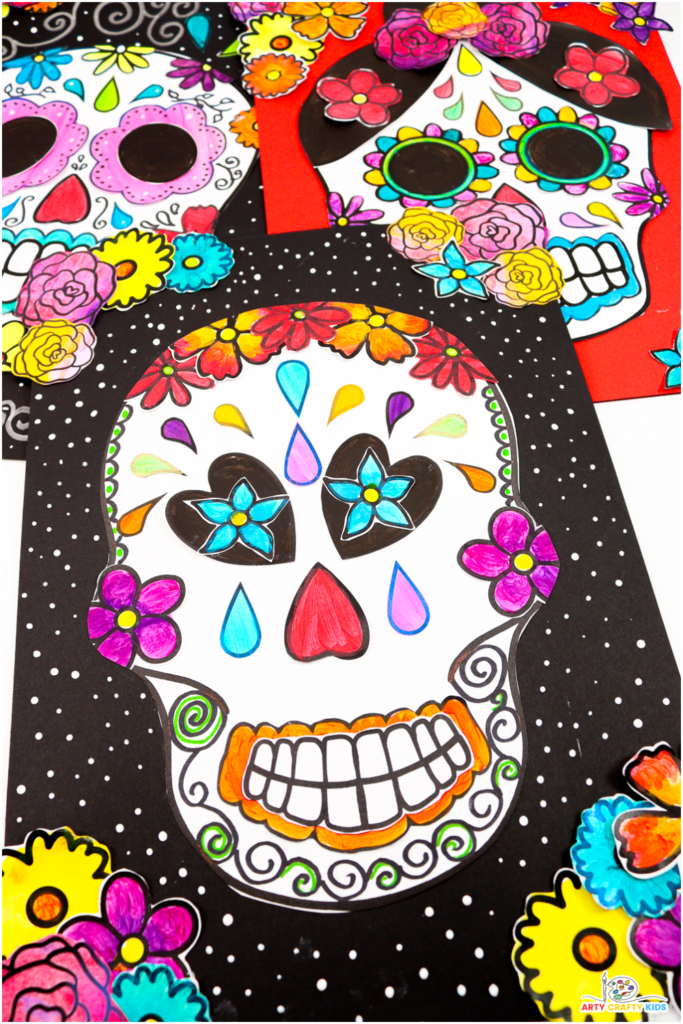
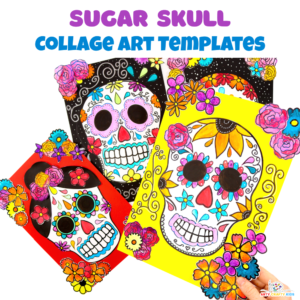
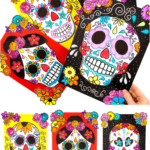
More Sugar Skull Art for the Day of the Dead Designs
We’ve got three more sugar skull designs featuring different colors and template elements, giving kids the chance to play around with their own creative ideas.
Each design is unique, showing off a variety of patterns and techniques.
When displayed together, these colorful sugar skulls make an amazing, eye-catching school display—perfect for celebrating the Day of the Dead in a fun and vibrant way that showcases every child’s artistic flair.
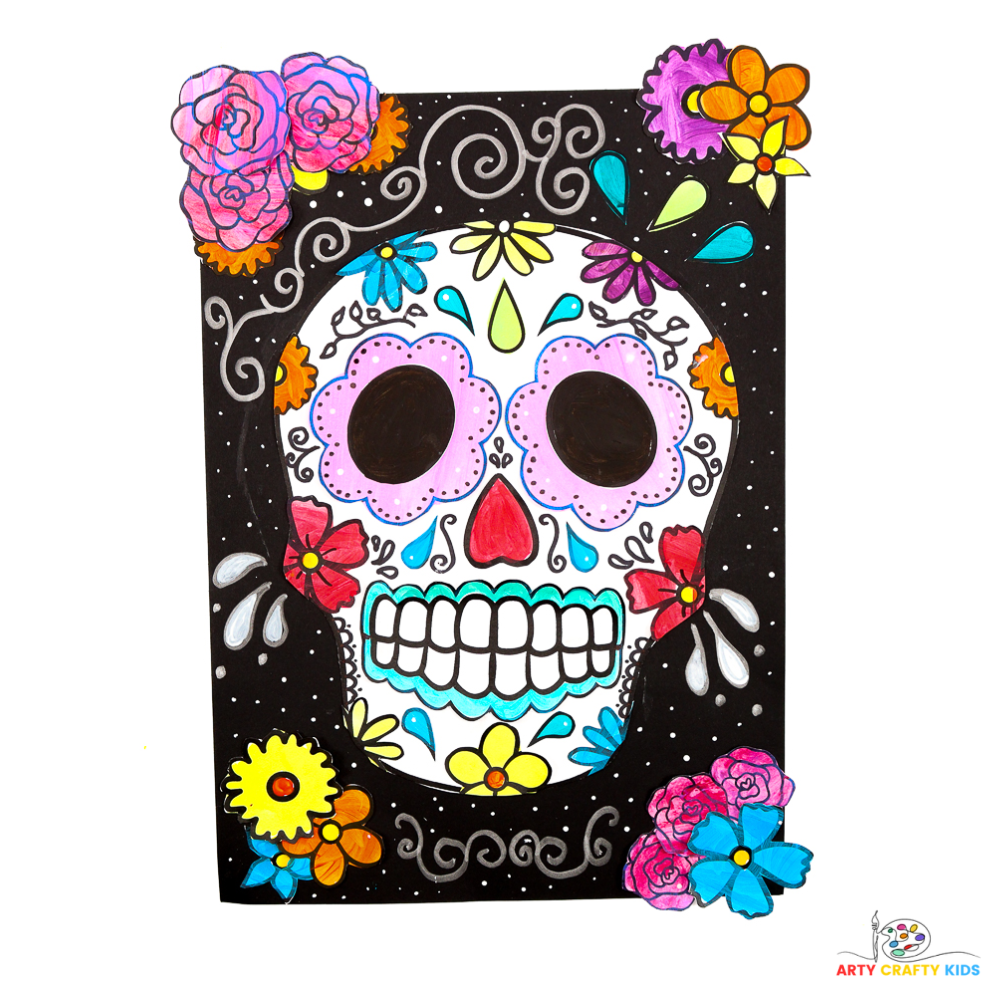
This sugar skull uses our second skull template, with the eye elements layered to create big, bold flowers.
We’ve added detail with a silver marker, drawing swirls and pretty shapes around the edges, and adding leafy lines within the skull itself.
These little touches give it a fun, decorative feel and really make the design pop!
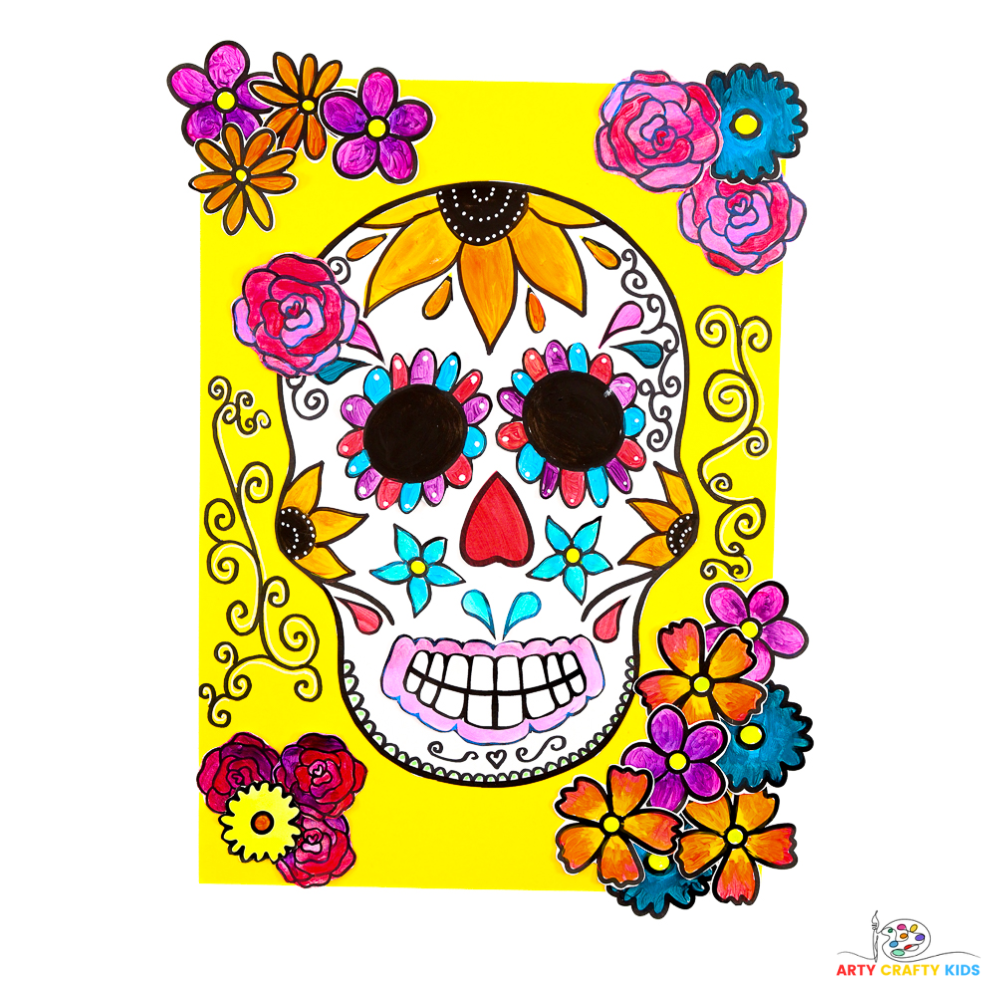
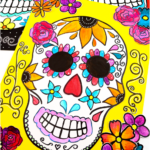
This skull design showcases hand-drawn sunflowers painted in rich shades of dark yellow and orange, set against a bright yellow background for a color-drenched effect that really enhances the sunflower motif.
The combination of tones makes the overall look bold, vibrant, and full of fun energy.
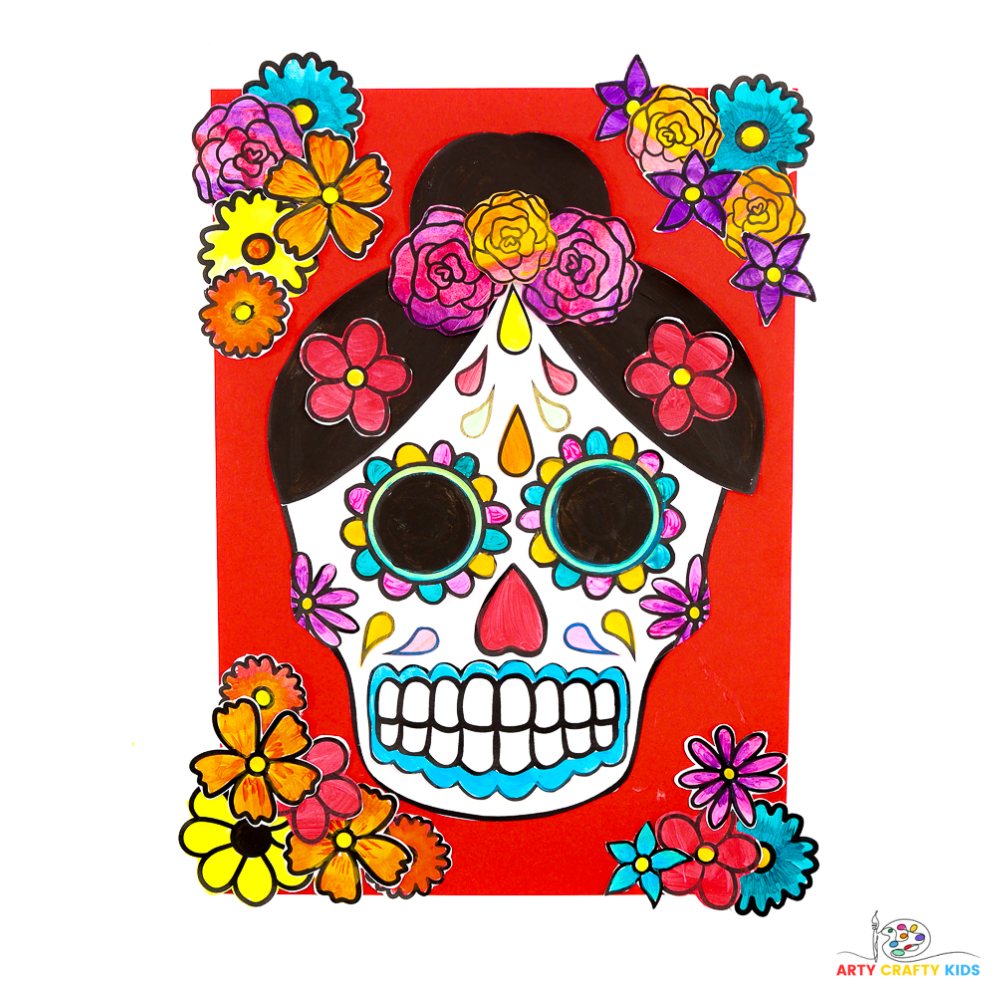
Our final example features classic black hair, a common element in Day of the Dead sugar skull art, and a little nod to Frida Kahlo.
This detail adds a touch of tradition and elegance, enhancing the design with a subtle tribute to Mexican culture and art.
Collage Art Ideas for Halloween
Check out our seasonal Frankenstein and Witch collages, which follow a similar style to our Day of the Dead art.
These projects are perfect for building up to the celebration, helping kids practice collage techniques, and get creative with colors and motifs while exploring different themes!
Download the Day of the Dead Templates:
Create vibrant Day of the Dead sugar skull art with our easy-to-use templates!
Featuring traditional motifs like flowers and hearts, these templates allow kids to explore cultural symbols while practicing fun techniques like squeegee painting and collage.
Perfect for classroom projects or seasonal crafting, these designs encourage creativity and celebrate the holiday’s spirit!