Sharing is caring!
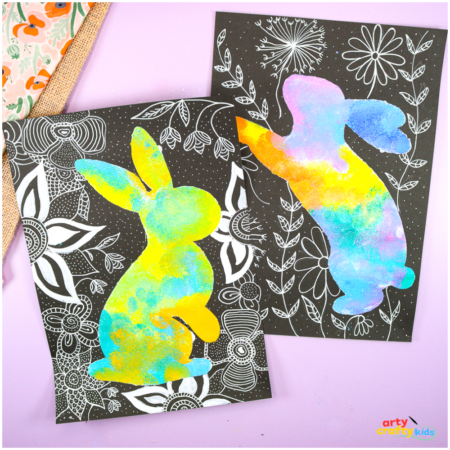
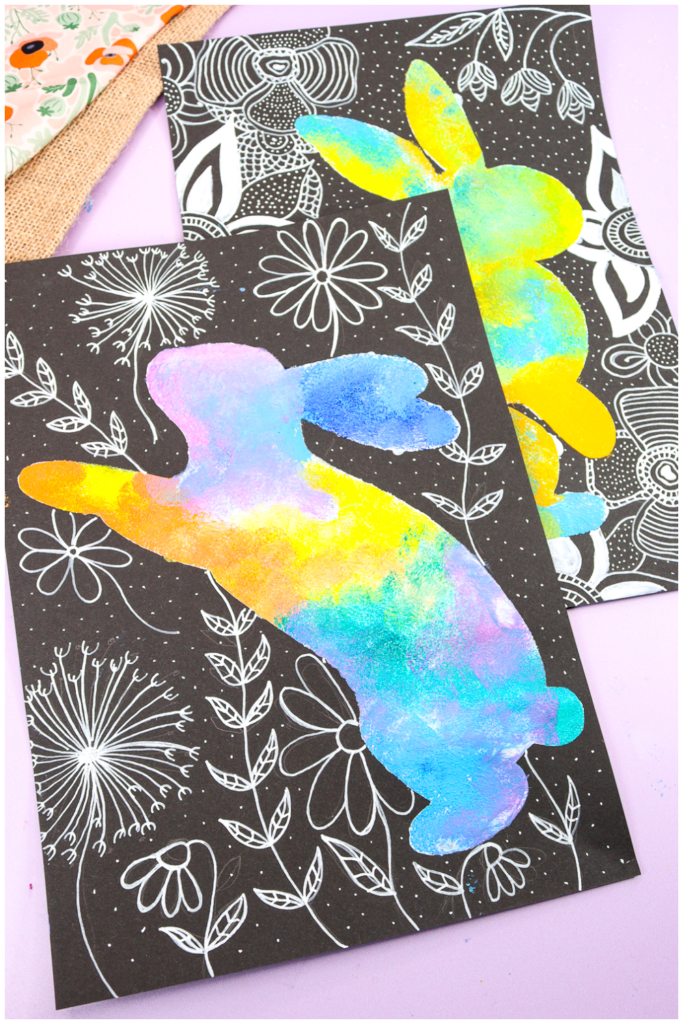
Our simple Bunny Silhouette Painting idea is the perfect Spring art project for kids!
This vibrant Spring bunny craft is full of color, creativity, and fun – making it a fantastic way to introduce little artists to adventurous color blending and contrast.
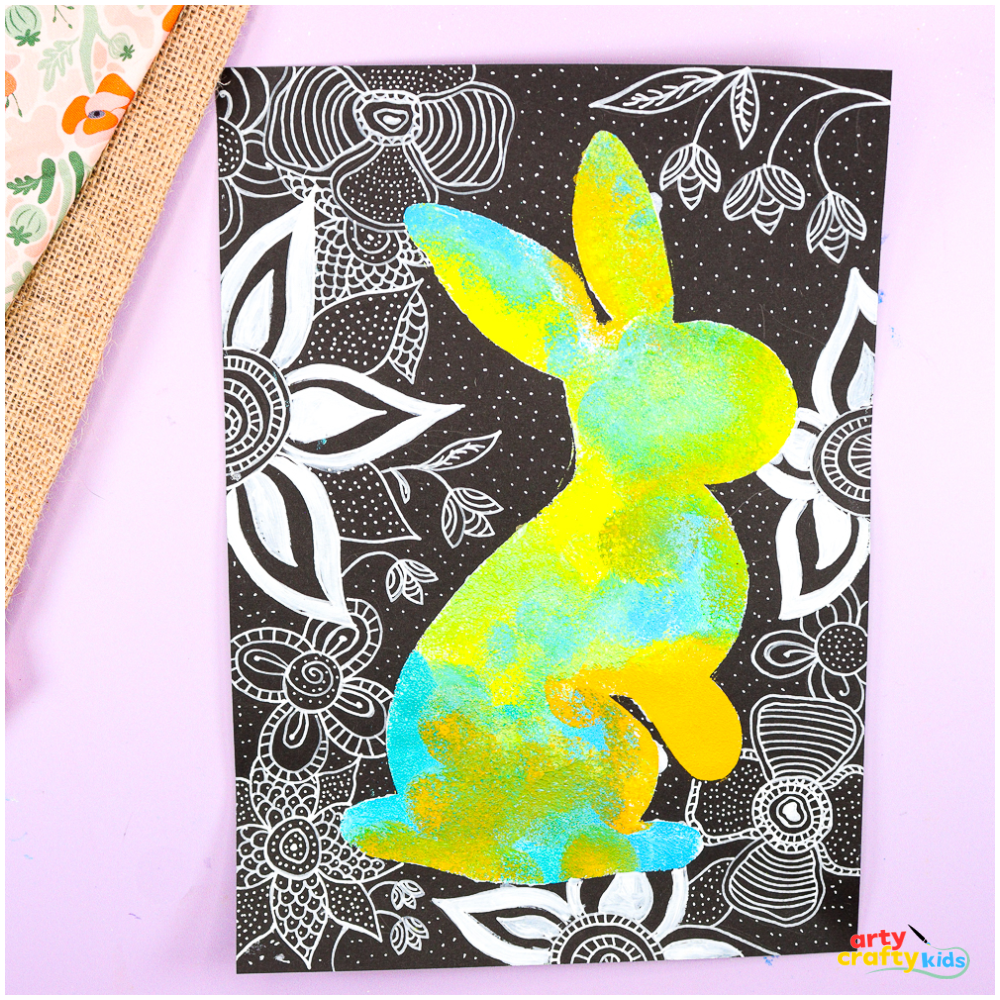
With just a few basic supplies, children can explore the magic of colour mixing on black paper, creating bold and beautiful effects. The striking white floral doodles add an extra touch of whimsy, transforming a simple bunny shape into a stunning Spring or Easter-themed art piece.
Whether you’re looking for an engaging seasonal activity or a colorful craft for your Spring display, this Bunny Silhouette Painting is sure to bring smiles to faces!
This Bunny Silhouette Painting is part of our growing silhouette art series, which also includes our popular Polar Bear, Wolf, and Reindeer silhouette paintings—perfect for exploring colour, contrast, and seasonal themes all year round!
How to make a Spring Bunny Silhouette Painting
What You’ll Need:
- Black card or heavy construction paper
- White gel pen or paint pen
- Pastel, neon, or rainbow-toned paints (we used acrylics)
- Sponge or paintbrush
- Pencil
- Scissors
- Glue stick or masking tape
- Bunny Templates (members will need to login to access the templates).

Not a Member?
The template set includes three unique bunny designs, each available in both black and white silhouettes – making it easy to adapt the project for different ages and abilities.
Join the Arty Crafty Kids club to access the Bunny Silhouette Templates and 100s more Art and Craft templates, How to Draw Guides, and Coloring Pages.
Bunny Silhouette Painting Step-by-Step
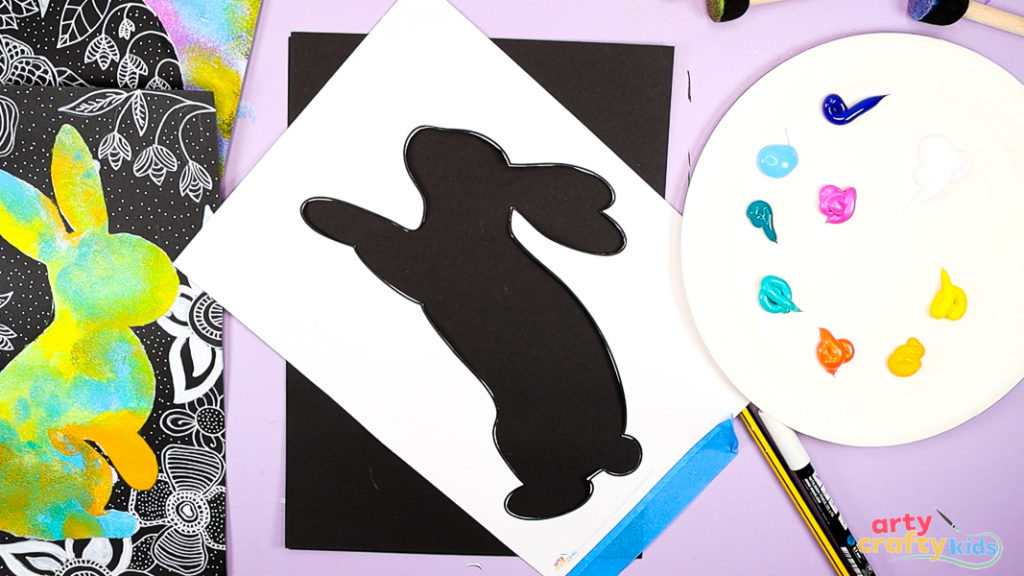
Step 1: Cut out the bunny template and position it onto black card stock.
Start by cutting out your chosen bunny template.
Children can choose to cut along the inside of the outline to create a stencil, or around the outside – either option works perfectly for this silhouette painting technique.
Once cut, position the silhouette onto a sheet of black cardstock. You can lightly secure it with masking tape to keep it in place while you paint.
This will act as a stencil, helping create a clean, defined bunny shape once the background is complete.
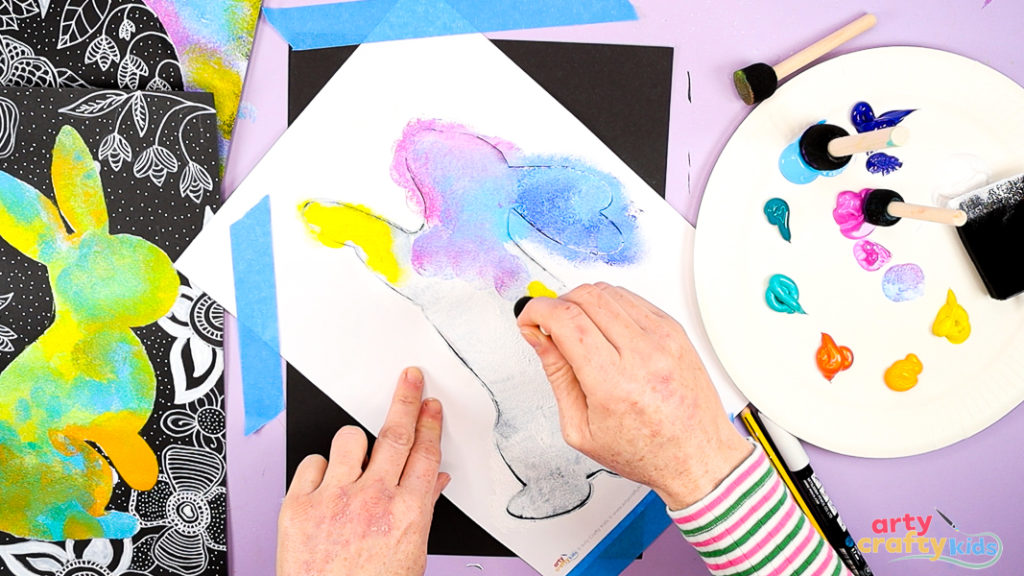
Step 2: Use a sponge to begin paint within or around the bunny.
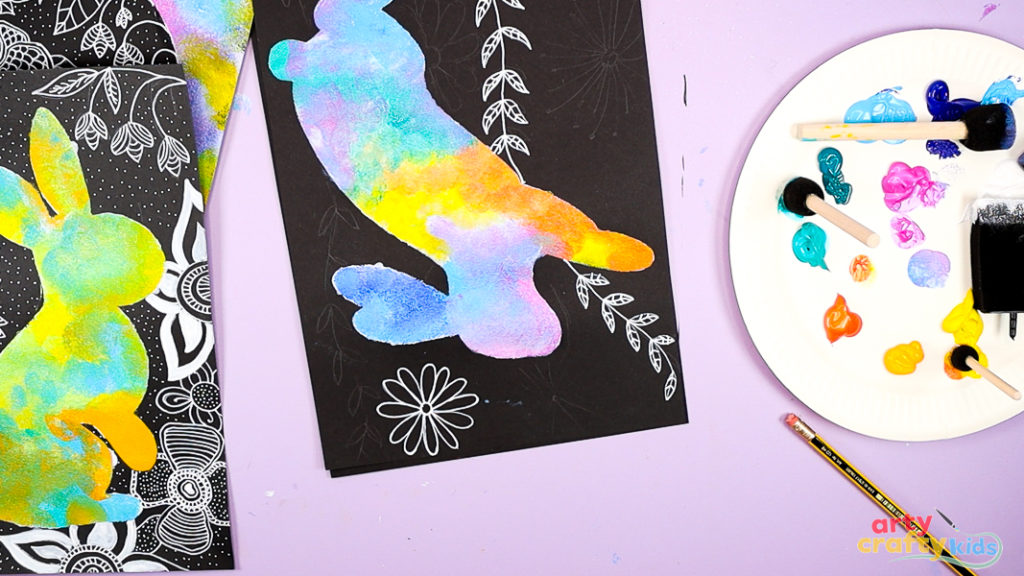
To make the colours really pop against the black background, start by applying a thin layer of white paint within (or around) the bunny shape using a sponge.

Once the white base is down, begin layering vibrant colors on top, blending as you go. Encourage children to experiment with color mixing for a fun, creative effect!
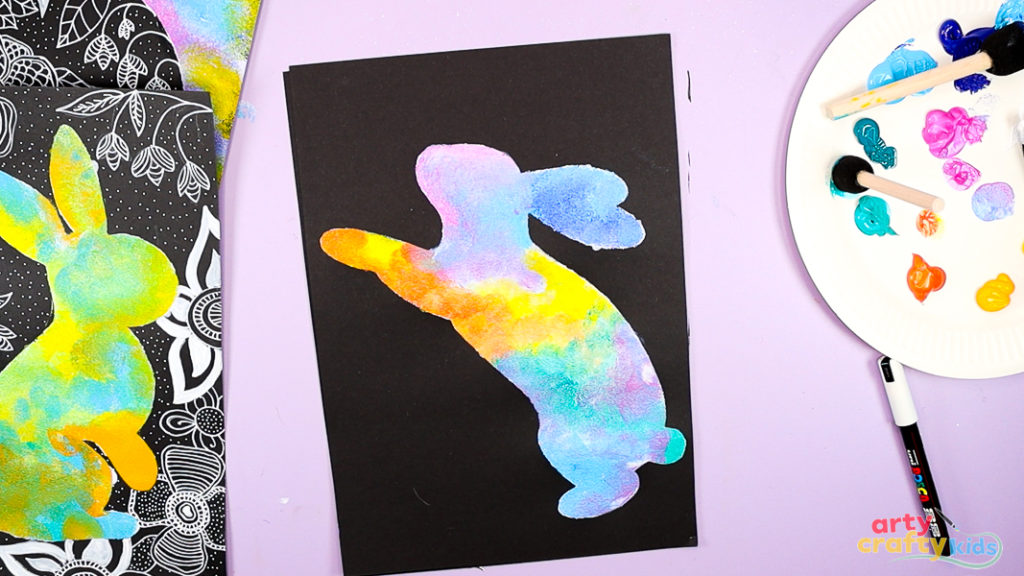
Step 3: Reveal your bunny and add extra details (Optional).
Carefully remove the template to reveal your beautifully painted bunny silhouette!
At this stage, younger children may feel their artwork is complete – and that’s absolutely fine!
But if they’d like to add a little more, they could fingerpaint simple flowers, stick on spring-themed stickers, or even glue real petals and leaves collected from the garden.

For children looking for more of a challenge, start by sketching a simple background design with a pencil. You could draw dandelions, tulips, or roses – check out our step-by-step flower drawing tutorials for guidance.
Arty Crafty Kids members can also download floral templates from our Bunny Line Art Project or the Van Gogh Sunflowers collection to use as inspiration or tracing guides!
Step 4: Outline the flower drawings with a white paint pen.
Once your pencil flower sketches are complete, use a white paint pen (or gel pen) to carefully outline the designs.
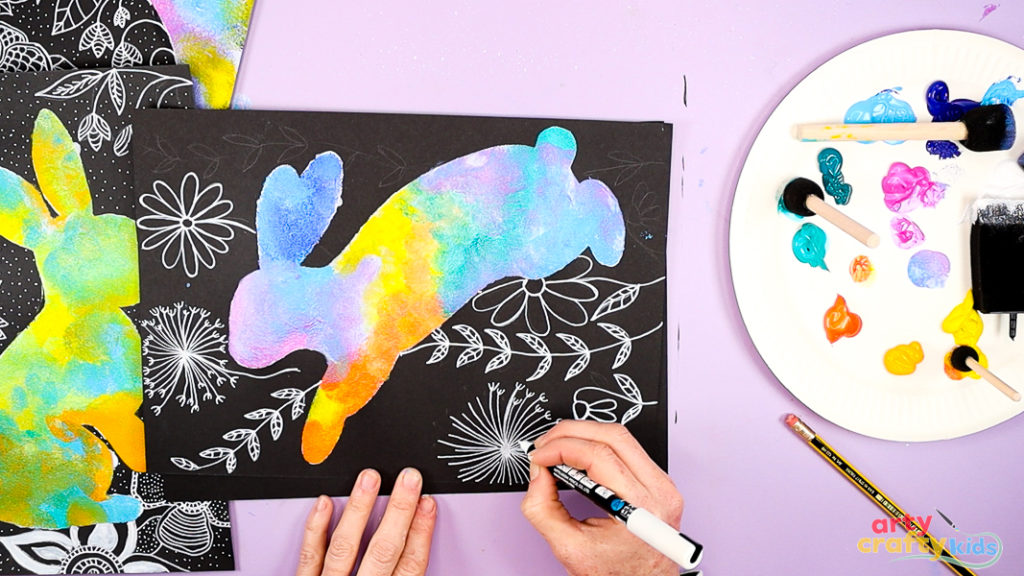
The crisp white lines create a beautiful mono-tone contrast against the black background and help the vibrant colours of the bunny silhouette stand out even more.
This step is a great opportunity for children to:
- Practise fine motor skills and hand control
- Explore contrast and colour theory (warm vs cool, light vs dark)
- Experiment with composition and layering in art
- Develop confidence in combining different materials and techniques

Step 5: Continue doodling around the bunny template.
Now for the fun finishing touches!
Continue doodling around the bunny silhouette with your white paint pen. Add more flowers, leaves, swirls, or simple patterns – whatever feels right for your spring scene.
This step encourages children to slow down, enjoy the creative process, and express their style. There’s no right or wrong – just keep doodling until their masterpiece feels complete!
The Bunny Silhouette Art Tutorial is Complete!
This Bunny Silhouette Painting is a wonderful way for children to explore color, contrast, and creative expression.
Whether they keep it simple or add layers of detail, there’s so much room for personal flair. To further experiment with their creativity, kids can enhance their flowers with doodle patterns or zentangle-style designs, adding texture and interest to each petal and leaf.
It’s also a brilliant opportunity to explore the concept of positive and negative space in art. The colourful painted area can act as the positive space (with the bunny left black), or the bunny can become the negative space, standing out boldly against a detailed or colourful background. For an extra twist, children can even doodle within the bunny silhouette – filling it with delicate lines, patterns, or spring-themed designs.
Whichever approach they choose, they’ll create a truly unique and imaginative springtime painting!

