Sharing is caring!

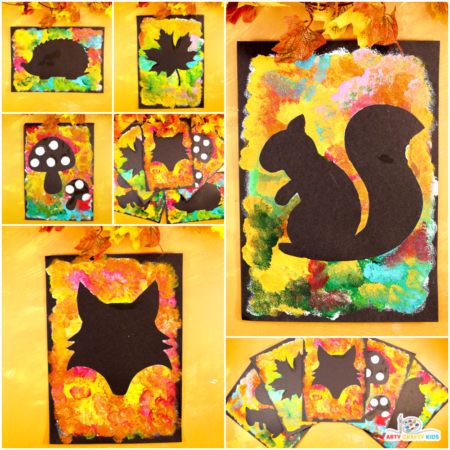
Engage your little ones in a fun and imaginative autumn activity with this Autumn Silhouette Art project! Featuring five adorable fall-themed templates—a fox, squirrel, hedgehog, mushrooms, and an autumn leaf—this hands-on painting experience combines the joy of sponge painting with the magic of color blending.
Children will love the tactile experience of dabbing paint onto the canvas with sponges, watching as vibrant fall colors mix and blend to form new shades. The project encourages creativity and experimentation, allowing kids to see how colors interact while developing their fine motor skills.

The highlight of the activity comes when the template is peeled away, revealing a sharp, clean silhouette of a fox, squirrel, hedgehog, mushrooms, or autumn leaves—symbols of the season that stand out against the colorful background they’ve created.
For even more seasonal fun, try the Halloween Silhouette Art project as well! Featuring spooky shapes like bats, ghosts, and witches, it’s a perfect companion activity that adds a touch of Halloween magic to your creative play. Both projects offer a wonderful way to explore different themes while practicing essential art skills!
How to Make Autumn Silhouette Art
Materials:
- Black Card Stock
- Acrylic Paint
- Sponges or Pom-Poms
- Scissors
- Autumn Silhouette Templates (The mushroom silhouette is free to download!)
Download the FREE Mushroom Silhouette:
Subscribe to our regular newsletter to receive your free Mushroom silhouette template!
Download the Complete Collection of Autumn Silhouette Art Templates
Featuring designs of a fox, squirrel, hedgehog, mushrooms, and leaves, these Fall Silhouette Art templates are perfect for painting, stenciling, or crafting. If you’re already a member of the Arty Crafty Kids Club, log in here!

Not a Member?
Join the Arty Crafty Kids club to access the Fall Silhouette Templates and 100s more Art and Craft templates, How to Draw Guides, and Coloring Pages.

Let’s Make a Silhouette Fall Painting!
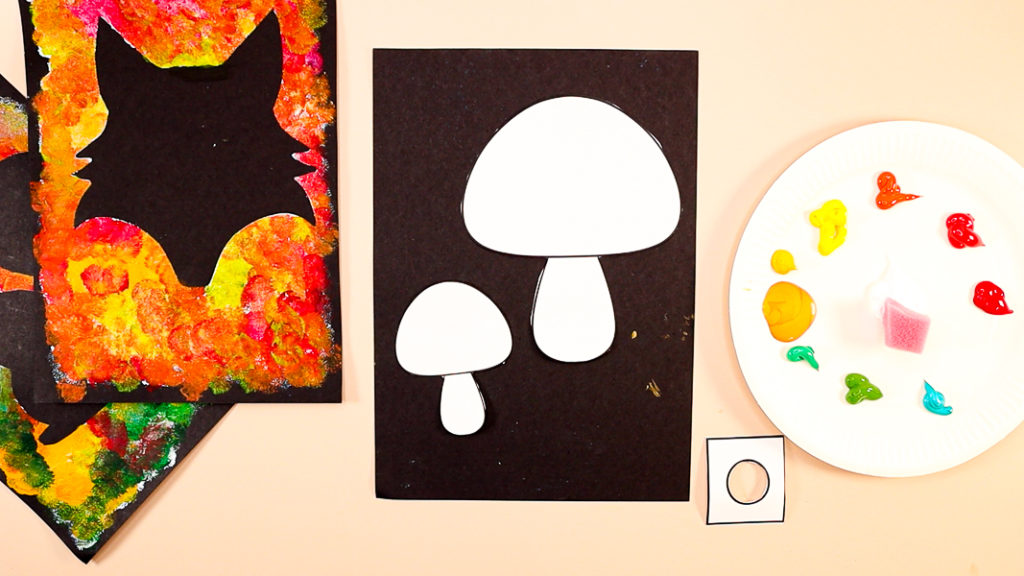
Step 1: Choose an Autumn Silhouette Art template and carefully cut it out.
Place the templates on black cardstock and prepare the paints by cutting the sponge into small pieces, using one piece for each color.
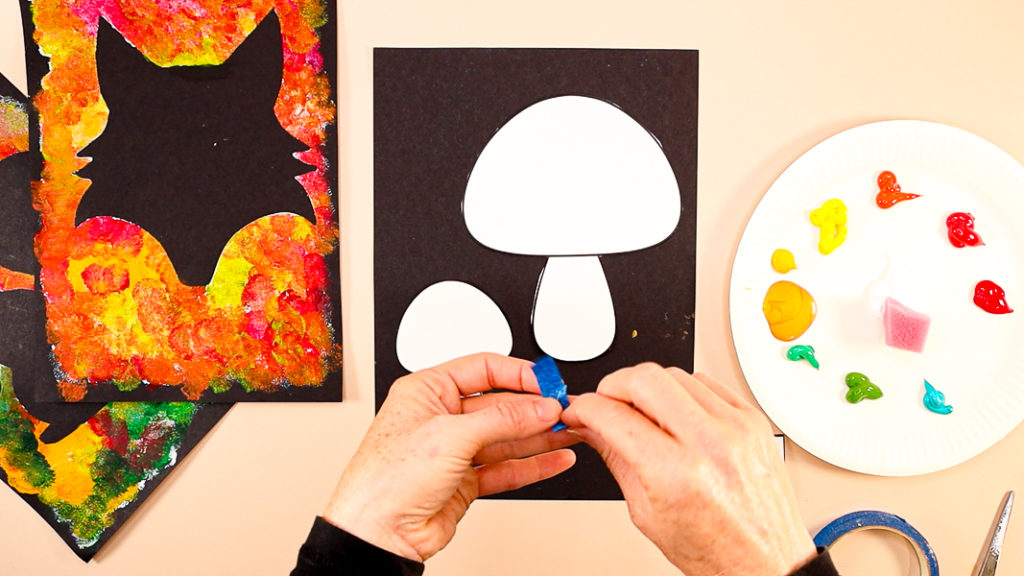
Step 2: Secure the silhouette template to the card stock.
Cut a small piece of masking tape, fold it over to create a double-sided sticky surface, and attach it to the back of the template. Then, press the template onto the cardstock to hold it securely in place.

Step 3: Dip the sponge into white paint and gently dab it around the autumn-themed template.
Add dabs of white paint over the black cardstock, creating a base layer. This will help the autumn-themed colors—yellow, orange, gold, red, and green—stand out vividly, ensuring they remain bold and bright instead of being muted by the dark background.
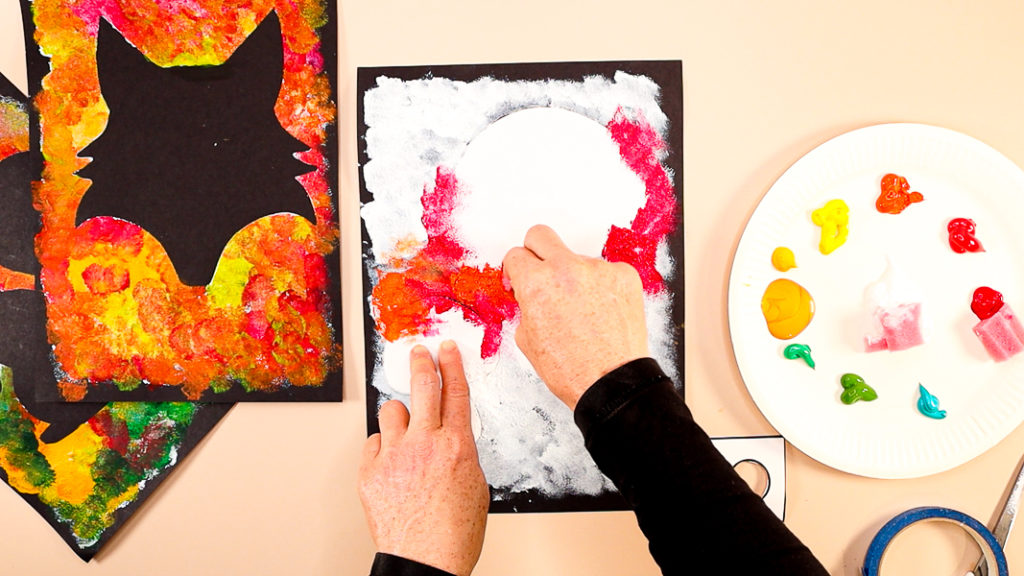
Step 4: Add dabs of color around the Autumn silhouette template.
Now the fun really begins! Start adding dabs of autumn colors—yellow, orange, red, gold, and green—around your chosen silhouette, experimenting with mixing and blending as you go.

This step encourages creativity and is completely open-ended, allowing your little artists to explore color combinations and techniques. Arty Crafty kids can use as many or as few colors as they like, letting their imagination guide the process. Whether they layer vibrant hues or focus on subtle blends, every piece will be unique and full of personal expression.
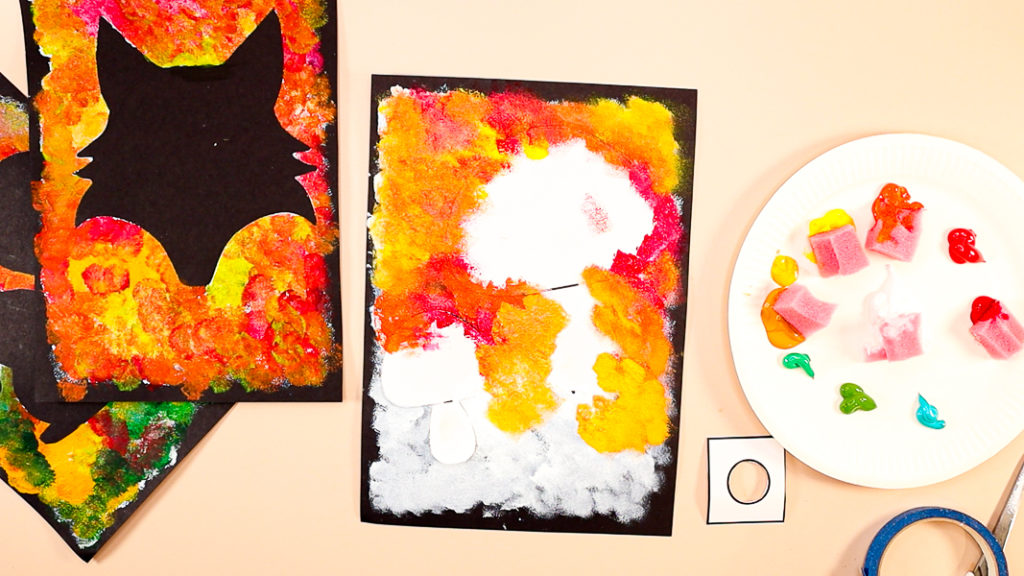
Continue dabbing the colored paint onto the white base, experimenting with layering and blending as you go.
Encourage kids to play with the thickness of the paint and the intensity of the colors—overlapping shades to see how they mix and change.
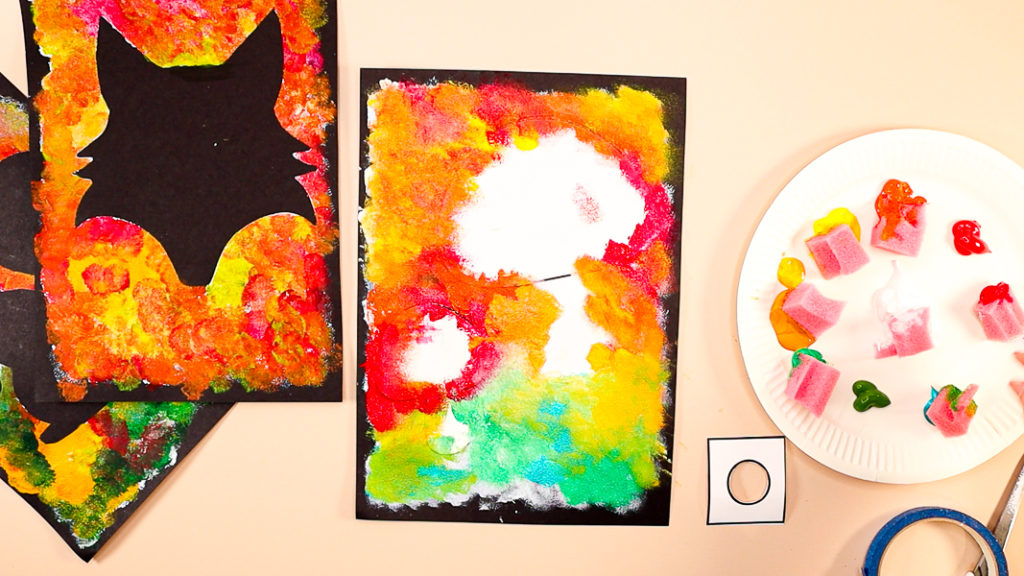
As they layer different hues, they’ll discover how blending creates new tones and adds depth to their artwork.
This playful exploration of color and texture brings the autumn theme to life in a vibrant, dynamic way!

Step 5: Carefully peel the silhouettes away.
Now comes the most exciting part—the big reveal! Once the paint is dry, carefully peel away the silhouette templates to uncover the crisp, clean shapes underneath.
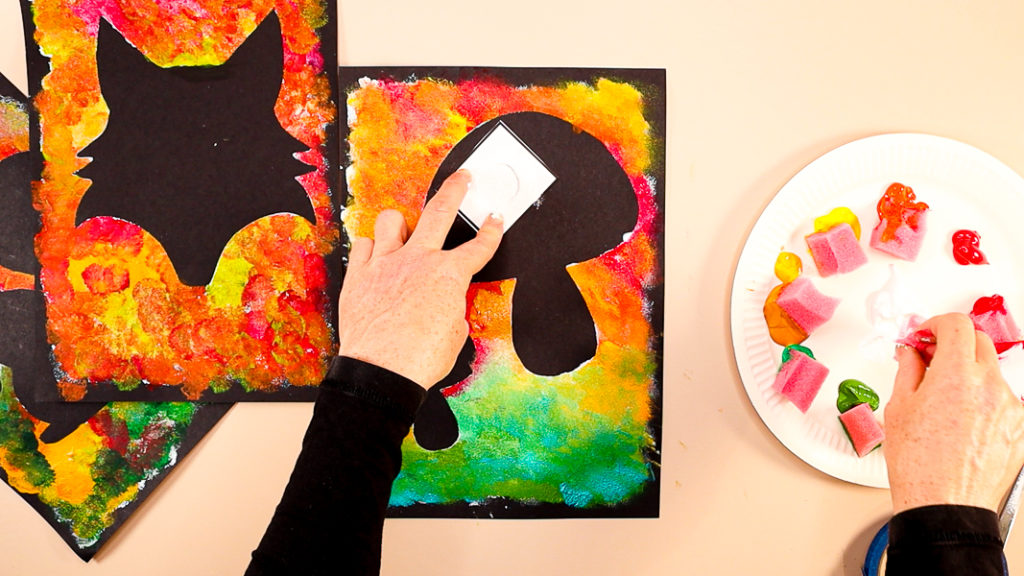
Step 6: (Optional) Add character to your mushroom silhouette by using the circular tool to create small white spots, mimicking the natural look of a toadstool.
Wait for the painting to try before trying this step!
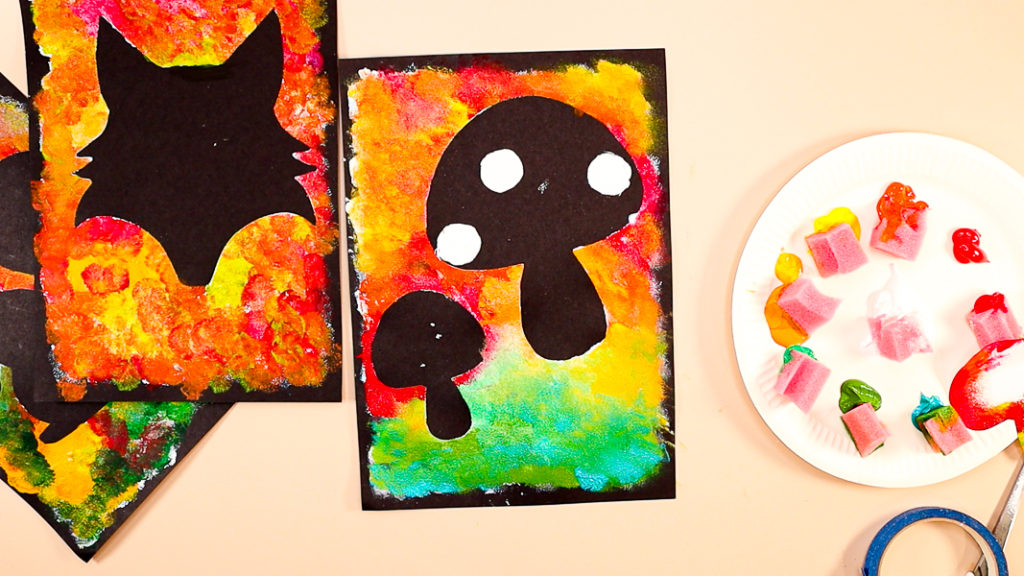
Add multiple white spots across both mushrooms to bring them to life. This small detail adds texture and charm!
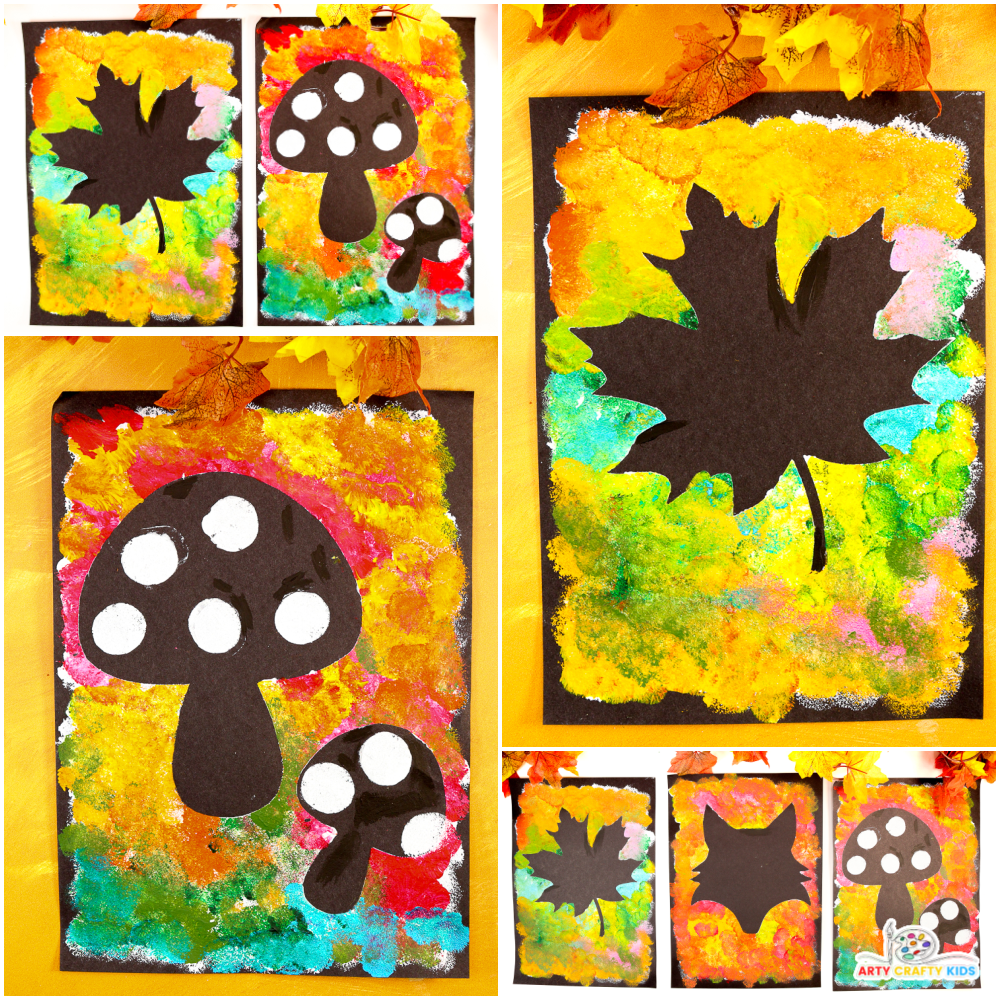
As the final touches dry, the autumn silhouette masterpiece is complete! This project not only provides a fun, creative outlet for children but also introduces them to artistic concepts like color blending and positive and negative space.

Whether displayed as part of your seasonal décor or gifted to a loved one, these vibrant autumn-themed artworks are sure to bring warmth and joy. Most importantly, the process encourages imaginative exploration, making each piece as unique as the little artist who created it. Happy crafting!

